13
Chapter 1: Hardware insertion and Bed Cabinet assembly.
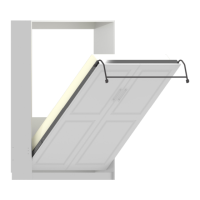
Lower “Bed Cabinet Top Nailer” onto “Bed Cabinet Top”
as shown in Fig. 1C, Tighten cam tting using a #1 Phillips
screwdriver. Note: Make sure cam ttings are facing toward
and aligned to this back edge of the “Bed Cabinet Top” as
illustrated below.
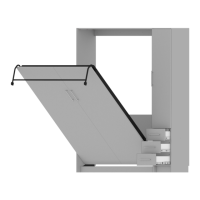
THE POSITION OF THE “BED CABINET TOP NAILER” IS
CRITICAL. THE CAM FITTINGS ON THE TOP NAILER MUST
ALIGN TO THE BACK EDGE OF “BED CABINET TOP” AS
SHOWN. THE TOP NAILER HAS A WARNING STICKER
ON EACH SIDE, FROM THE VIEW SHOWN IN FIG. 1C,
YOU WILL SEE THE WARNING STICKER SHOWN ABOVE.
STEP 3
Critical Step
FIG. 1C - ASSEMBLED VIEW
FIG. 1C
This side aligns with back edge of top shelf
When Top Nailer is properly installed
This label will be against mounting wall