14
Chapter 1: Hardware insertion and Bed Cabinet assembly.
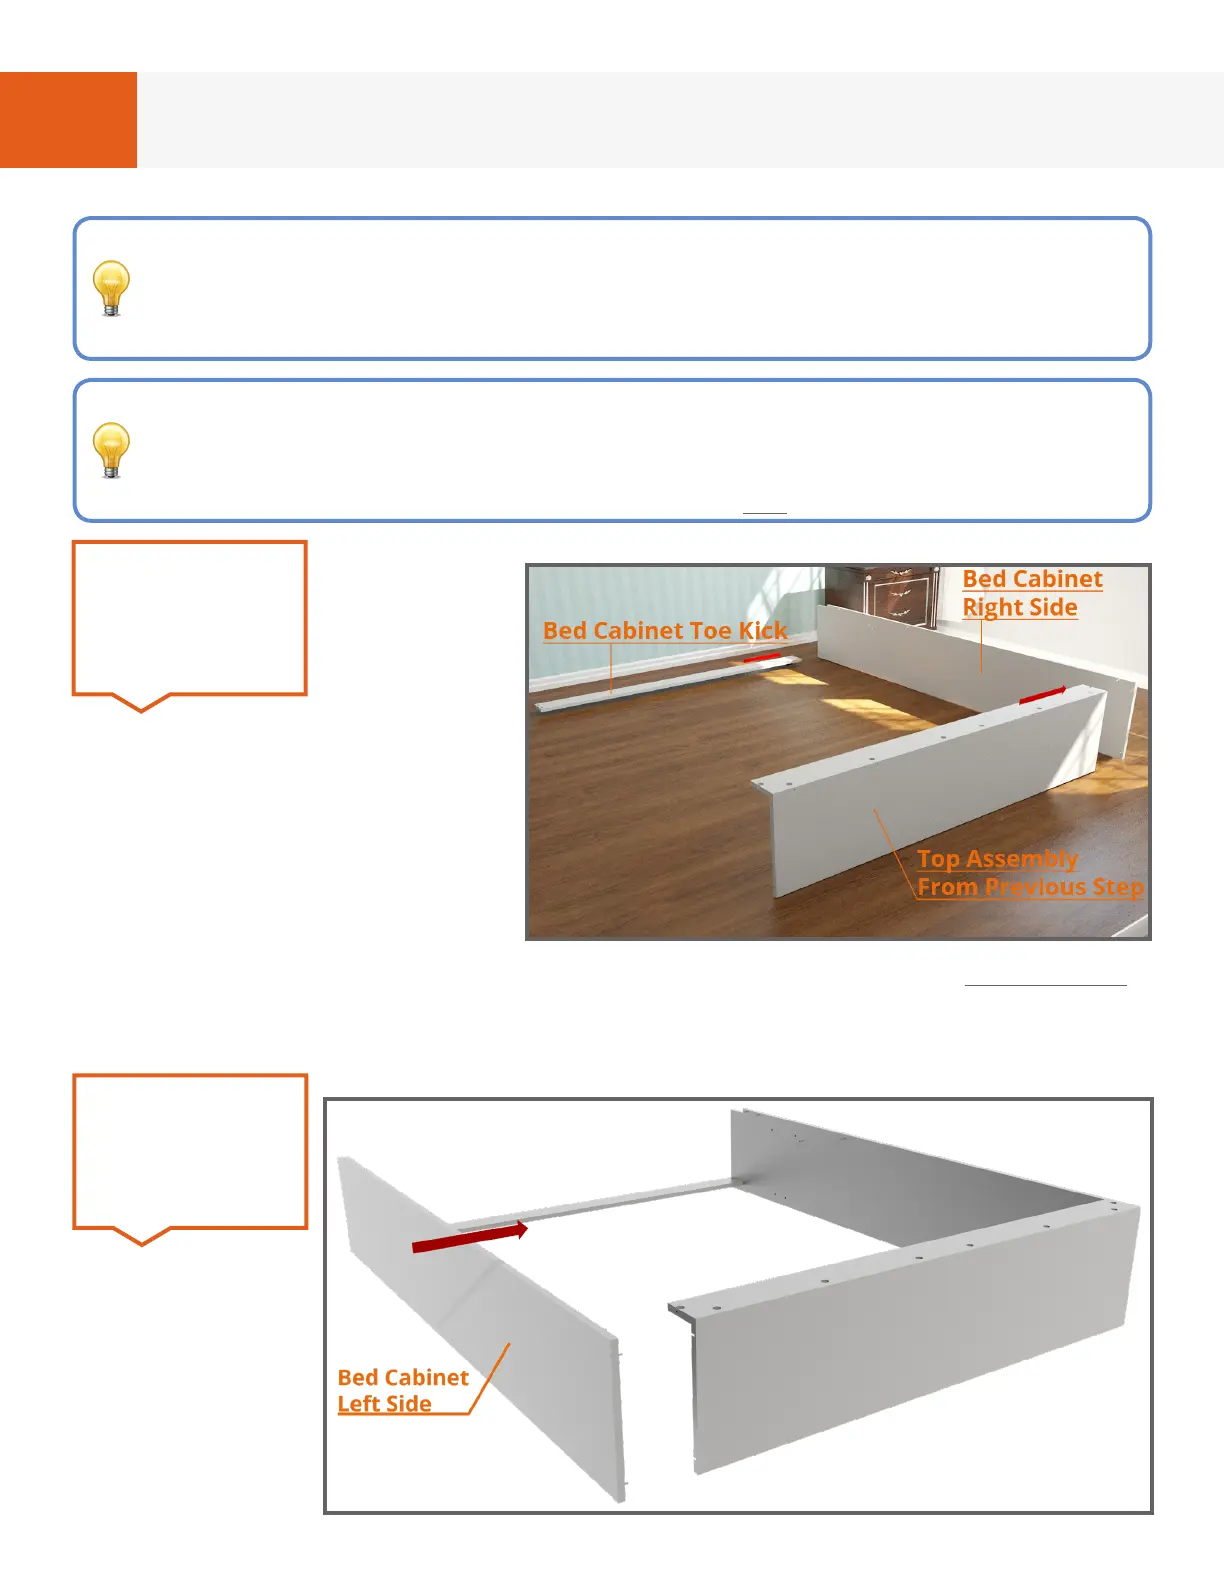
Position the
“Bed Cabinet
Right Side” on
it’s edge with
notch for the
baseboard
facing up. Next,
position the top assembly from
previous step and “Bed Cabinet
Toe Kick” as shown in Fig. 1D
with “Bed Cabinet Toe Kick”
closest to the wall where bed will
be attached. Slide in direction of
arrows and tighten all cam ttings.
The Toe Kick cams face up and
tighten from the top side. The unnished side of the Toe Kick will be exactly ush
with the unnished edge of the cabinet side. If there is a 1/4” dierence, turn the
Toe Kick around 180 degrees (use the other two cams on the opposite side).
STEP 4
FIG. 1D
Slide “Bed
Cabinet Left
Side” as shown
in Fig. 1E in
direction of
arrow and
tighten all cam
ttings.
STEP 5
FIG. 1E
In the following steps, you’ll assemble the Bed Cabinet on the oor, then once
assembled, tilt the Bed Cabinet up. To do this, you’ll need at least 3 extra
inches of height clearance. If the height of your room is shorter than this,
you’ll have to assemble the Bed Cabinet vertically.
Cam ttings on the Toe Kick, Bottom Nailer and Headboard should be facing
up, and tighten from the top side. If assembling vertically, these cam ttings
should face the wall the Bed Cabinet will attach to. Once assembled, cam
ttings on these parts should not be visible.