Naming and configuration of flows
Each service consists of a bundle of flows. For the VB440 to recognize which flows belong
together, the flows need to be configured correctly.
Go to Expert View (displayed as a toolbox in the navigation menu), select the Multicast tab,
then the Streams tab and add a new flow or click Edit
on the preferred flow. This will open
the edit multicast view where the user can define the following parameters.
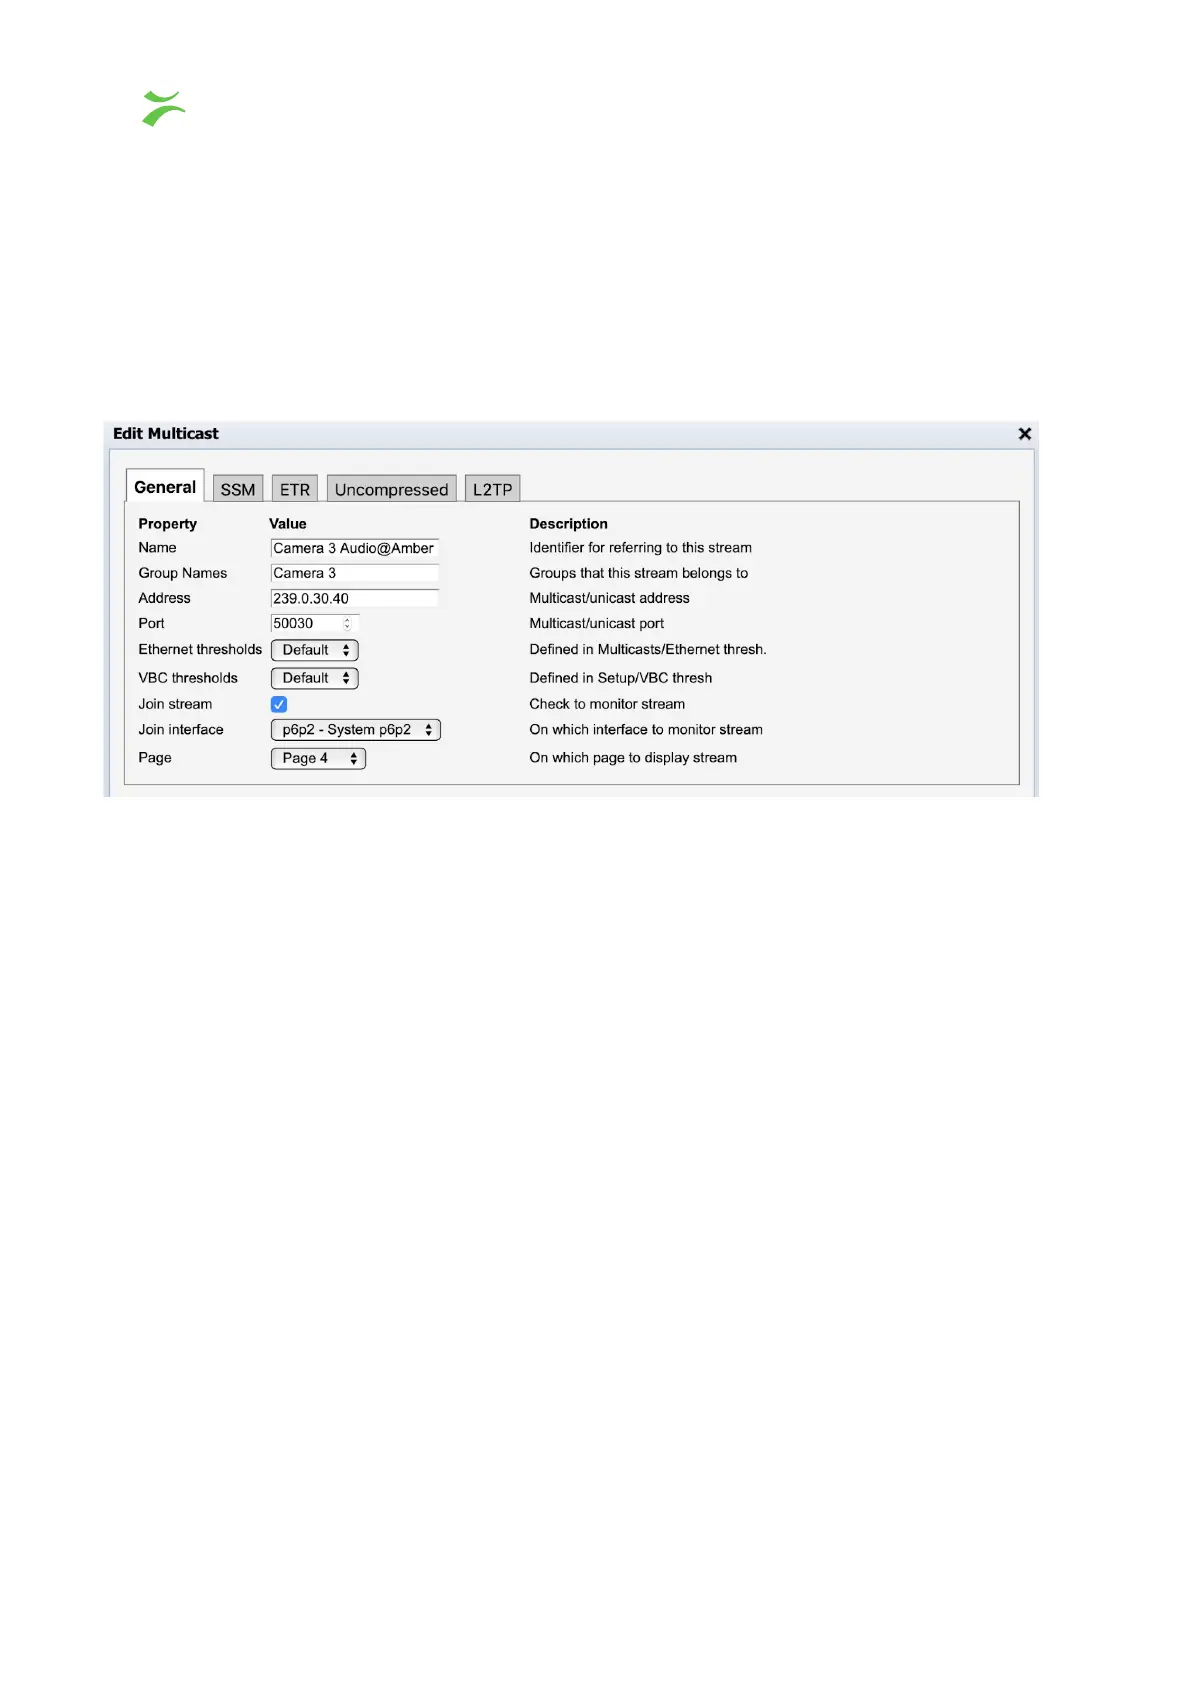
In the name section you can provide both a flow name and a class label. A class will in this
context be used as a label to show which network you are receiving the stream from.
Typically used labels are Primary
and Secondary
or Amber
and Blue
. The flow class is
added as a part of the flow name by separating the flow name and class with the character
‘@’. In order to join more then one class of flows and create two identical parallel services,
it's important to be careful to not mix capitalization between the different class labels. The
Group Name also needs to be identical for all flows belonging to the specific group.
For example, in the screenshot above the video flow is labeled with the class name Amber
and assigned to the group “Camera 3”. For the remaining flows to be configured correctly,
the flows should then be named “Camera 3 Video@Amber”, “Camera 3 Anc@Amber” and
belong to the same Group Name
(“Camera 3”). To add a second class, use the flow names
and Group Name
together with a new class label. A completed configuration may look like
the image below.
18 VB440 Studio Probe User’s Manual v6.0 © Bridge Technologies Co AS