11
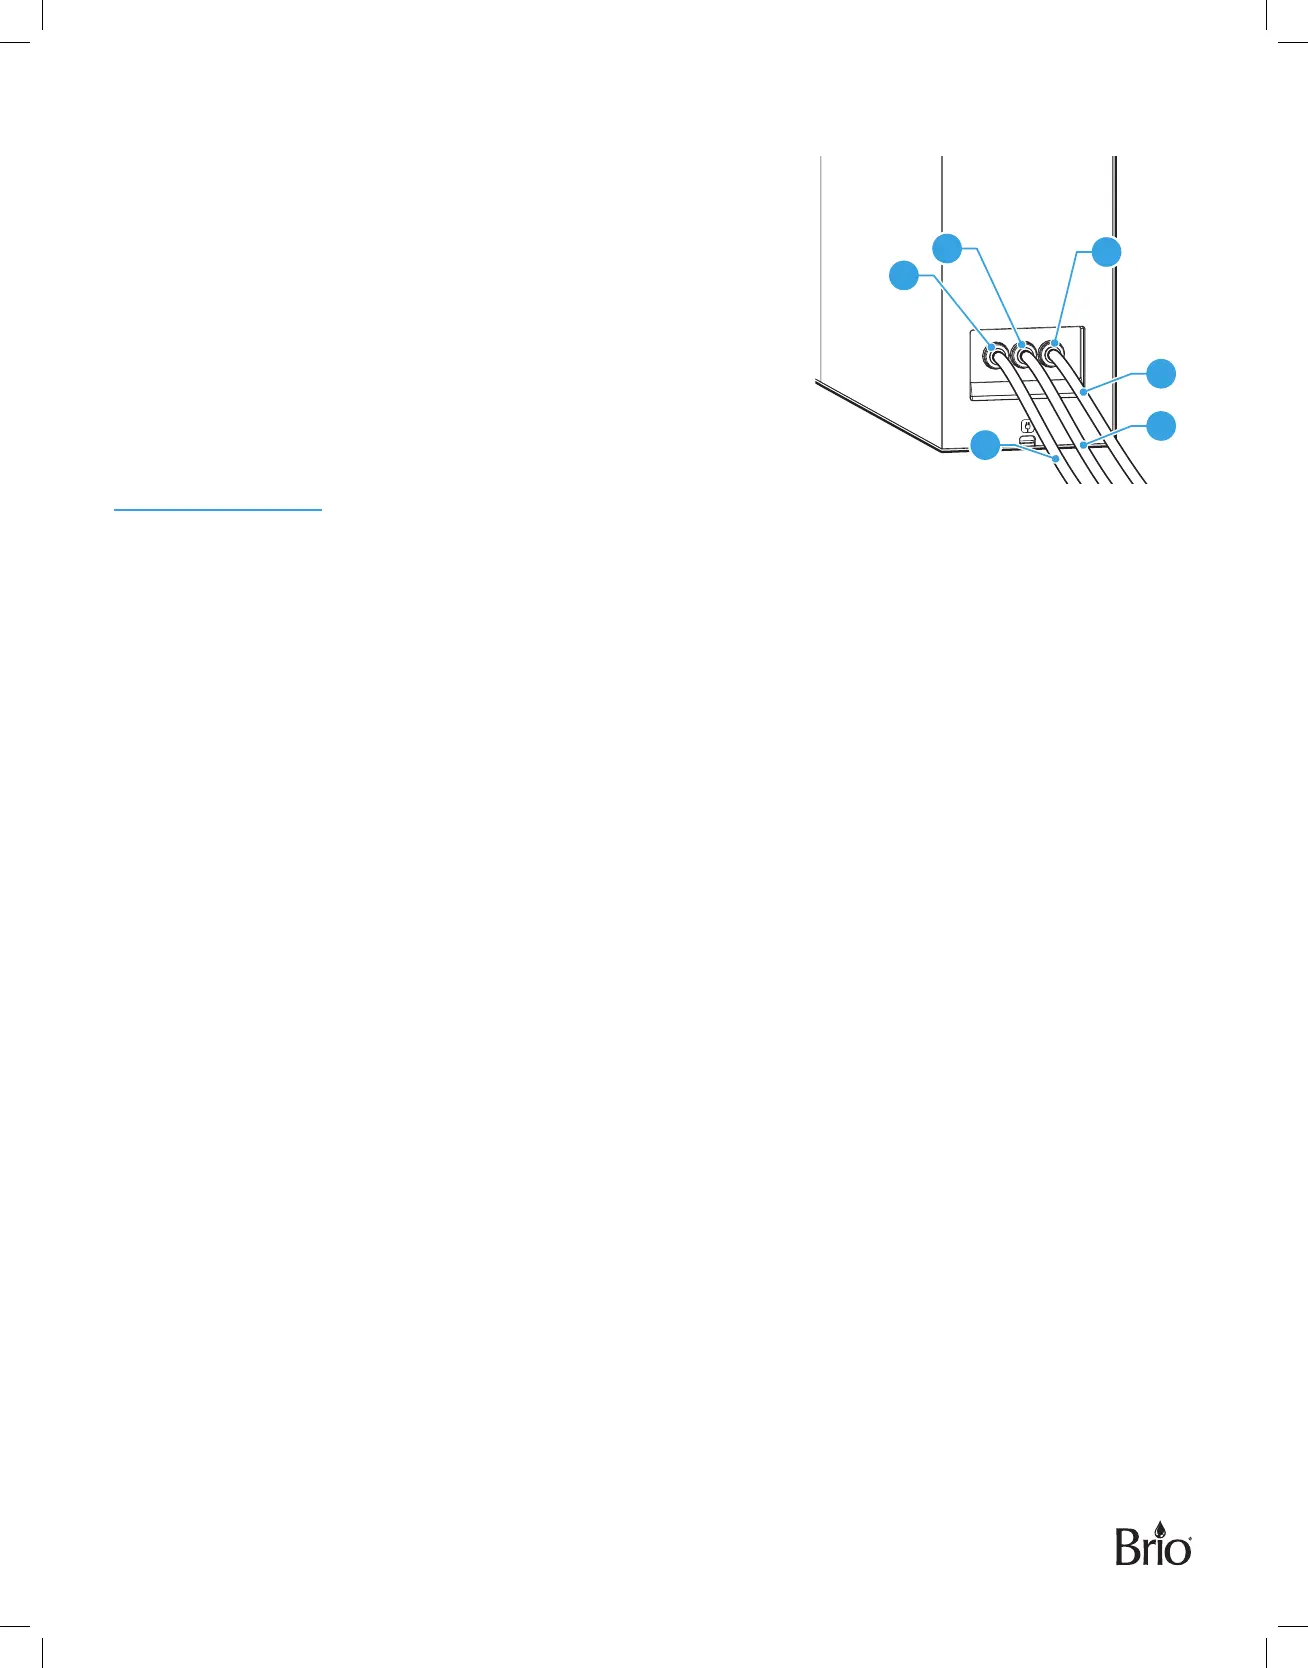
5. Complete the Installation
A. Connect the shut-o valve tube (J) to the inlet water
connection(4).
B. Connect the filtered water tube (K) to the filtered water
connection(5).
C. Connect the RO waste water tube (I) to the waste water
connection(6).
D. Ensure all connections are secure before proceeding.
Operation
Start Up the Filtration System
1. Ensure all water connections are completed as described in the Installation section.
2. Connect the power supply to the filtration system and then to an outlet. The filter indicator panel turns on.
3. Turn the cold water supply on. Open the shut-o valve on tube (J).
NOTE: When the system is first turned on, it goes into automatic flushing state, which lasts approximately
25 seconds.
4. Flush the filters. (See “Flushing the Filters” on page 13.) While system is flushing, make sure there are
no leaks in the joints, fittings, valves, and tubing connections.
Start Water Purification
Turn on the faucet by rotating the lever forward. The water filtration system starts to produce water.
NOTE: If the faucet runs water for over 30 minutes, the filtration unit enters overtime protection mode.
When this happens, the unit will beep, the filter indicator lights will flash, and the system will no
longer produce water. Unplug the filtration unit from the outlet, and then plug it in again to clear the
protection mode.
Shut Down
1. Close the shut-o valve on tube (J).
2. Unplug the unit from the outlet.
6
5
4
J
K
I