12
Care and Maintenance
• Keep this device in a cool, dry place away from direct sunshine.
• Use a clean, soft cloth to remove dust build-up. Do not use soap, detergent, or harsh abrasives.
• If the filtration system is not going to be used for an extended period of time, close the shut-o valve on
tube(J) and unplug the unit from the outlet.
• Never lay the unit on its side or back. It should always be operated and stored in an upright position.
• If the cold water inlet temperature drops to <32 °F (<0 °C), there is a risk the tubes could crack and
damaging leaking could occur. To prevent this, turn o the shut-o valve on tube (J), then turn on the faucet
and drain any remaining water out of the filtration system.
Filter Replacement Schedule
Filter Type Replacement Schedule Function
PCB Composite
Filter (PAC and
Carbon)
12 months Removes mud, sand, rust, suspended solids, residual chlorine,
and unpleasant residual tastes.
RO Filter 24 months Removes up to 99% of contaminants including arsenic, lead,
fluoride, heavy metals, and more.
Replacing the Filters
When one or both of your filter indicator lights begin to flash,
the filter(s) needs to be replaced. To change a filter:
1. Unplug the unit from the power source, then turn o the shut-o
valve on tube(J).
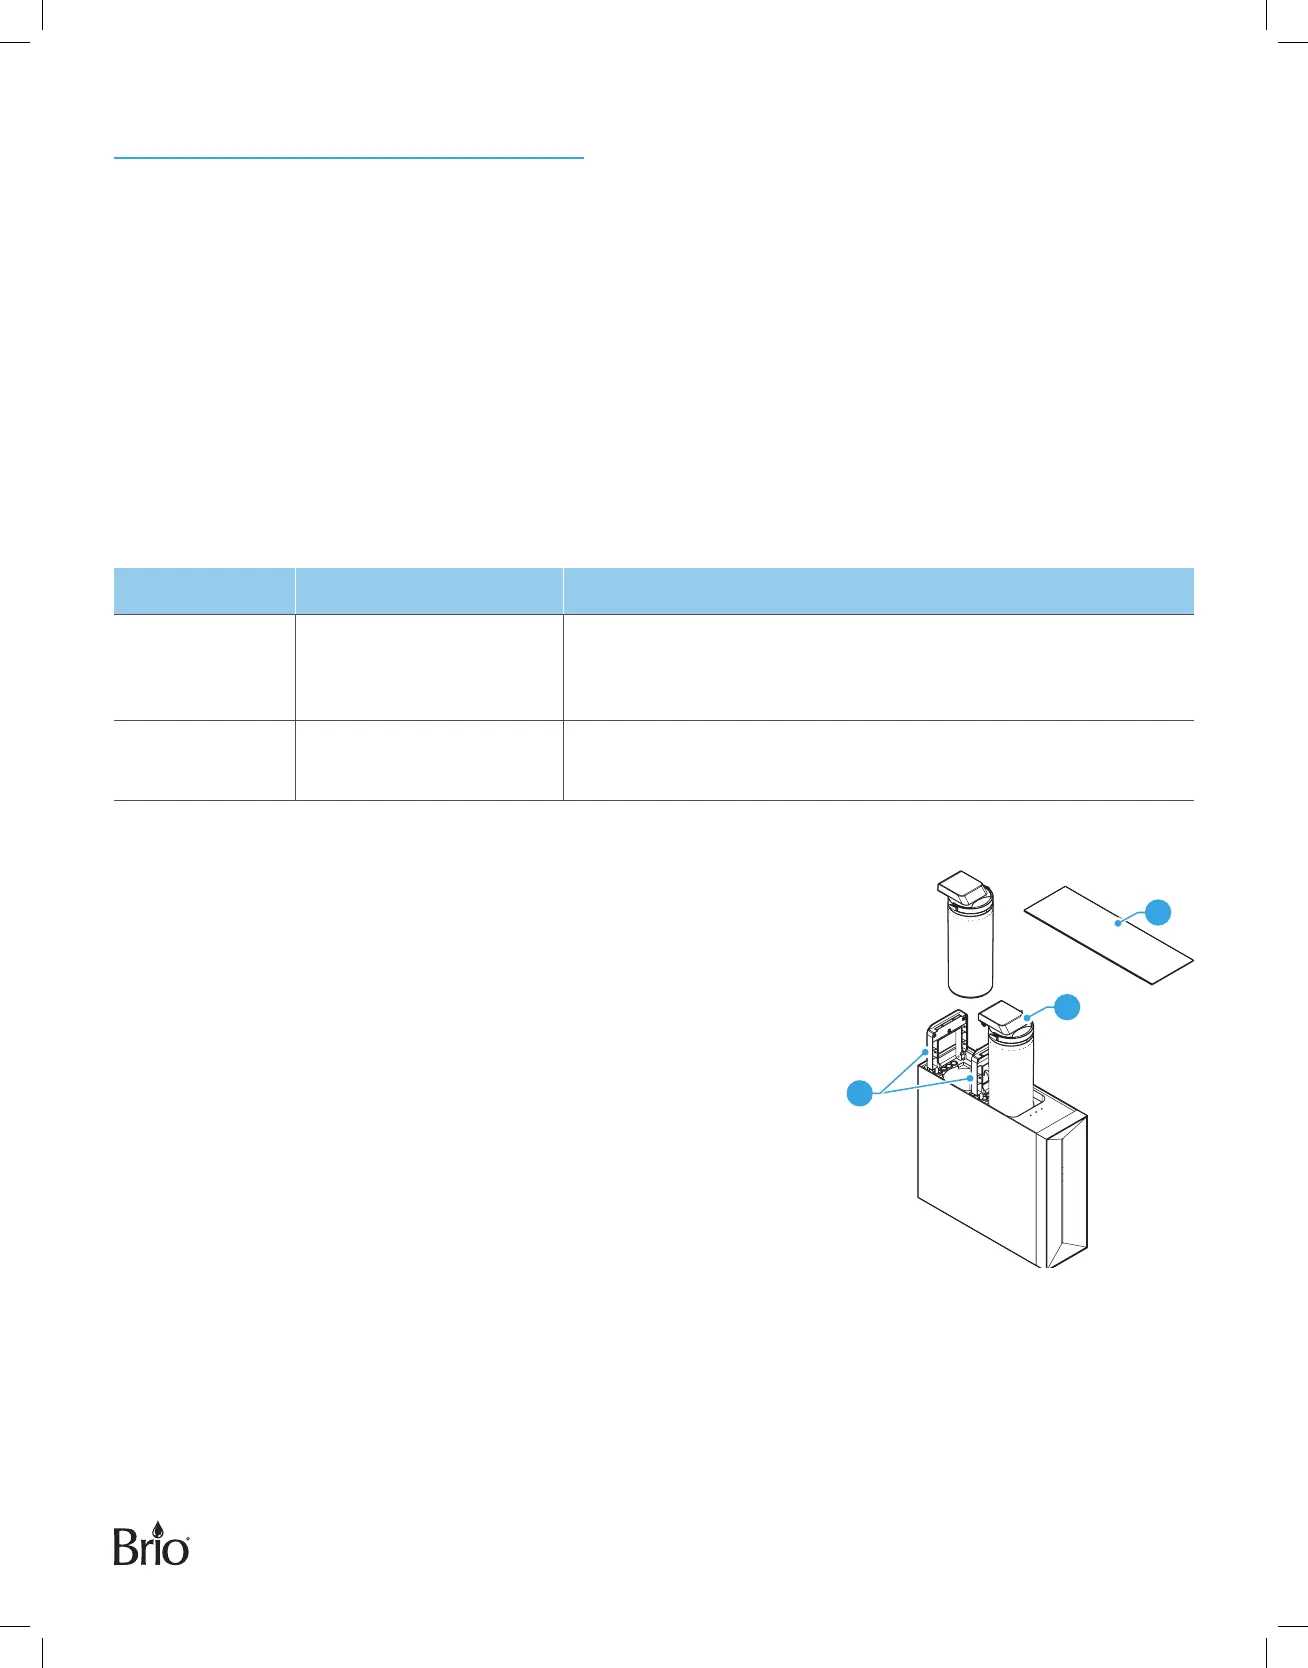
2. Carefully pry o filter compartment cover (C).
3. Flip up the bracket (15) of the expired filter, then grasp the
handle(16) and remove the expired filter.
4. Insert a new filter and flip down the bracket (15) to lock the filter
into place.
5. Snap the filter compartment cover (C) back onto the unit.
6. Turn on the shut-o valve on tube (J), then plug the unit back into
the power source.
7. Touch and hold the Reset button until the filter indicator light stops flashing (approximately 3 seconds).
8. Flush the new filter. (See “Flushing the Filters” on page 13.)
C
16
15
 Loading...