Installation cont
Installation contInstallation cont
Installation cont.
..
.
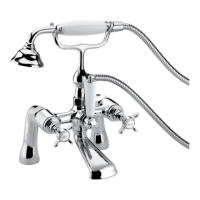
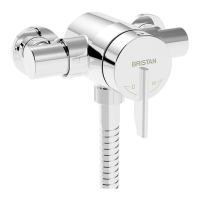
Bath Shower Mixer
Bath Shower MixerBath Shower Mixer
Bath Shower Mixer
1. Identify all components are present prior to starting installation using the diagram
overleaf.
2. Slide the base washer (15) onto the threaded tails of the tap body and install the mixer
body (6) to the bath.
3. Using washers (8) and the backnuts (9) secure the mixer body (6) to the bath by
tightening the backnuts (9) onto the threaded tails. A suitable spanner (not supplied)
may be required to fully tighten the backnuts (9).
4. Connect the hot and cold water supplies using ¾" tap connectors (not supplied).
5. Fit the shower hose (10) to the hose outlet using the small washer, and the handset (11)
to the hose using the small washer.
6. Fit the wall bracket (12) to the wall using the fixings supplied, ensuring the handset (11)
and hose (10) reaches it comfortably.
7. Turn the handles in both directions, letting the water flow for a few minutes to check all
joints and connections for leaks.
joints and connections for leaks.
8. To switch from bath to shower mode, simply pull the diverter up. After use the mixer
automatically reverts to the bath filling mode.
NOTE
NOTENOTE
NOTE: The mixer incorporates a ‘lock-up’ diverter feature, for use with low pressure
water systems. Simply twist the diverter knob when in the up position to lock in the
shower mode. After use twist back to allow diverter knob to drop back down to bath
filler mode
1. Handle x2 9. Backnut x2
2. Indice x2 10. Shower Hose x1
3. Grub Screw x2 11. Handset x1
4. Spline Adapter x2 12. Wall Bracket x1
5. Valve x2 13. Diverter Assembly x1
6. Mixer Body x2 14. Hose Outlet x1
7. Anti-Splash Assembly x2 15. Base Washer x1
8. Washer x2
10