Please check that you are familiar with the installation
requirements before commencing work.(section 6)
Installation
The installation kit included with the flue components
comprise following items :
- Hanging bracket
- A paper template (showing the dimensions of the boiler with
5 mm side clearances, fitting instructions and commissioning
instructions)
- Connection tails
- Screws and wall plugs
- Connection washers and filters
- Pre-piping jig
- Installation manual
Method of positionning the boiler on the wall.
The paper template can be used to ensure the correct
positioning of kitchen cabinets etc. It also details the
commissioning instructions.
The paper template has to be fixed to the wall and used to fix
the position of the hanging bracket, the centre for the flue
hole and, if required, the fixings for the pre-piping jig.
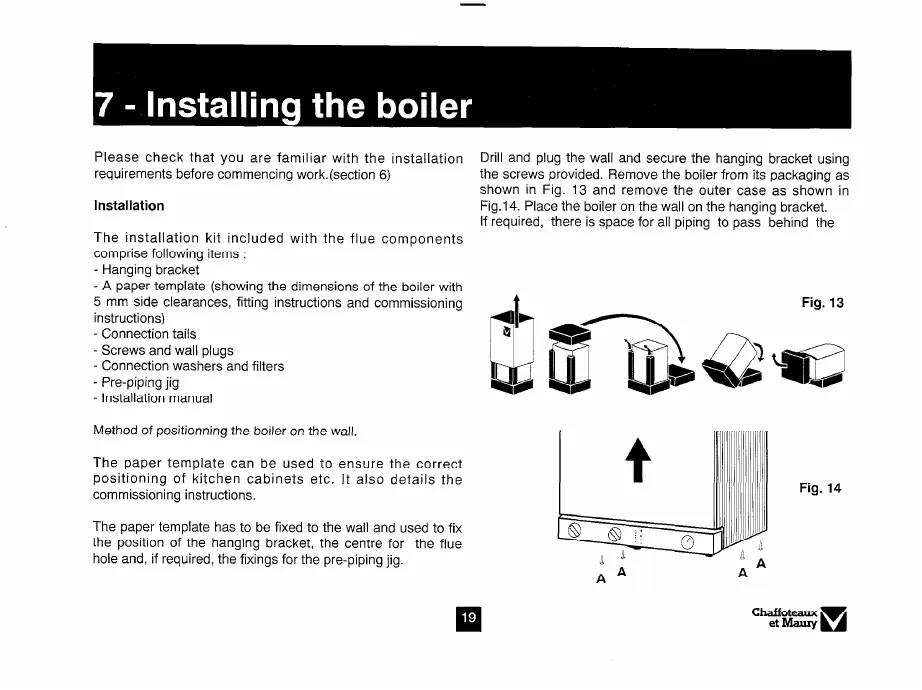
Drill and plug the wall and secure the hanging bracket using
the screws provided. Remove the boiler from its packaging as
shown in Fig. 13 and remove the outer case as shown in
Fig.1 4. Place the boiler on the wall on the hanging bracket.
If required, there is space for all piping to pass behind the
Fig. 13
Fig. 14