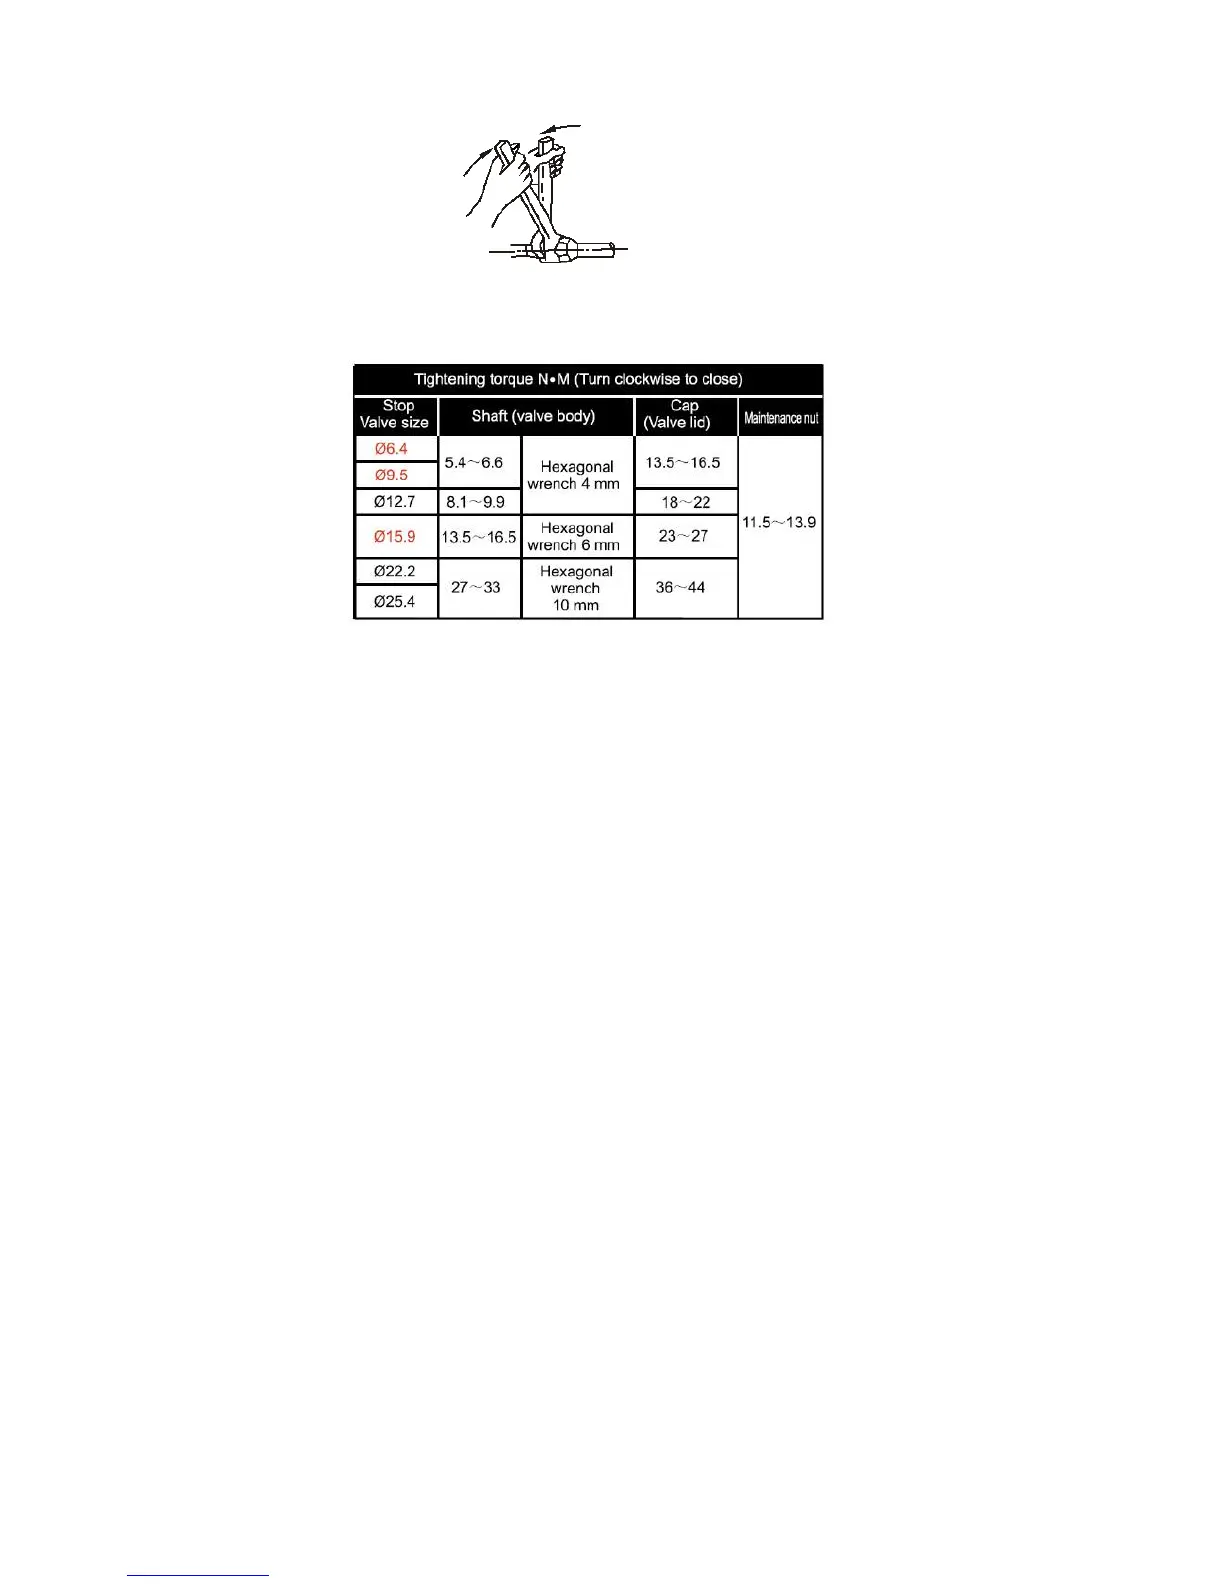
• Be sure to use both a spanner and torque wrench together when connecting/disconnecting pipe to/from the unit.
NOTE: Too large torque will harm the bell-mouthing and too small will cause leakage. Please determine the torque according to
the following table. Leak test the unit after finishing the connection.
Table 4 – Service Valve Tightening Torque
6.3 Expelling the air with the vacuum pump
Stop Valve opening / Closing
Opening: Remove the cap and turn the valve counter-clock wise (with the hexagon wrench) until the shaft stops. Do
not apply excessive force to stop the valve. Doing so may damage the valve as the valve is not a backseat type. Always use
the correct tools. Make sure to tighten the cap securely.
Closing: Remove the cap and turn the valve clock wise with the hexagon wrench. Securely tighten the valve until
the shaft contacts the main body seal. Please make sure to tighten the cap securely and refer to the table … for the
tightening torque.
Using the vacuum pump
• Loosen and remove the service port nuts of stop valves A and B, and connect the charging hose of the manifold valve to the
service port of isolation valve A. Ensure that the isolation valves A and B are both closed.
• Connect the charging hose with the vacuum pump.
• Open the Low-side valve of the manifold completely.
• Turn on the vacuum pump. At the beginning of pumping, loosen the service valve nut of isolation valve B a little to check for
air entering (the sound of the pump will change, and the manifold gauge reads below zero). Then close the service valve.
• When evacuation is complete, close the Lo-side valve of the manifold gauge completely and turn off the vacuum pump. Let
the system hold for 15 minutes or more and check that the pressure does not rise, suggesting a system leak.
• Loosen and remove the cap of isolation valves A and B to open stop valve A and B completely, then fasten the cap.
• Disassemble the charge hose from the service port of the isolation valve A, and fasten the nut.
 Loading...