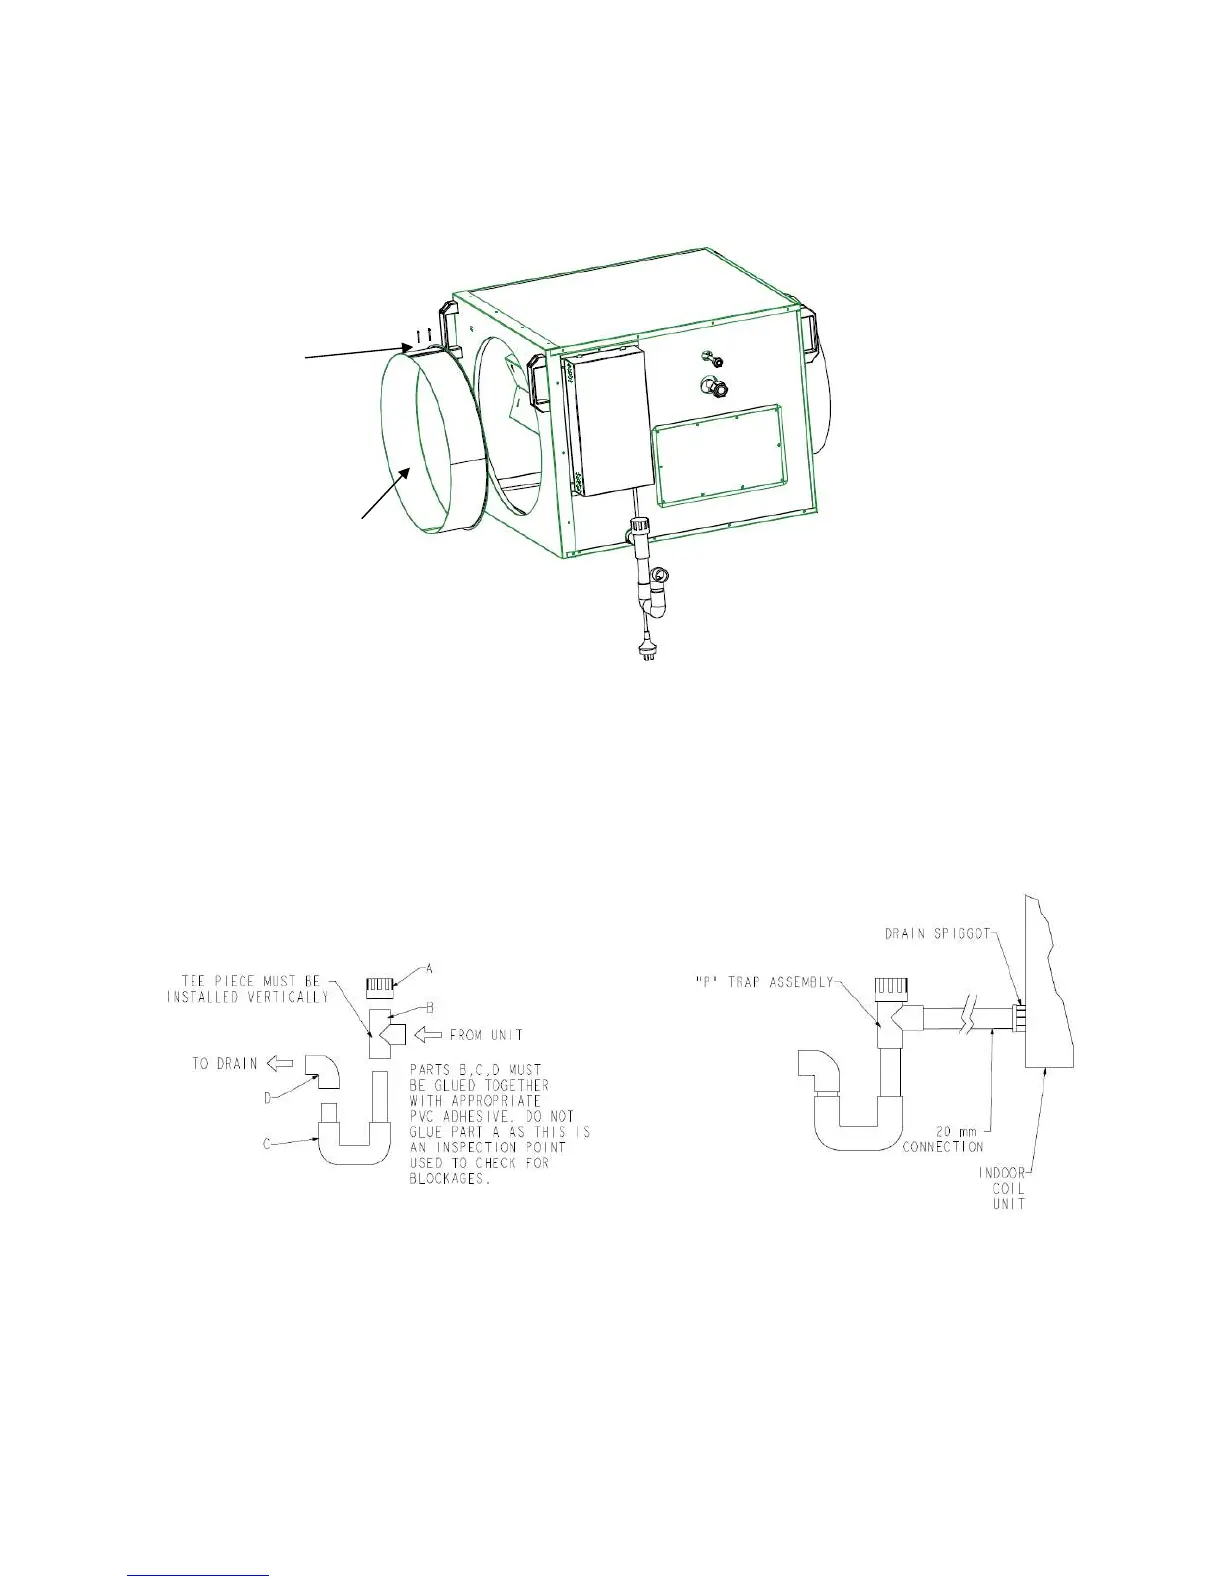
2.2 Starting Collars
Insert starting collar (pop) into the hole in pop plate, ensuring pop flange is placed over the inner supply air wall of the
cabinet. Spread the pop flange to fit tight in the cabinet’s hole with the notch side of the collar over lapping the other.
Secure the pops with the rivets supplied.
Fig. 2 - Indoor Unit Starting Collar Assembly
2.3 P-Trap
The Indoor Unit incorporates an evaporator drip tray and is supplied with a 20mm Female Pressure Pipe drain spigot, which
is to be connected to the "P" trap (supplied).
• Always install the “P” trap as close to the unit as possible
• Fill the "P" trap with water during installation before starting unit, to prevent air movement through the drainpipe
• Ensure trap contains water at all times
• Adjust the level of the unit to ensure that the condensate drains from the evaporator drip tray (approx 10 - 15mm
incline from back to front)
Fig. 3 - “P” TRAP ASSEMBLY
Fig. 4 - “P” TRAP INSTALLATION
Pop
flange
Rivets
(Supplied)
 Loading...