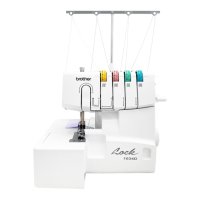
Serger Badge: Brother 1034D
Age: Grade 9-Adult
• • • • • • • • • • • • • • • • • • • • • • • • • • • • • • • • • • • • • • • • • • • • • • • • • • • • • • • • • • • • • • • • • • • • • • • • • • • • • • • • • • • • • • • • • • • •
● Always turn machine off when adjusting needle and presser foot, or threading the
machine.
● Always close front cover before operating the machine
● Move knife lever only when the needle is at its lowest point
3. Setting up the machine - Power cord, presser foot,
and needles.
● Power Cord - Turn power switch to off position (“O”). Insert plug into machine socket
and then plug power supply into the wall socket. Turn switch to on position (“1”). Place
foot pedal on floor beneath machine.
● Foot Pedal - Works like a gas pedal in a car. Press down to go faster; lift up to slow
down or stop.
● The Presser Foot - To raise or lower, use presser foot lifter on the right side of the
machine. Lift to place fabric or remove fabric. Always remember to lower the presser
foot before pressing the foot pedal. Choose the correct presser foot for the stitch you
are planning to sew.
● Adjusting the Presser Foot Pressure - If your fabric is especially heavy or light, you
can adjust the presser foot pressure with the pressure adjustment screw on the top of
the machine. When sewing very light materials, the presser foot pressure should be
loosened (turn counterclockwise). When sewing heavy materials, the presser foot
pressure should be tightened (turn clockwise). See p. 38 in manual for more information
and diagrams.
● To change the presser foot:
1. Turn off the power switch and/or unplug the machine.
2. Raise the presser foot level.
3. Set the needle to its highest position by turning the handwheel counter clockwise
(see arrow on side of machine)
4. Push the button on the presser foot holder and the standard foot will be released.
5. Raise the presser foot farther by pushing the presser foot lever upward. Remove
presser foot and store it in a safe location.
6. Again, raise the presser foot farther by pushing the presser foot lever upward.
Then place your new presser foot (blind stitch presser foot, gathering presser
foot, multipurpose foot, etc) just under the presser foot holder so that the groove
in the bottom of the presser foot holder is aligned and catches the bar on the top
of the presser foot. Then lower the presser foot lever and press button on presser
foot holder to attach the new foot. (see p. 47 in manual for diagram)

 Loading...