EasyManua.ls Logo

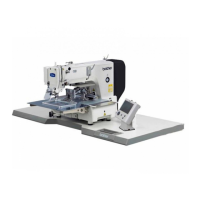
Brother BAS-341H User Manual

Brother BAS-341H
70 pages
To Next Page IconTo Next Page
Page #1 background imageLoading...
Page #1 background image
BAS-341H
BAS-342H
Please read this manual before using the machine.
Please keep this manual within easy reach for quick reference.
DIRECT DRIVE
PROGRAMMABLE ELECTRONIC PATTERN SEWER
INSTRUCTION MANUALINSTRUCTION MANUAL

Table of Contents

Questions and Answers:

Brother BAS-341H Specifications

General IconGeneral
BrandBrother
ModelBAS-341H
CategorySewing Machine
LanguageEnglish

Summary

Safety Instructions

Safety Indications and Their Meanings

Explains safety indications and symbols used in the manual and on the machine.

Notes on Safety

Provides crucial safety notes regarding electrical hazards, environmental conditions, and proper usage.

Environmental Requirements

Details environmental conditions like temperature, humidity, and electrical noise for optimal operation.

Installation Safety Precautions

Advises on safe installation procedures, weight handling, and electrical grounding.

Sewing Safety Precautions

Safety precautions to take during sewing operations, including protective gear and avoiding moving parts.

Cleaning Safety Measures

Safety measures for cleaning the machine, handling oils, and using protective gear.

Maintenance and Inspection Safety

Outlines safety precautions for maintenance and inspection, including electrical safety and part handling.

Machine Components Overview

1. Names of Major Parts

Identifies and labels the key components of the sewing machine.

Technical Specifications

2. Specifications

Lists technical specifications for the BAS-341H and BAS-342H sewing machines.

Machine Installation Guide

3-1. Table Processing Diagram

Illustrates the required dimensions and processing steps for the sewing machine table.

3-2. Installing the Control Box

Step-by-step instructions for securely mounting the control box to the sewing machine table.

3-3. Installing Oil Pan and Support Lever Base

Details the process of attaching the oil pan and support lever base to the machine.

3-4. Installing the Machine Head

Instructions for safely placing and securing the machine head onto the table.

3-5. Tilting Machine Head

Explains the safe procedure for tilting and returning the machine head for access or adjustment.

3-6. Installing the Gas Spring

Step-by-step guide for installing the gas spring to support the machine head.

3-7. Installing the LCD Panel

Instructions for mounting and connecting the LCD control panel to the machine.

3-8. Installing Solenoid Valve Assembly

Details on how to install the solenoid valve assembly underneath the work table.

3-9. Connecting the Air Tubes

Guidance on connecting the various air tubes to the system.

3-10. Installing the Air Hose

Instructions for connecting and setting up the air hose for pneumatic functions.

3-11. Installing Two-Pedal Foot Switch

Explains the connection and operation of the two-pedal foot switch.

3-12. Connecting the Cords

Instructions for routing and connecting various electrical cords within the control box.

3-13. Connecting the Ground Wire

Emphasizes the importance of secure ground connections for electrical safety.

3-14. Securing Cords and Air Tubes

Guides on how to properly secure all cords and air tubes under the table and in the control box.

3-15. Connecting the Power Cord

Instructions for connecting the power cord, including ground wire connection and voltage specifications.

3-16. Installing the Eye Guard

Steps for securely attaching the eye guard for operator safety.

3-17. Installing the Cotton Stand

Instructions for mounting the cotton stand for thread spool placement.

3-18. Lubrication

Detailed instructions on lubricating the machine before first use and for maintenance.

3-19. Checking Machine Head Switch

Procedure to check the machine head switch and adjust its position if errors occur.

Sewing Preparation

4-1. Installing the Needle

Step-by-step guide for correctly inserting the needle into the machine.

4-2. 2-Pedal Foot Switch Operation

Explains how to operate the work clamp and start sewing using the two-pedal foot switch.

4-3. Threading the Upper Thread

Detailed instructions for threading the upper thread through the machine.

Threading Mode

Describes how to use the threading mode for easier thread insertion.

4-4. Winding the Lower Thread

Instructions for winding thread onto the bobbin using the machine's winder.

4-5. Installing the Bobbin Case

Step-by-step guide for properly inserting the bobbin case into the rotary hook.

4-6. Thread Tension

Provides reference values and guidelines for setting upper and lower thread tension.

4-6-1. Lower Thread Tension

Explains how to adjust the lower thread tension for optimal sewing.

4-6-2. Upper Thread Tension

Details on adjusting the upper thread tension using digital controls and manual nut.

4-7. Starting Up

Steps to follow before turning on the power and starting the machine.

4-8. Setting 2-Step Operation for Work Clamp

Instructions on configuring the work clamp for two-step lowering operation.

Sewing Operation

5-1. Sewing

Step-by-step guide for performing the actual sewing operation on the machine.

5-2. Using the STOP Switch

Explains how to use the emergency stop switch and continue sewing after a stop.

Machine Cleaning Procedures

6-1. Cleaning the Rotary Hook

Detailed steps for cleaning the rotary hook assembly and removing lint.

6-2. Draining the Oil

Instructions for draining and managing the lubricating oil from the machine.

6-3. Checking the Regulator

Procedure for checking the regulator for water and draining it.

6-4. Cleaning Control Box Air Inlet Ports

How to clean the air inlet ports on the control box using a vacuum cleaner.

6-5. Cleaning the Eye Guard

Instructions for cleaning the eye guard with a soft cloth.

6-6. Checking the Needle

Guidance on checking the needle for damage or bending before sewing.

6-7. Lubrication Reference

Refers to section 3-18 for lubrication instructions.

Standard Adjustments

7-1. Adjusting Thread Breakage Sensor Sensitivity

How to adjust the thread breakage sensor sensitivity for reliable detection.

7-2. Thread Take-Up Spring Adjustments

Adjusting the height and tension of the thread take-up spring for even thread length.

7-3. Arm Thread Guide R Adjustment

How to adjust the arm thread guide for different material weights to control thread take-up.

7-4. Adjusting Needle Bar Height

Procedure for adjusting the needle bar height relative to the needle bar bush.

7-5. Adjusting Needle and Rotary Hook Timing

Steps to align the needle with the rotary hook for correct stitch formation.

7-6. Adjusting Driver (Needle Guard) Position

How to adjust the driver position to prevent needle contact and skipped stitches.

7-7. Adjusting Needle and Rotary Hook Tip Clearance

Setting the precise gap between the needle and the rotary hook tip.

7-8. Adjusting Shuttle Race Thread Guide

Instructions for positioning the shuttle race thread guide correctly.

7-9. Rotary Hook Lubrication Amount

Methods to adjust the amount of oil supplied to the rotary hook for proper lubrication.

7-10. Adjusting Movable Knife Position

Steps to adjust the position of the movable knife for accurate thread trimming.

7-11. Replacing Movable and Fixed Knives

Detailed procedure for replacing the movable and fixed knives for thread trimming.

7-12. Installing the Feed Plate

Instructions for correctly installing the feed plate onto the machine.

7-13. Adjusting the Thread Wiper

How to adjust the position and stroke of the thread wiper for effective operation.

7-14. Intermittent Presser Foot Installation Position

Guides on setting the correct installation position for the intermittent presser foot.

7-15. Adjusting the Intermittent Presser Foot

How to adjust the stroke of the intermittent presser foot by changing link positions.

7-16. Adjusting Work Clamp Lift Amount

Procedure to set the maximum lift amount for the work clamp.

7-17. Adjusting Air Pressure

How to adjust the air pressure using the regulator to the specified 0.5 MPa.

7-18. Adjusting Speed Controller

Adjusting lifting and lowering speeds of the work clamp using valve knobs.

7-19. Processing Work Clamp and Feed Plate for Patterns

Diagrams for processing work clamps and feed plates to match specific sewing patterns.

Error Code Reference

8. List of Error Codes

Provides a comprehensive list of error codes, their causes, and remedies for troubleshooting.

Troubleshooting Guide

Sewing Machine Does Not Start

Troubleshooting steps for when the machine fails to start.

Work Clamp Malfunction

Diagnosing and fixing issues related to the work clamp not functioning correctly.

Lower Thread Winding Issues

Addresses issues with the lower thread winding unevenly or incorrectly on the bobbin.

Thread Unraveling at Sewing Start

Troubleshooting common issues causing thread to unravel at the beginning of sewing.

Skipped Stitches

Common causes and remedies for skipped stitches during sewing.

Upper Thread Breakage

Troubleshooting guide for frequent upper thread breakage issues.

Lower Thread Breakage

Reasons and solutions for the lower thread breaking during operation.

Needle Breakage

Common causes and remedies for needle breakage during sewing.

Upper Thread Not Cut

Troubleshooting steps when the upper thread is not being trimmed properly.

Lower Thread Not Cut

Solutions for issues where the lower thread is not cut correctly.

Upper Thread Tension Issues

Addresses problems with the upper thread not being sufficiently taut.

Lower Thread Tension Issues

Troubleshooting steps for when the lower thread is not tight enough.

Poor Seam Finish at Sewing Start

Solutions for poor seam quality at the beginning of the sewing process.

Irregular Upper Thread Trailing Length

How to fix irregular upper thread trailing length for consistent stitching.

Related product manuals