Fig. 2-42Fig. 2-42
Fig. 2-43Fig. 2-43
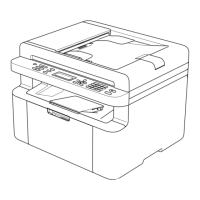
Assembling Note:Assembling Note:
•• Fold the laseFold the laser unit flat cablr unit flat cable as shown in the figue as shown in the figure belowre below..
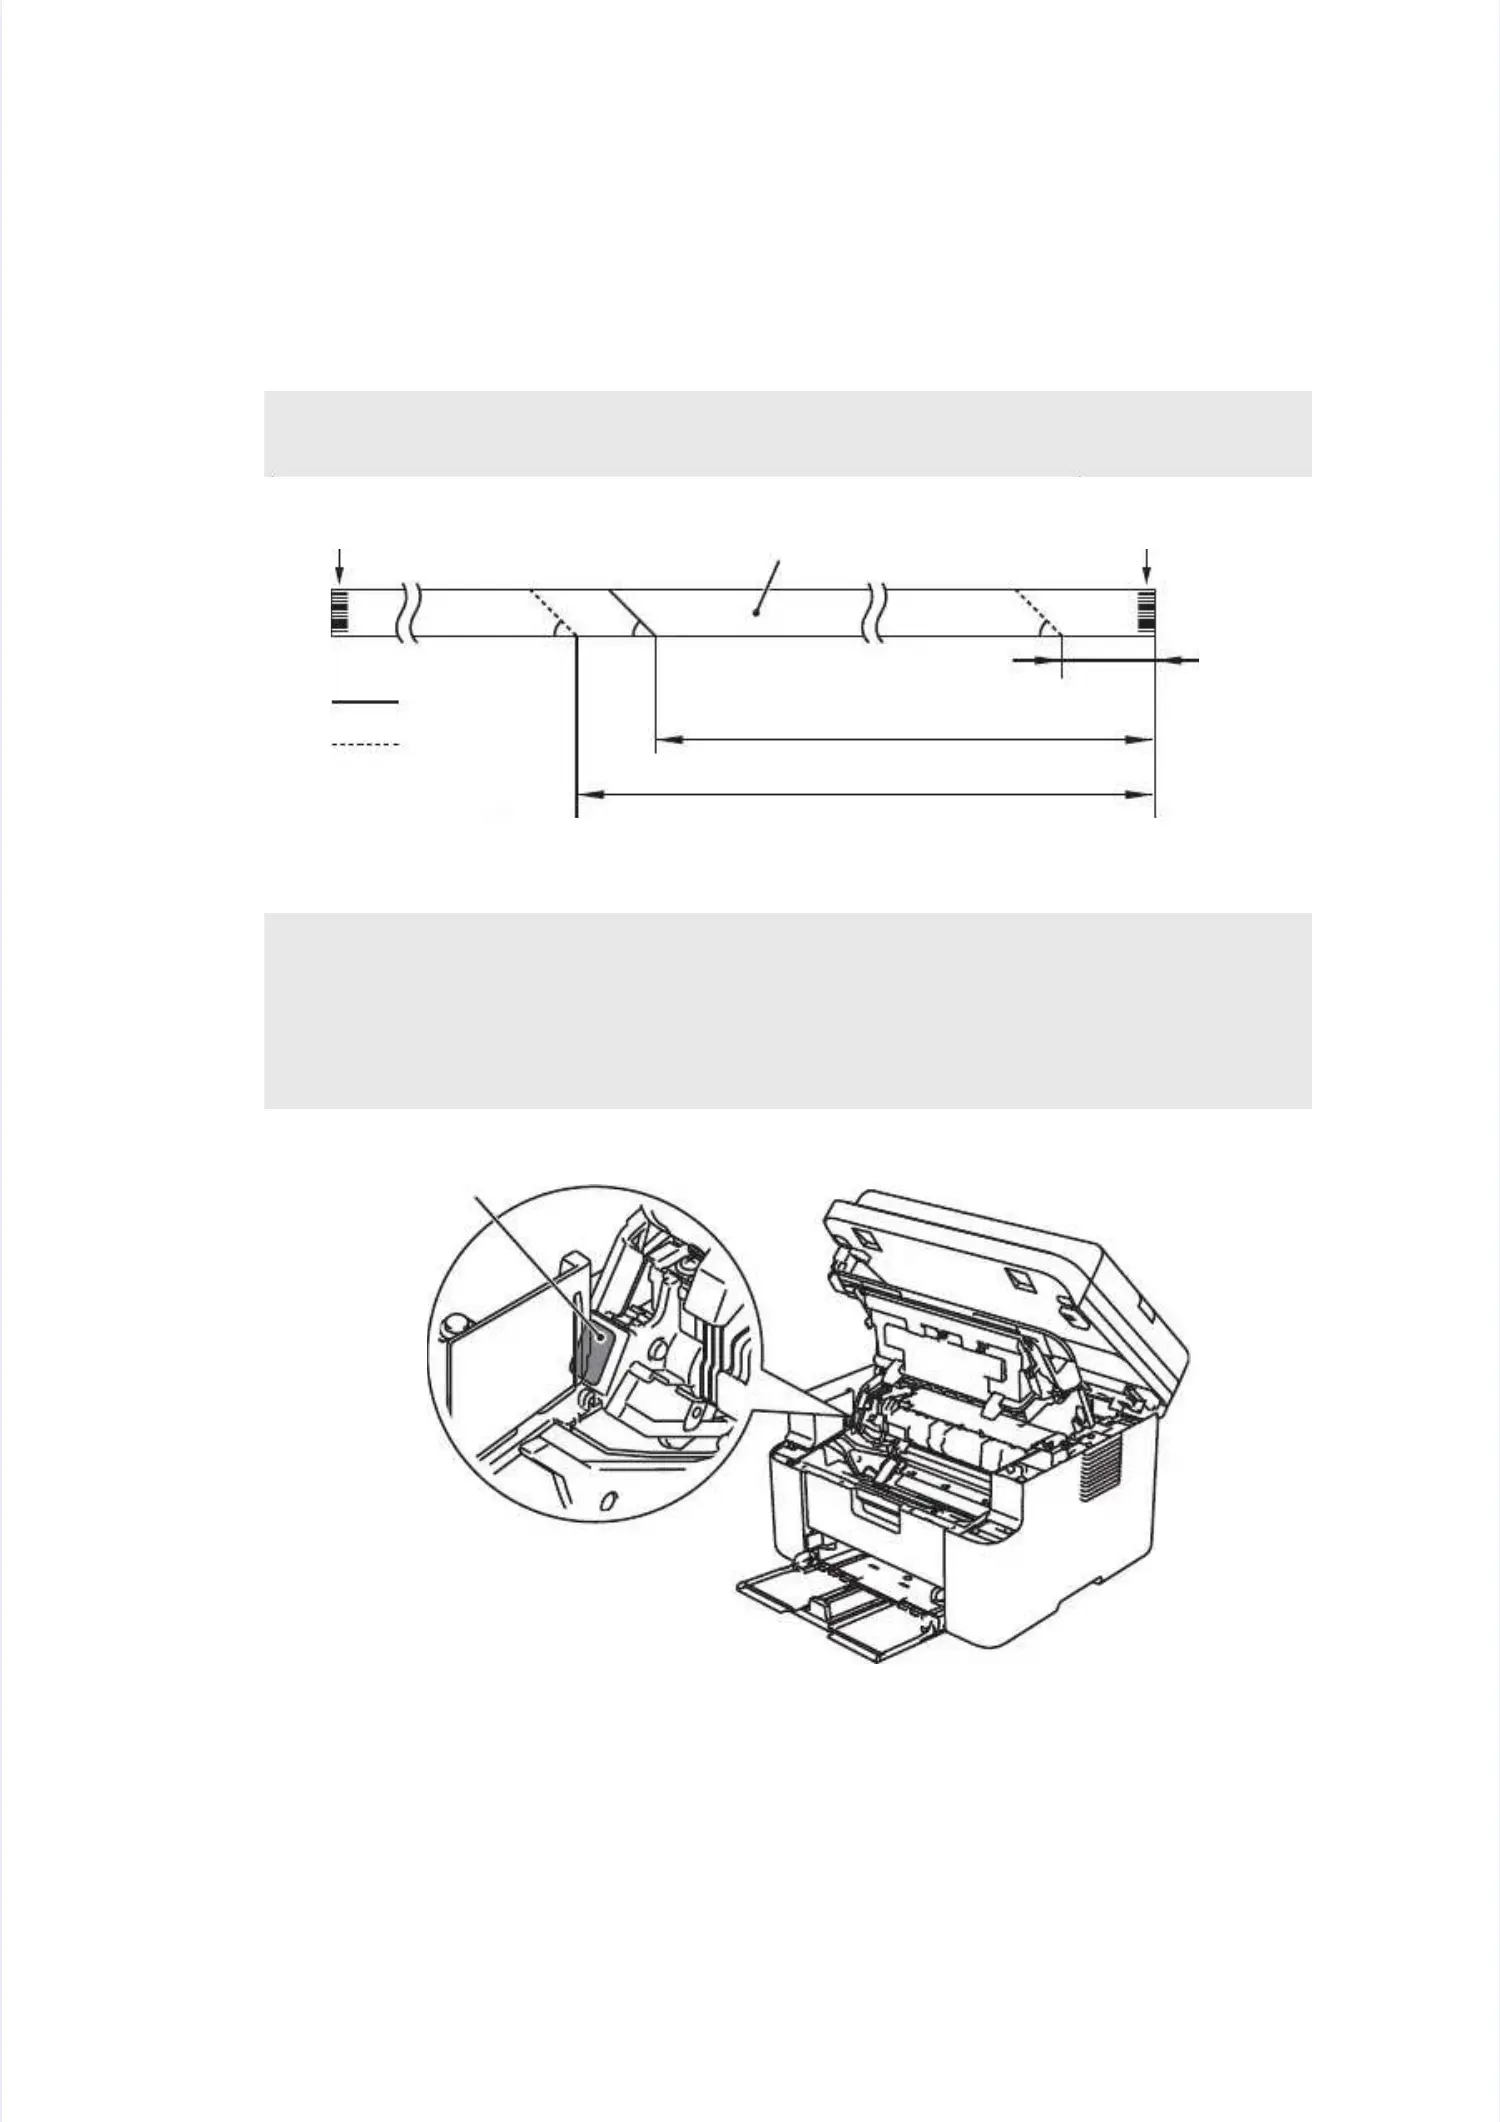
Assembling Note:Assembling Note:
•• If you replacIf you replaced the laser unied the laser unit, attach tht, attach the serial nume serial number label of the laber label of the laser unit onto thser unit onto thee
location shown in the figure location shown in the figure below.below.
•• After After the the replacreplacement, ement, refer refer toto "2.
"2. IF YOU RIF YOU REPLACE THE LASER UNEPLACE THE LASER UNIT" in chapter IT" in chapter 33toto
enter the adjusted value of the laser unit.enter the adjusted value of the laser unit.
Laser unit flat cableLaser unit flat cable
20 mm20 mm
155 mm155 mm
172 mm172 mm
Mountain foldMountain fold
Valley foldValley fold
To be connectedTo be connected
to laser unitto laser unit
To be connected toTo be connected to
main PCB ASSYmain PCB ASSY
Electrode planeElectrode plane
4455°° 4455°° 4455°°
Electrode planeElectrode plane
Serial number labelSerial number label
 Loading...