~
Procedures
Temporarily fasten lower knife holder support
0
on
needle plate support bracket
8.
2
Temporarily fasten lower knife holder guide 0
on
needle
plate support bracket
8.
3 Insert spring
Ci)
into lower knife holder
8,
fit lower
knife holder into lower knife holder support
0,
and
tighten screw
8
just
tight enough to keep it from
sliding
out
(but
not
securely).
4
Temporarily fasten lower knife
(t
on the lower knife
holder
e.
5
Install needle plate
on
needle plate support bracket
8.
Ill
The below items 8 and 8 should be taken simul-
taneously.
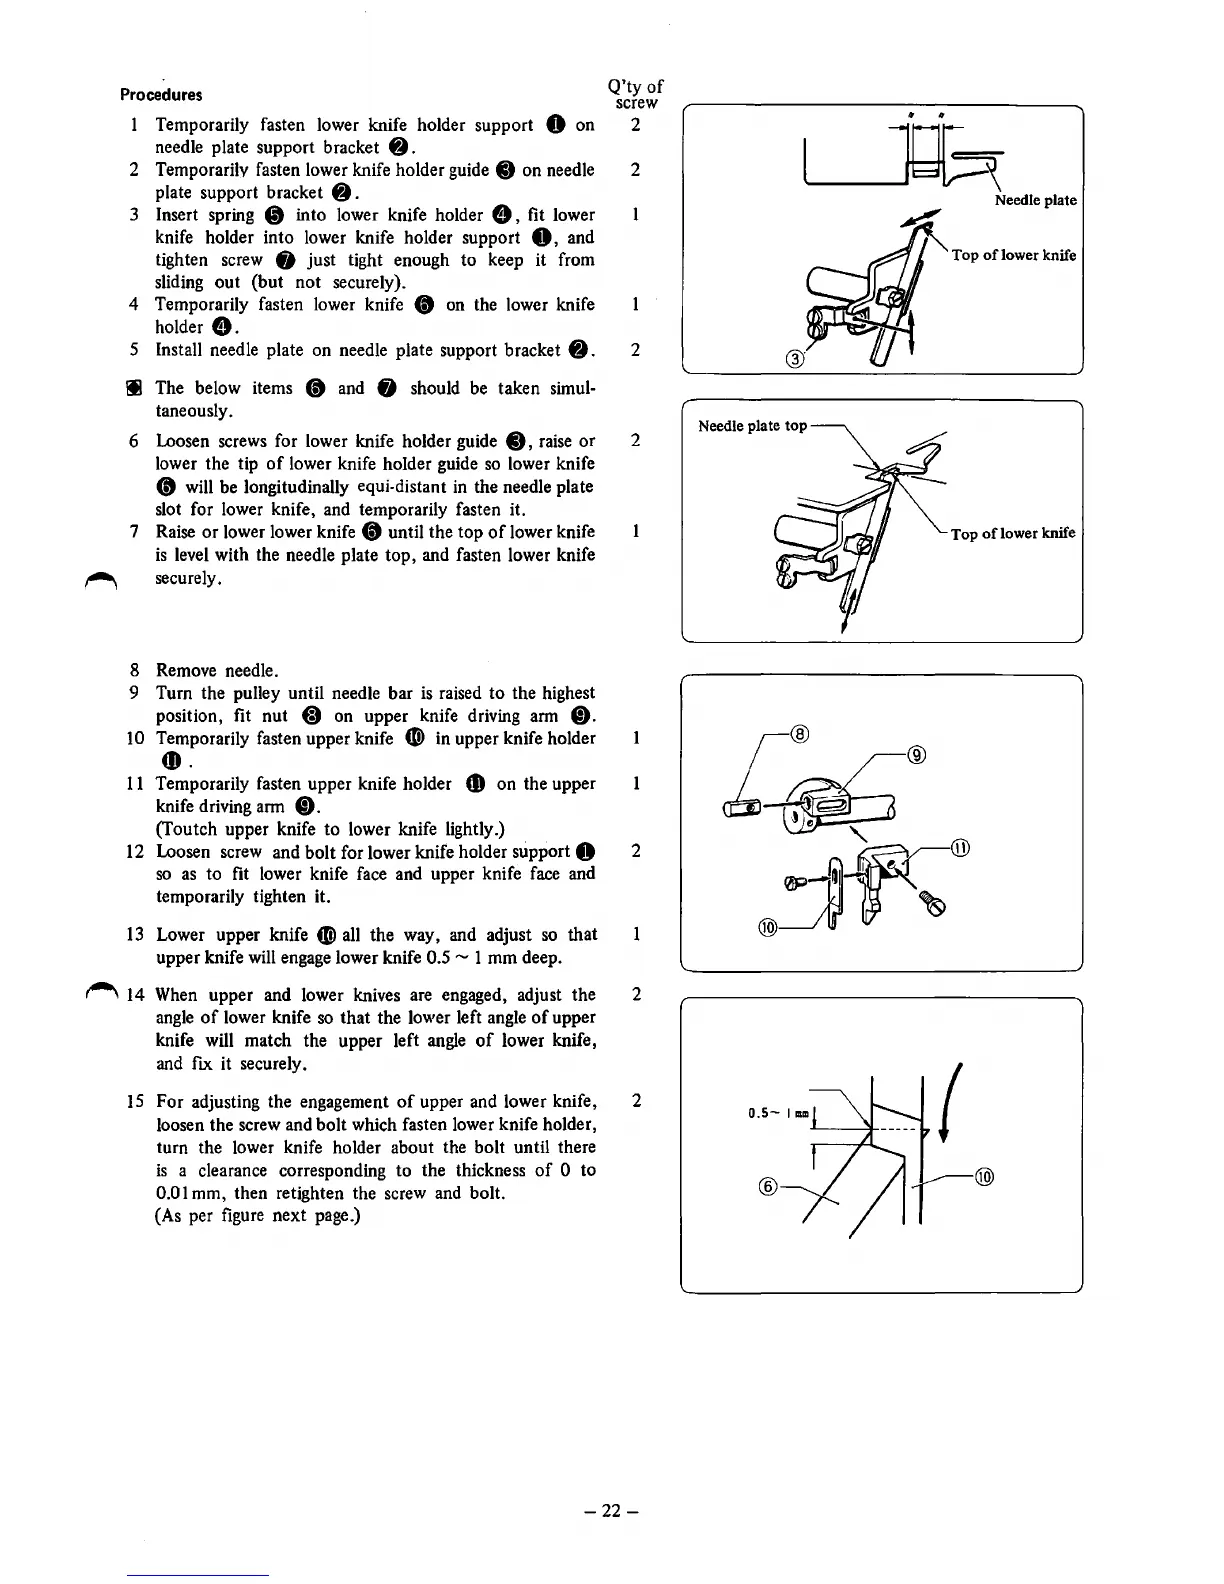
6
Loosen screws for lower knife holder guide
0,
raise
or
lower the tip
of
lower knife holder guide
so
lower knife
8 will be longitudinally equi-distant in the needle plate
slot for lower knife, and temporarily fasten it.
7
Raise
or
lower lower knife
(t
until
the
top
of
lower knife
is
level with the needle plate
top,
and fasten lower knife
securely.
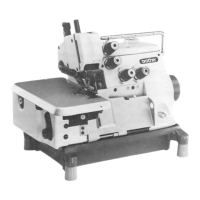
8 Remove needle.
9 Turn the pulley until needle bar is raised
to
the highest
position, fit
nut
• on upper knife driving arm Q).
10 Temporarily fasten upper knife
CD
in upper knife holder
••
11
Temporarily fasten upper knife holder
fD
on
the upper
knife driving arm
Q).
(Toutch upper knife
to
lower knife lightly.)
12 Loosen screw and
bolt
for lower knife holder support 0
so
as
to fit lower knife face and upper knife face and
temporarily tighten it.
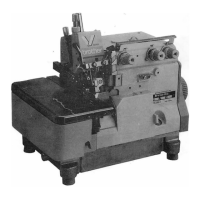
13
Lower upper knife
f)
all
the
way, and adjust
so
that
upper knife will engage lower knife
0.5-
1
mm
deep.
~
14 When upper and lower knives are engaged, adjust
the
angle
of
lower knife so
that
the lower left angle
of
upper
knife will match the upper left angle
of
lower knife,
and fix it securely.
15
For
adjusting the engagement
of
upper and lower knife,
loosen the screw and
bolt
which fasten lower knife holder,
turn the lower knife holder about the
bolt
until there
is
a clearance corresponding
to
the thickness
of
0
to
0.01 mm, then retighten the screw and bolt.
(As per figure
next
page.)
Q'ty
of
screw
2
2
2
2
1
2
2
2
-22-
"
"
~
Needle plate
Top
of
lower knife
Top
oflower
knife
{
®