Do you have a question about the Brother MFC MFC-290C and is the answer not in the manual?
Essential safety precautions and initial steps for unpacking the printer, including USB connection warnings.
Step-by-step guide for inserting and adjusting paper in the tray, covering all steps from a to h.
Connecting the power cord and telephone line, including sharing line scenarios and important notes.
Detailed procedure for unpacking, preparing, and installing ink cartridges into the printer.
Performing a print quality check and initiating cleaning if necessary.
Starting the installation of the Brother MFL-Pro Suite software package from the CD-ROM.
Completing the installation of MFL-Pro Suite and associated software components.
Connecting the power cord and completing the online product registration process.
Physically connecting the printer to the Macintosh computer via USB, with important notes.
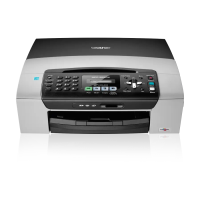
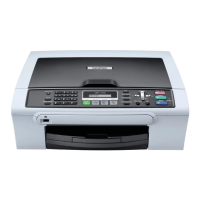
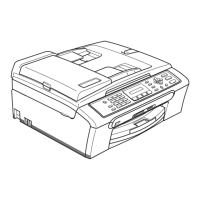
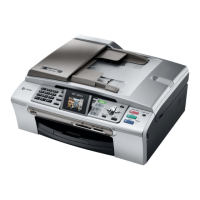
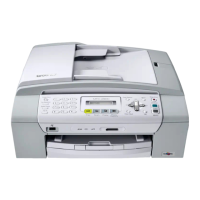
This document provides a comprehensive guide for setting up, using, and maintaining the MFC-290C, a multi-function center designed for home or small office environments. The device integrates printing, scanning, copying, and faxing capabilities, offering a versatile solution for various document handling needs.
The MFC-290C is a compact and efficient all-in-one device. Its primary function is to provide a centralized hub for document management. As a printer, it supports plain Letter/A4 paper and utilizes a four-color ink cartridge system (Black, Yellow, Cyan, Magenta) to produce color prints. The device is equipped with a scanner glass for flatbed scanning and an Automatic Document Feeder (ADF) for scanning multiple pages. Copying functionality allows for quick duplication of documents without the need for a computer. Fax capabilities enable sending and receiving faxes, with options for various receive modes to integrate with existing telephone setups, such as external telephones, answering machines, or voicemail services. The device also supports USB connectivity for direct connection to computers running Windows or Mac OS.
Setting up the MFC-290C begins with unpacking and verifying all components, including the starter ink cartridges, User's Guide, CD-ROM, Accessory Order Form, Test Sheet (USA only), and Telephone Line Cord. It is crucial to avoid connecting the USB cable during the initial setup phase. Protective tape and film must be removed from the scanner glass and the plastic bag containing the ink cartridges from the paper tray.
Loading paper involves pulling out the paper tray, fanning the paper stack to prevent jams, and gently inserting the paper print side down and top edge first. The paper side guides and paper length guide must be adjusted to fit the paper size, ensuring the triangular marks align with the chosen paper size. For Legal size paper, a universal guide release button needs to be pressed while sliding out the front of the paper tray. After loading, the paper tray cover is closed, and the tray is pushed back into the machine. The paper support is then pulled out until it clicks, and its flap is unfolded.
Connecting the power cord and telephone line is a critical step. The power cord is connected to the machine and a power outlet. For telephone line connection, one end of the telephone line cord goes into the jack marked "LINE" on the machine, and the other end into a modular wall jack. If sharing a telephone line with an external telephone or answering machine, the protective cap from the "EXT." jack on the machine must be removed before connecting the external device. The manual emphasizes that the telephone line cord MUST be connected to the "LINE" jack on the machine. Users with an external answering machine are advised to set the receive mode to "External TAD."
Installing ink cartridges requires ensuring the power is on and the LCD displays "No Cartridge." The ink cartridge cover is opened, and the green knob on each protective yellow cap is turned clockwise until it clicks, releasing the vacuum seal, before removing the cap. The green protective part from the cartridge is also removed. Each ink cartridge is then unpacked and installed, matching the color of the lever with the cartridge color, in the direction of the arrow on the label. Once all cartridges are gently pushed in until they click, the ink cartridge cover is closed. The machine will then prepare the ink tube system, a process that takes approximately four minutes, during which the machine should not be turned off.
After ink installation, a print quality check is performed. The LCD will prompt "Set Paper and Press Start," followed by "Press Color Start." Users check the quality of four color blocks (black, yellow, cyan, magenta) on the printed sheet. If all lines are clear, "Yes" is selected. If missing short lines are observed, "No" is selected, and the machine will initiate a cleaning process. After cleaning, "Color Start" is pressed again to print a new quality check sheet.
The device also offers language selection, LCD contrast adjustment, and date and time setting. The station ID, including the user's name and fax number, can be stored for printing on all outgoing faxes. The manual provides a detailed chart for entering text using the dial pad.
For USB interface users, the installation of MFL-Pro Suite software is guided for both Windows and Mac OS. It is crucial not to connect the USB cable until prompted by the software installation. The scanner cover is lifted to access the USB socket inside the machine, where the USB cable is connected. The cable is then routed through a trench and out the back of the machine to the computer. After connecting the USB cable, the scanner cover is closed. The software installation proceeds, and users are guided through various screens, including license agreements and setup types. For Windows Vista users, specific security prompts are addressed. After installation, the computer needs to be restarted.
Optional applications like FaceFilter Studio and BookScan&Whiteboard Suite can also be installed. FaceFilter Studio is a photo editing application for borderless photo printing, red-eye reduction, and skin tone enhancement. BookScan&Whiteboard Suite includes BookScan Enhancer for correcting scanned book images and Whiteboard Enhancer for cleaning up and enhancing text and images from whiteboard photos. Installation of these applications requires the machine to be on and connected to the computer, and the computer to be connected to the Internet.
The manual provides important warnings and notes regarding the usage and maintenance of the MFC-290C. Users are advised to keep plastic bags away from babies and children to avoid suffocation. In case of ink getting into eyes, immediate washing with water and consulting a doctor if irritation occurs is recommended.
Regarding ink cartridges, users are warned not to remove them unless replacement is needed, as this can reduce ink quantity. Shaking ink cartridges is discouraged, and any ink stains on skin or clothing should be washed off with soap and detergent. Repeatedly inserting and removing cartridges may cause ink to seep out. If colors are mixed due to incorrect cartridge installation, the print head should be cleaned multiple times after correction. Once opened, ink cartridges should be installed and used within six months, and unopened cartridges should be used by their expiration date. Dismantling or tampering with ink cartridges is prohibited to prevent leaks. Brother strongly recommends using only Genuine Brother Brand replacement ink cartridges and advises against refilling, as incompatible inks or cartridges may damage the machine or result in unsatisfactory print quality, voiding warranty coverage. The green protective part removed from new ink cartridges should be kept for transporting the machine.
For software installation, users are reminded to save all packing materials and the box for potential future shipping. It is important to ensure the computer is on and logged on with Administrator rights, and no other programs are running. Memory cards or USB Flash drives should not be inserted during installation. If the Brother screen does not appear automatically from the CD-ROM, users are instructed to navigate to "My Computer" (or "Computer"), double-click the CD-ROM icon, and then double-click "start.exe." If an error occurs during software installation, users are directed to run the "Installation Diagnostics" tool.
The manual also highlights that the components included in the box may vary by country. Users need to purchase a USB 2.0 cable (Type A/B) no longer than 6 feet (2 meters). The machine's USB 2.0 Full-speed interface is compatible with USB 2.0 Hi-Speed (with a maximum data transfer rate of 12 Mbits/s) and USB 1.1 interfaces. When connecting the USB cable, it should not be connected to a USB port on a keyboard or a non-powered USB hub, but directly to the computer. The cable must not restrict the cover from closing to prevent errors.
For Mac OS users, it is recommended to upgrade to Mac OS X 10.2.4 or greater for optimal performance. The Brother Solutions Center website is provided for obtaining the latest information and software downloads.
The document concludes with information on replacement consumables, trademarks, and copyright details, emphasizing the importance of using genuine Brother products for optimal performance and warranty coverage.
| Connectivity | USB |
|---|---|
| Scanner Type | Flatbed |
| Standard Media Capacity | 100 sheets |
| Print Technology | Inkjet |
| Functions | Copier, printer, scanner, fax |
| PC Connectivity | Yes |
| Media Type | Plain paper |
| Ink Cartridge | Brother LC51BK, Brother LC51C, Brother LC51M, Brother LC51Y |