Adjusting the needle and rotary hook timing
1
Set the stitch length dial to the actual length of the
stitches to be sewn.
Standard stitch length
Specifications Stitch length dial
-T[]F 2
-[][]3 2
-405, -407 3
2
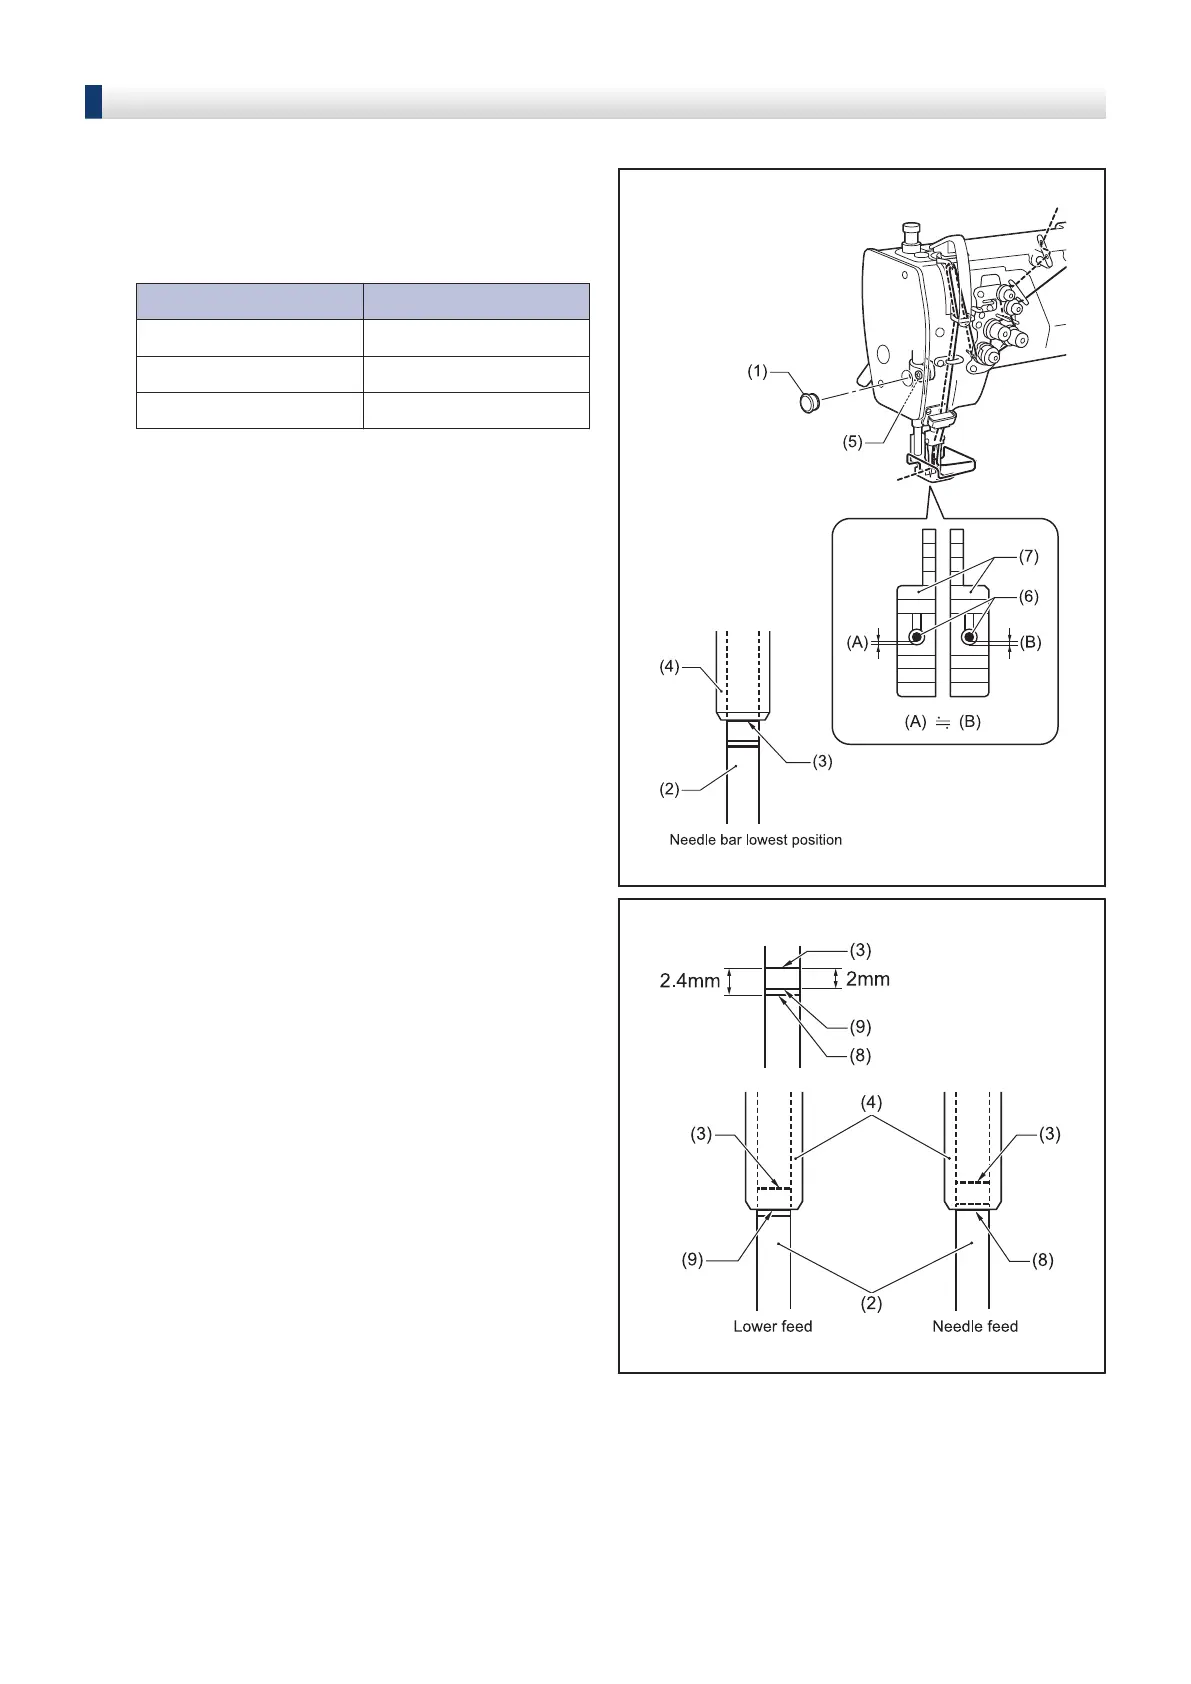
Remove the rubber cap (1).
3
Loosen the screw (5) and move the needle bar (2)
up or down to adjust so that the top reference line
(3) on the needle bar (2) is aligned with the bottom
edge of the needle bar bracket (4) when the
needle bar (2) is at its lowest position. Be careful
not to turn the needle bar (2) at this time.
4
Securely tighten the screw (5).
5
At this time, the gaps (A) and (B) between the
needle (6) and the front of the feed dog (7) should
be about the same as each other.
6
Turn the machine pulley forward to raise the
needle bar (2) until the reference line ((8) or (9),
depending on the feed condition) on the needle bar
(2) is aligned with the bottom edge of the needle
bar base (4).
7
In this condition, secure the machine pulley with
tape or similar, so that the needle bar (2) will not
move.
The procedure up to this point determines the
needle bar lift amount.
78
 Loading...