BRUNSWICK INSTALLATION MANUAL PAGE 5
BLACK WOLF
SLATE
BASE
FRAME
GULLY
#8 WASHER (7/16 O.D.)
#8 x ½” PAN HEAD SCREW
CENTER SLATE
SECTION
SLATE JOINT
SUPPORT SILL
CENTER SLATE
SECTION
END SLATE
SECTION
END SLATE
SECTION
PENCILED
ARC
CLOTH
STRIP
CLOTH
STRIP
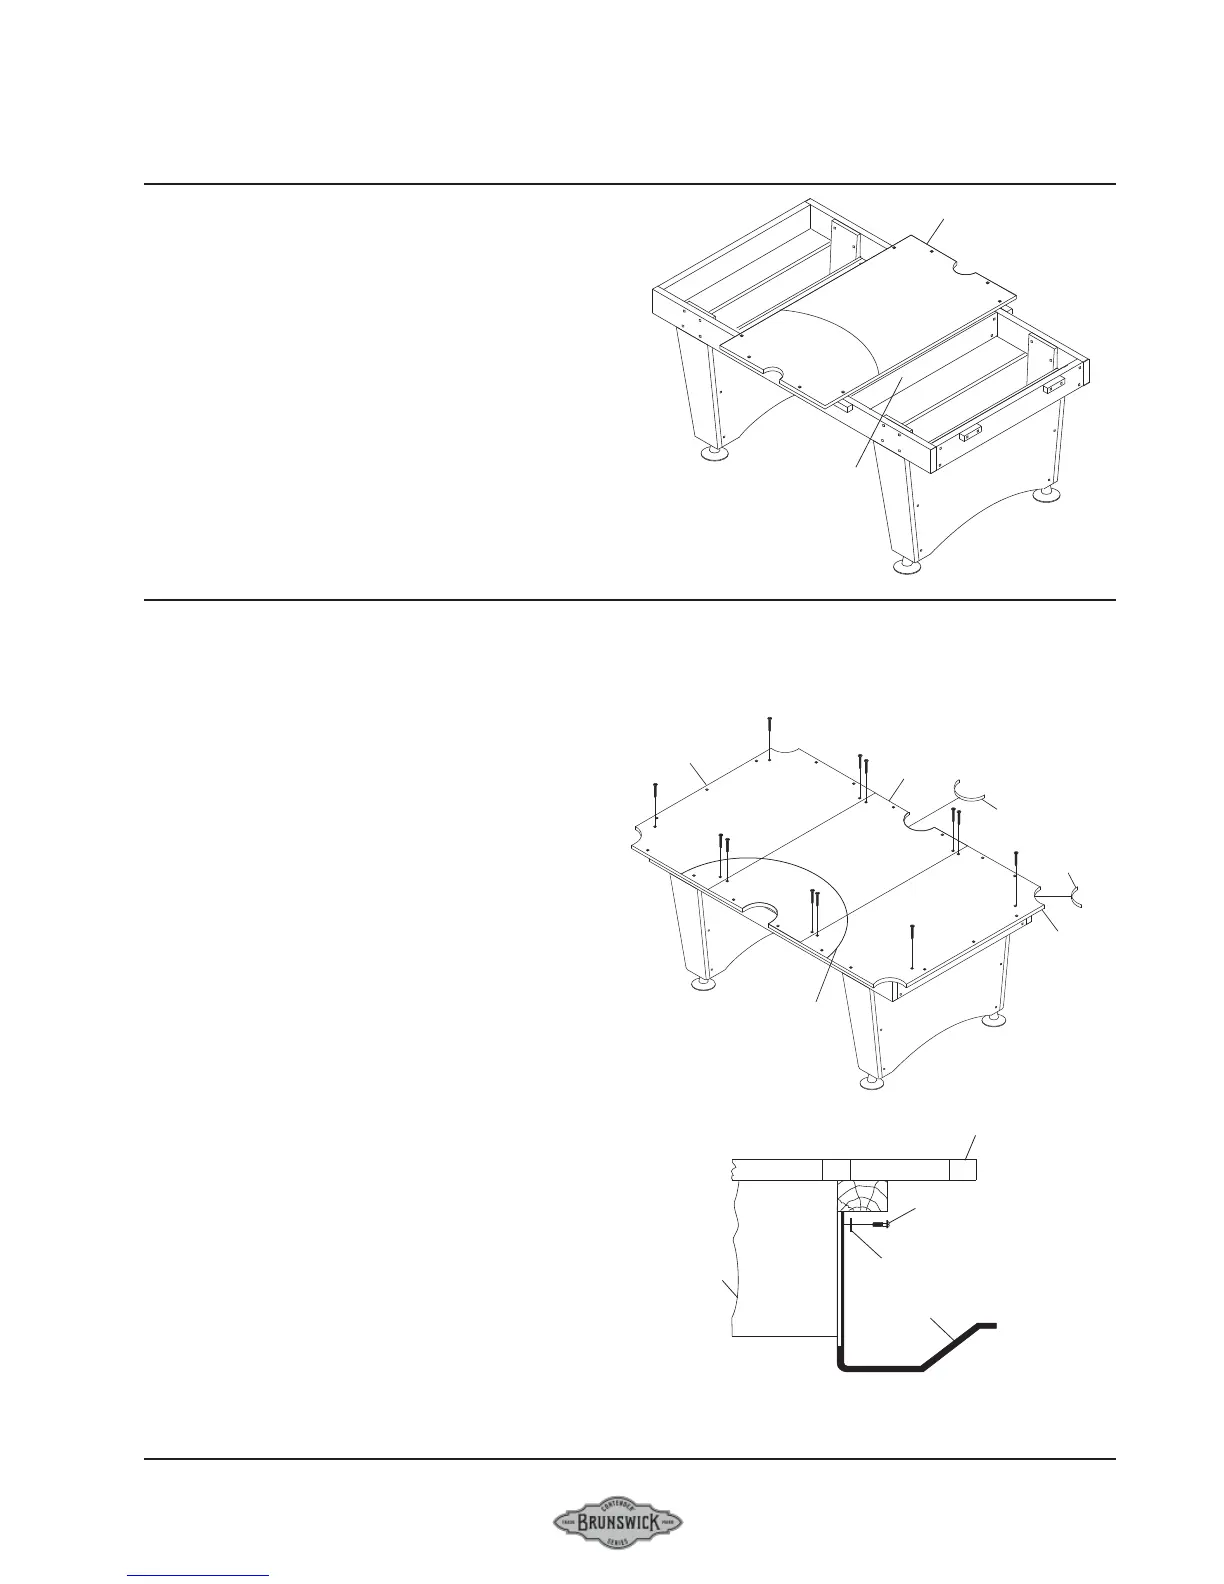
FIGURE TWO
SLATE ASSEMBLY
FIGURE ONE
Step #1: Position the center slate section evenly between
the two base frame cross supports as shown, carefully
center the slate section so there is an equal amount of
overhang at each side of the base frame.
FIGURE ONE
FIGURE TWO
Step #2: Position the two end slate sections on the base
frame. Be sure the penciled arc forms a radius. Recheck
to be sure the slate has an equal amount of overhang
around the base frame.
Step #3: Using the 12 countersink holes in the slate as a
template, pilot drill 5/32" diameter holes into the mount-
ing cleats
Step #4: Securely fasten the end slate sections at both
ends of the table (4 holes).
Step #5: With a precision tool, level each end slate
section by driving wooden slate wedges (provided)
between the top of the base frame and bottom of the
slate as needed. Keep the wedges as close to the
countersink holes as possible.
Step #6: With both end slates perfectly level, shim the
center slate section as required to obtain a flush fit at
both joints. Then screw center slate down.
Step #7: Slate joints can now be filled with Rock Hard
putty or beeswax. Lightly sand or scrape across the
joints after grouting.
Step #8: Cut strips approximately 1-1/2” x 8” from the
end of the table cloth.
Step #9: Clean top of slate thoroughly with a damp cloth
before applying bed cloth.
NOTE: If your table is equipped with a gully system,
the gully should be installed at this time. Center and
attach the gully to designated foot end of the table as
shown. See gully assembly for further instructions.