2. Connect the disconnected connection
elements, including the screwed on control
unit of the AQA total 4500 unit to the
water pipe using the pre-mounted screw
connections (DN 40, 1 1/2“ external thread).
Important: When delivered the unit is congured
with a ow direction from „left to right“. If the ne-
cessary ow direction at the installation site must be
„right to left“, then the screwed components (X +Y)
must be turned around as follows with an open-end
wrench (SW/wrench size 13) and the hexagon so-
cket screw wrench provided.
Remove the screws (Z)
8 unit hex-head screws (M8) and
2 Allen screws
Exchange the screwed components (X + Y)
Check that the seal is tted correctly. 9
Important: The screwed component MUST
be mounted with a backow preventer (X)
in the ow direction.
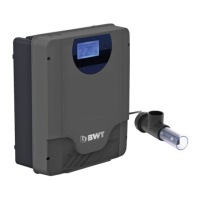
3. Mount the AQA total 4500 unit on the wall
with the brackets, screws and dowels
provided. (See 6.3.c Installation diagram:
AQA total 4500) Tighten fastening screws.
4. Remove the red transport caps from the
working units.
Push the retaining ring on the connection component
upwards and turn it to the left until the stop is re-
ached. Push the working unit claws upwards in the
connection component and turn them to the right by
45° up to the stop. Pull the blue retaining ring back
down. The working unit is then protected against un-
intentional rotation.
5. Connect the electrode cable to the underside
of the working unit.
7
6. Check the system for correct installation of
power and water (as per DIN 1988, Part 4).
7. Start up the unit (see commissioning) and
check for leaks.
8. Mount the unit cladding and fasten in place
with knurled screws.
4
6. Commissioning
Commissioning must be implemented by trained
experts. Caution: The specied sequence must be
complied with (I-X)!
I. Close the shut-off valves upstream and
downstream of the unit and close all
installation outlets (e.g. ttings)..
II. Check correct mounting of working unit.
III. Check correct mounting of electrode plug.
IV. Open the water supply inlet. Pressurise the
unit by slowly opening the shut-off valve
upstream of the unit. When using a multiblock,
set up the multiblock so that the entire water
supply ows through The AQA total unit.
V. Check unit for leaks.
VI. Open the shut-off valve downstream of unit.
VII. Rinsing: By slowly opening the rinsing
valve or another water tapping point
immediately downstream of the unit,
any debris caused by transport can be
ushed away. The rinsing valve must
remain open (for at least 3 minutes)
until the water runs clear. Close the
rinsing valve or other water taping
point.
VIII. Plug the mains cable into the protective
contact socket (230V/ Hz) provided. At
start-up of AQA total Energy the starting
picture and the version number are shown
on the display.
IX. After a short time an info-display appears.
Explanation of the information on the
display:
13
• actual ow rate by displayed triangle
• Time hh:mm:ss
• Water consumption since last rell-
change in m3
• Remaining capacity of the installed rell
in percent
• Calculated (forecasted) remaining months
until next rell-exchange.
X. The unit is now ready for operation.
9