S320 OCS Getting Started Guide
10 of 42
3.1.2 Required Tools
The tools needed to properly install the S320 OCS are:
#1 and #2 Phillips screwdrivers
Wire stripper, crimp tool and pliers
ESD mats
Wrist grounding straps
Anti-ESD examination gloves
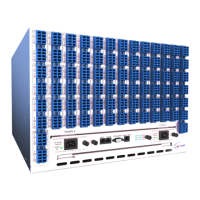
3.1.3 Installing the S320 OCS in a Rack
The S320 OCS is a 7RU chassis that is installed in a rack by inserting screws through the
mounting holes in the flange extending from each side of the switch’s faceplate, and screwing
them into the appropriate holes on the rack uprights.
To avoid possible injury to personnel and/or damage to equipment, CALIENT strongly
recommends that two people install the S320 OCS in a rack—one person to support
the switch and a second person to secure the rack screws. For the same reasons,
CALIENT also recommends using a shelf when mounting the S320 OCS in a rack.
Failure to correctly follow the safety rules and instructions in this guide may result in
bodily injury.
The following procedure describes how to install the S320 OCS in a rack:
1. Attach a shelf to the rack, one screw hole below the desired location of the switch.
This shelf will support the S320 OCS while it is being bolted to the rack.
2. Lift the S320 OCS onto the shelf.
3. Secure the S320 OCS to the rack using the mounting screws provided with the switch.
There should be 12 screws in the accessories box that came with the switch—6 per
flange on each side of the switch faceplate.
 Loading...