EasyManuals Logo

Can-Am Spyder ST Series User Manual

Can-Am Spyder ST Series
41 pages
To Next Page IconTo Next Page
To Previous Page IconTo Previous Page
Page #12 background imageLoading...
Page #12 background image
PARTS TO BE INSTALLED
rbl2014-003-001_a
TYPICAL-ALLEXCEPTBRAZILMODELS
1. Upper side panel
2. Pa nel screw
3. Pa nel nut
4. Locking tie
2.2 Remove screws at rear of panel.
rbl2013-002-019_a
TYPICA
L
1. Screws to remo ve
2.3 Install the previously removed panel nut on
lateral bracket.
rbl2013-002-020_a
TYPICAL
1. Panel nut
3. Remove antenna from the cargo module sub-
crate.
rbl2014-003-003_a
ANTENNA
REMOVAL
1. Antenn a
2. Front cargo module sub-crate
3. Lockin
gtiestocut
4. Assisted by another person, remove and dis-
card bolts holding the bottom and the top sec-
tions of sub-crate.
rbl2014-002-002_a
TYPICAL
1. Lower retaining bolts
2. Upper retaining bolts
12 / 41 2014-3 PREDELIVERY

Questions and Answers:

Question and Answer IconNeed help?

Do you have a question about the Can-Am Spyder ST Series and is the answer not in the manual?
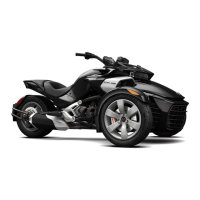
Can-Am Spyder ST Series Specifications

General IconGeneral
Front SuspensionDouble A-arm with anti-roll bar
Rear SuspensionSwing arm with monoshock
Rear Tire225/50R15
Transmission5-speed manual (SM5) or 5-speed semi-automatic (SE5) with reverse
Fuel SystemElectronic Fuel Injection
ABSStandard
Traction ControlStandard
Stability ControlStandard
Front Tires165/55R15

Related product manuals