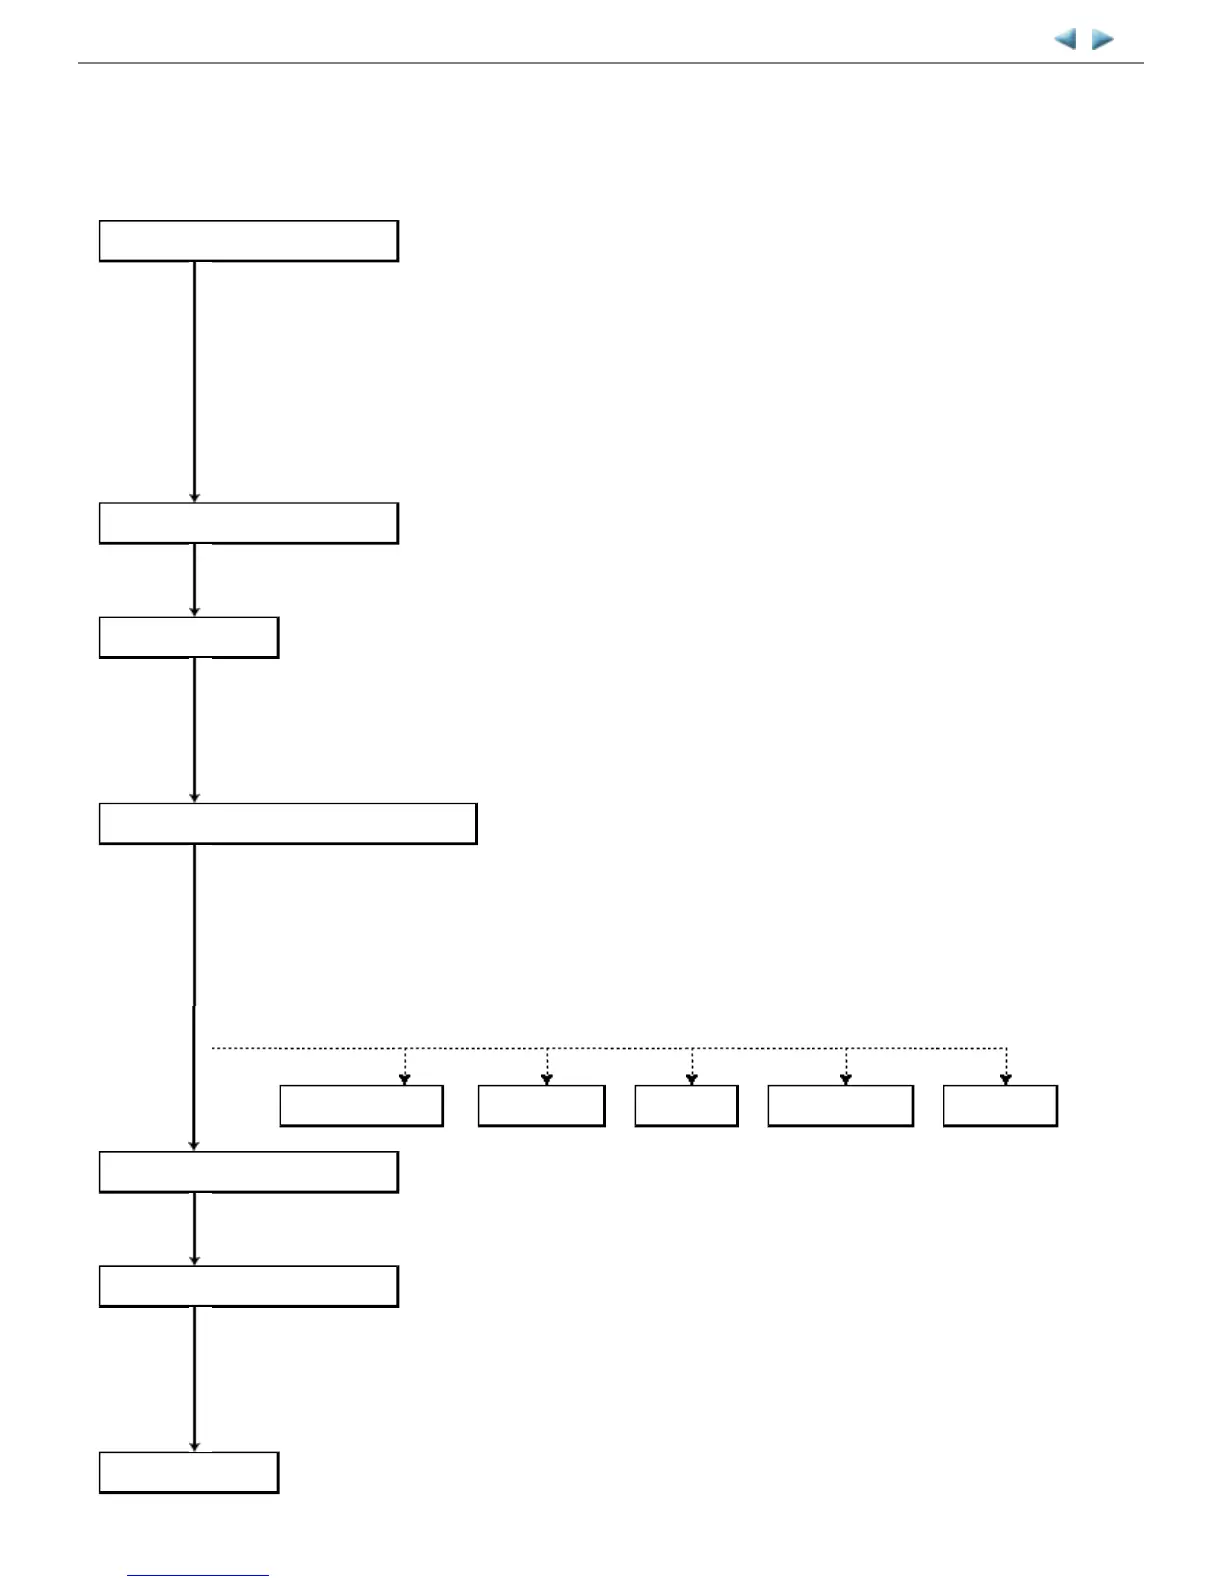
3-4. Verification After Repair
(1) Standard inspection flow
In each step below, confirm that printing is performed properly and the machine operates properly without any strange noise.
MP620 / MP628 --- 3. REPAIR TABLE OF CONTENTS
EEPROM information print
<Check point>
- The information must be printed properly.
<Additional verification to be made> See 3-1. Notes on Service Part Replacement.
- At logic board replacement
- At ink absorber replacement
- At platen unit or spur unit replacement
- At operation panel or LCD replacement
- At wireless LAN board replacement
Nozzle check pattern print
<Check point>
- The pattern must be printed properly.
Copy function
<Check point>
- Copying must be performed properly.
<Additional verification to be made> See 3-1. Notes on Service Part .
- At document pressure sheet or scanner unit replacement
Communication with a connected computer
<Check point>
- Via USB connection to the computer, printing from the computer must be performed properly
(paper feeding from the rear tray and from the cassette respectively).
<Additional verification to be made>
- For repair of a specific problem, confirm the applicable specific function in the user mode.
PictBridge, IrDA communication, wired or wireless LAN connection, Bluetooth communication,
Scan-to-Memory function, Card Direct printing, etc.
PictBridge, IrDA
LAN, WLAN
Bluetooth
Scan-to-Memory
Card Direct
Power-off in the service mode
<Check point>
- The paper lifting plate must be in the raised position.
External and internal appearance
<Check point>
- No grease, oil, or smearing on the timing slit strip film.
- No lifting of the platen ink absorber.
- No foreign material or dislocation of any part inside the printer.
- No damage or scratches that will affect the functionality.
Packaging
<Check point> See 4. MACHINE TRANSPORTATION.
- The carriage must be locked in the home position.