9
Multi Function Professional Puncher – B1
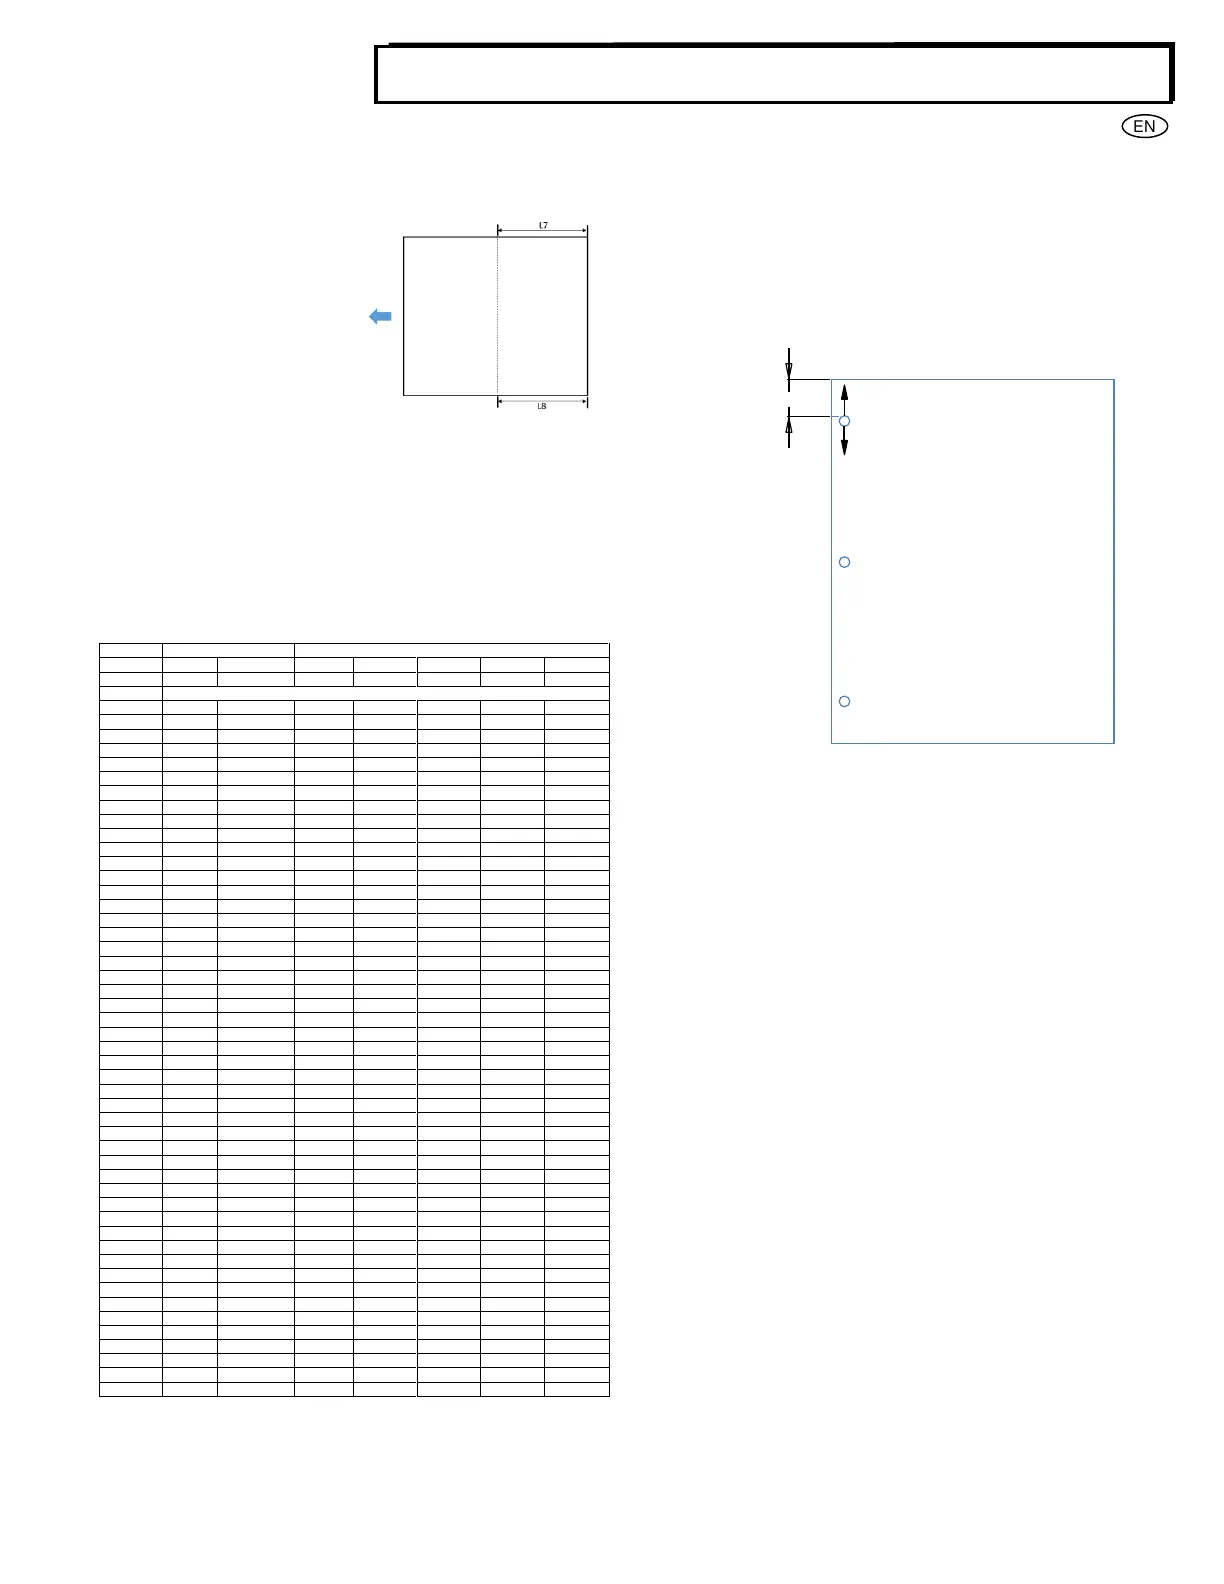
3. Skew Offsets (Only if Crease die is inserted)
The skew offsets can be adjusted to improve the angle of the crease
in the media.
i) Print a 10 sheet job in
crease mode.
ii) Measure L8 and L7 on
each sheet.
iii) Calculate L8-L7 and divide
the average of (L8-L7) by
2. The number is “X”.
iv) Based on “X” and paper
size on the table below, search for input number “S” to change
either BG DP L REAR or BG DP XL REAR.
v) If L8>L7, skew offset BG DP L/ XL REAR is negative “S”.
vi) If L8<L7, skew offset BG DP L/ XL REAR is positive “S”.
vii) After inputting “S”, print 1-sheet by crease mode.
viii) After measuring L8, calculate the difference between L8 and
original paper size mid position. Input this number into
“1Crease Mid”, in the backgage menu to correct the crease
position.
Skew Offset Table
4. Alignment Setting
Alignment is the distance of the Top punched hole from the side
edge of the sheet (viewed from the punch output orientation). This
distance can be adjusted by entering the Settings section (press Up
or Down arrow from the Home screen, and press OK for Settings).
Pressing Up arrow will increase the Alignment position, and
Pressing Down arrow will decrease the Alignment position.
5. Clear Cover
The Backgage Depth setting and Alignment setting for Clear Cover
media can be adjusted using this function.
6. Language
The LCD panel can be configured to display one of the following
languages: English; Francais; Espanol; Deutsch or Italiano.
Displaying Information on the LCD Panel
1. Die type
The type of die set that is presently installed in the machine will be
displayed.
2. Punch cycles
This is the total number of punched sheets the system has
processed.
3. Firmware
This displays the current level of firmware of MFPP-B1.
ALIGNEMENT
“+” ON THE LCD
INCREASES
ALIGNMENT
OFFSET
“-” ON THE LCD
DECREASES
ALIGNMENT
OFFSET
 Loading...