126
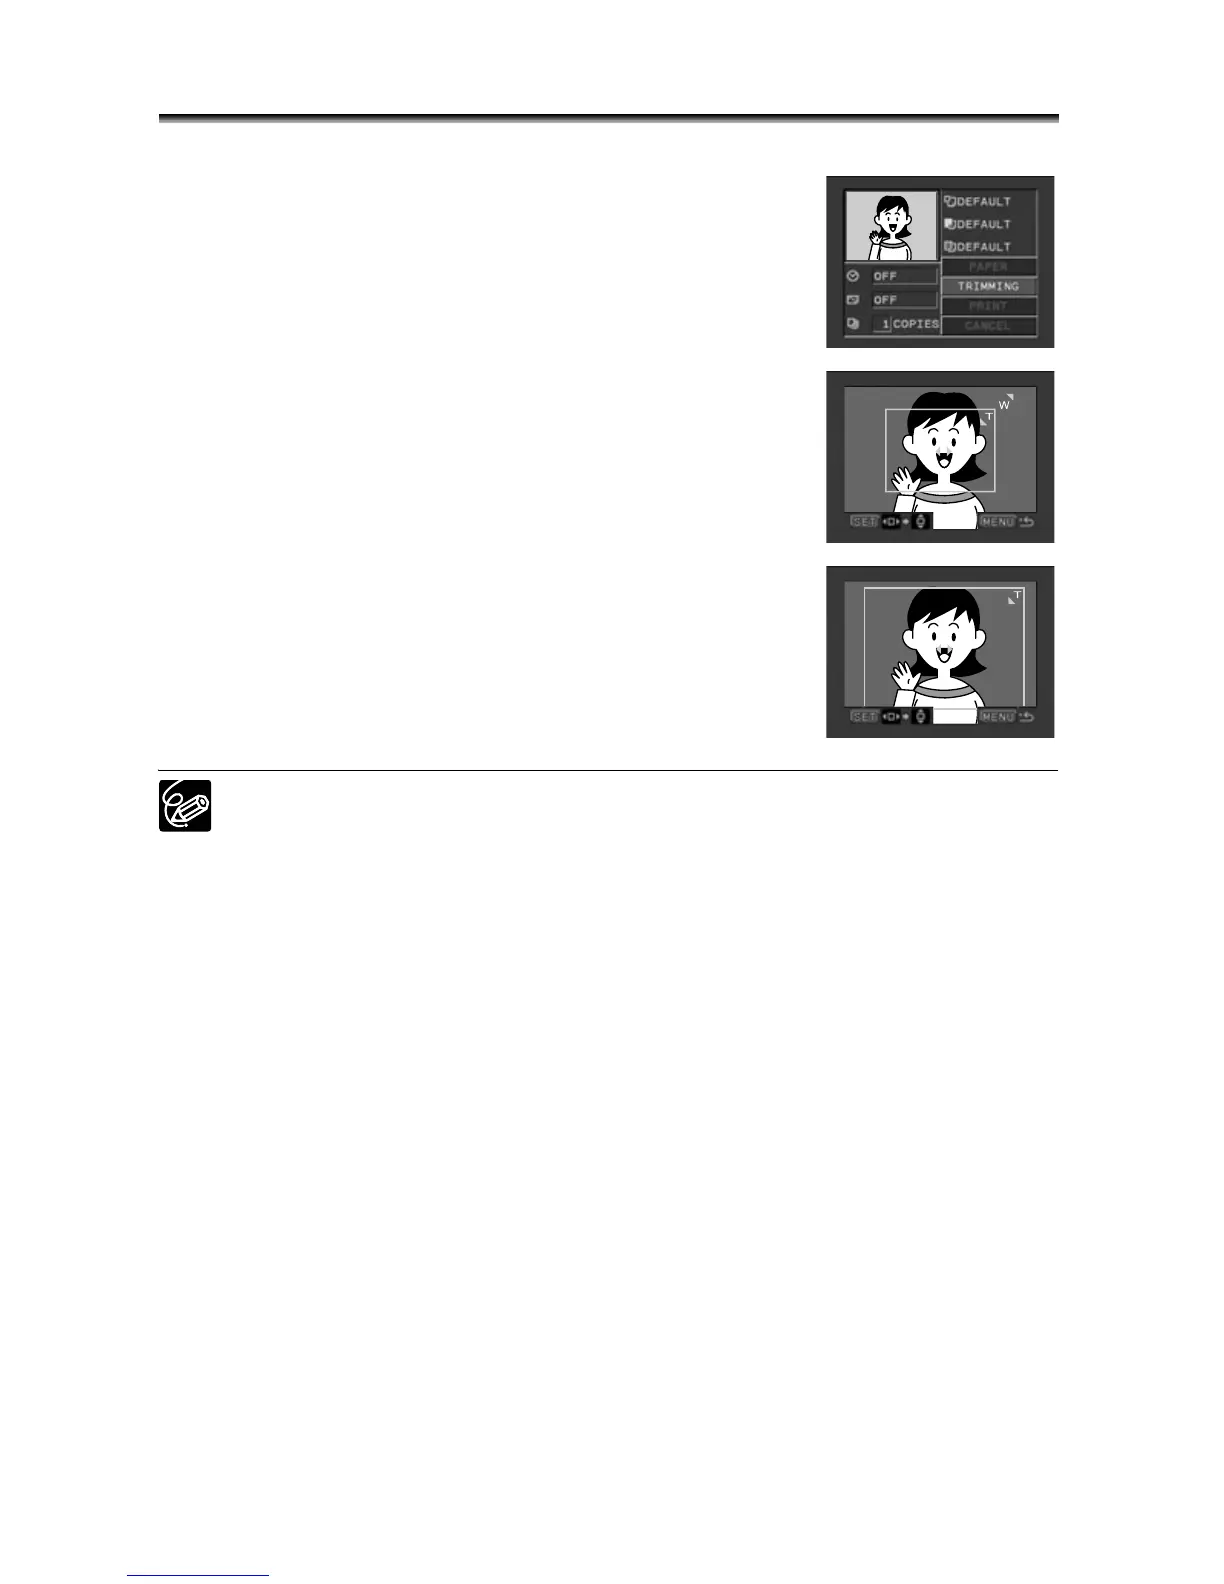
Trimming Settings
Set the print style before you start with the trimming settings.
1. In the print setting menu, turn the SET dial to select
[TRIMMING] and press the SET dial.
The trimming frame appears.
2. Change the size of the trimming frame.
• Move the zoom lever toward T to shrink the frame, and
toward W to enlarge the frame.
• To cancel the trimming settings, move the zoom lever toward
W until the trimming frame disappears.
3. Move the trimming frame.
• Turn the SET dial to move the frame. Press the SET dial to
switch between the directions (up/down or right/left) and the
orientation of the frame (vertical/horizontal).
• Pressing the MENU button brings you back to the print
settings menu.
About the color of the trimming frame (Canon CP printers only):
- White: No trimming settings.
- Green: Recommended trimming size. (The trimming frame may not appear in
green depending on the image size, paper size or borders settings.)
- Red: The image is magnified beyond recommended size. The image will be
printed coarsely.
The trimming setting applies only to one image.
The trimming setting is canceled with the following operations:
- When you turn off the camcorder.
- When you disconnect the interface cable.
- When you expand the trimming frame beyond its maximum size.
 Loading...