Instruction manual CR700 / CR750
Please keep this instruction manual for future reference
8
Check that the remaining length of steel cables from the supports indicated in fig.
6 is the same, in order to ensure that it will be installed perfectly parallel to the
ceiling. Tightening the appropriate support by screwing it as shown in fig.6, block
the steel cables. Add the clips as a further safety precaution for cable blocking
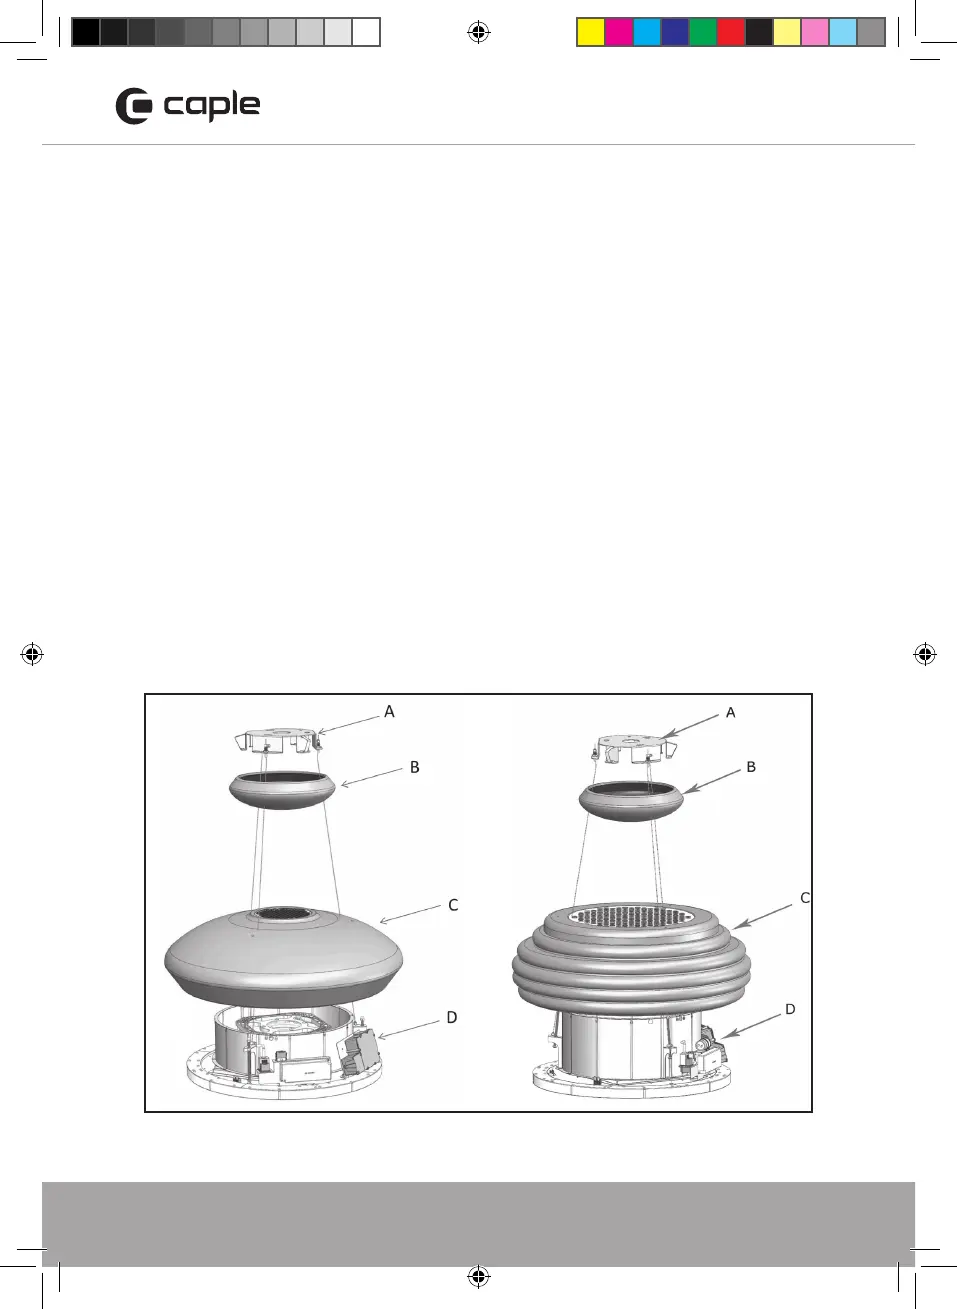
fig. 7. Put the hood near the ceiling and hook the plate to the screws previously
installed (fig.8 A) Tighten the three screws fixing the plate to the ceiling, then block
the hood definitively adding the security screw , see fig.9 B. Connect the appliance
to the electric grid.
Lift up the ceramic cover until reaching the ceiling (fig.10 ), make sure that the
springs have hooked the ceramic cover. Install the grease filter making sure to hook
first the security steel cable, as shown in fig. 16.
The grease filter must be positioned by orienting the dedicated opening, near the
speed indicator (fig. 17). In case the ceramic cover of the body, is not perfectly flat
or parallel to the body, it is possible to make an adjustment after installation.
Remove the grease filter as described in Maintenance Section. Using a Phillips screw
head screwdriver, (fig. 13A) tighten or loosen the three screws in order to raise or
lower the ceramic body on a specific side (fig. 14). After the adjustment insert the
rubber tips and the grease filter again.
CR700_CR750_Instruction manual.indd 8 04/04/2018 14:08