Standard air-conditioning units
Carel Cod. +030221421 – Rel. 1.2 – April, 11, 2003
13
4.0 FIRST INSTALLATION AND SOFTWARE UPDATING
At first installation, the boards shall be programmed by DOWNLOADING the application program to the Flash buffer memory; this operation
can be performed either using a computer or the hardware key.
4.1 PROGRAM DOWNLOAD FROM HARDWARE KEY
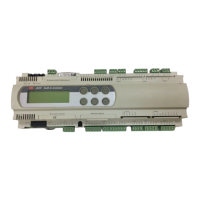
To connect the key to the pCO2 – pCO1, proceed as follows:
1. Switch the pCO2 – pCO1 off and remove the “expansion memory” cover using a screwdriver
2. Place the key selector on
3. Insert the key into the corresponding slot
4. Press Up and Down together and switch the board on
5. Check that the red key LED comes on
6. Wait until the upload request is displayed on the LCD, then release the buttons and confirm by pressing Enter; the data transfer
operation will take approximately 10 seconds
7. Switch the pCO2 – pCO1 off, remove the key, place the cover in its original position and switch the board back on again
8. The board will now work with the program transferred from the key.
4.2 PROGRAM DOWNLOAD FROM COMPUTER
Use the kit code PC485KIT00 and the WinLOAD 32 program, proceeding as follows:
1. Connect the converter (RS232/RS485) to the mains using the transformer provided in the kit
2. Connect the converter to a free serial port on the PC, using the serial cable provided in the kit
3. Connect the converter to connector J10 on the pCO2 – pCO1 using a telephone cable (code S90CONN00*)
4. Install Winload, if Winload is not already installed on the PC
5. Run WinLOAD32 on the PC, with the board off
6. Enter in the number of the PC serial port in the field “COMM” (1 for COM1, 2 for COM2)
7. Enter “0” in the field “pCO² ADD.”
8. Switch the board on
9. Wait 30 seconds until the message “OFF LINE” becomes “ON LINE” in the WinLOAD32 program, in the lower left, or until the
yellow LED next to the dipswitch on the board starts flashing; now enter the actual board pLAN address value in the field “pCO²
ADD”; a blue light in the Winload program, in the bottom centre of the window, will start flashing.
10. In WinLOAD32, select “Upload” and then “Application”
11. Select the folder containing the application program source files
12. Use CTRL to select a series of *.iup files, if needing to load a series of languages to the pCO2-pCO1. Also select the *.blb files (for
non-pLAN applications) or the flash1.bin file in the program being loaded (for pLAN applications)
13. Click “UPLOAD” to start the file download procedure, which will take approximately 1 to 5 minutes, depending on the number of
*.iup files selected and the size of the various files
14. Wait until the message “Upload OK” appears in the progress bar
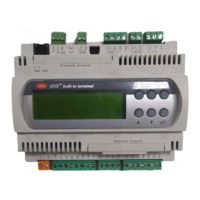
15. Disconnect the telephone cable between the board and converter; connect the external terminal (if featured), then switch the board off
and on again
NOTE: if a pLAN network with a series of boards is used, the program can be installed on the other boards without repeating the operations:
after installing the program on the first board, simply repeat steps from 8 to 14, entering the new board addresses each time in the field “pCO²
ADD” in the WinLOAD32 program.
4.3 INSTALLING THE DEFAULT PARAMETERS
Default parameters are the values assigned by CAREL to the application program main operative parameters. Parameters are assigned
automatically when executing the DOWNLOAD operation as described above. Parameters indicate timing, set points, differentials, etc… (refer
to the complete list of default values in par. 6.0).
After installing default values, the parameters can be modified within the prescribed values range.
If required, parameters can also be installed manually by the user, at any time, by the external or built-in terminal.
Operations to be carried out for default parameters manual installation:
1. Push buttons MENU + PROG and key in the Manufacturer password (1234), then push Enter
2. By pushing button Down three times, move the cursor on “INITIALISATION” (last row), then push ENTER
3. The parameters installation screen is displayed; to install, push ENTER and key in the Manufacturer password
4. WARNING: we recommend extreme care since this operation deletes all the installed parameters from the memory and replaces them
by the default parameters – after this operation, parameters cannot be restored.
5. After pushing ENTER, message “PLEASE WAIT” is displayed for some seconds.
4.4 LANGUAGE SELECTION
English is the language automatically selected, but it can be changed into: Italian, French, German, Spanish. To modify the language, operate as
follows:
1. Push buttons MENU + PROG and key in the Manufacturer password (1234), then push Enter
2. By pushing button Down three times, move the cursor on “INITIALISATION” (last row), then push ENTER
3. The parameters installation screen is displayed; push button Down three times
4. The screen with the language selection parameter is displayed, push Enter to scroll and select the language.
 Loading...