2.4 Accessing the screens
The C-Trak
®
Apollo is a touchscreen system. To change screens or
input data, select the desired field by touching the corresponding
‘button’ with your finger. The screen will respond to bare or gloved
fingers or other stylus and solid instruments. Please use caution
when using anything other than your finger. The screen can
be damaged. You may wish to use a clear plastic ‘screen
protector’ product.
Note: ‘Greyed out’ buttons indicate options that
are unavailable based on current settings.
Note: There may be dierences in the screen on your
analyzer from those presented here due to revisions
to the system software over time.
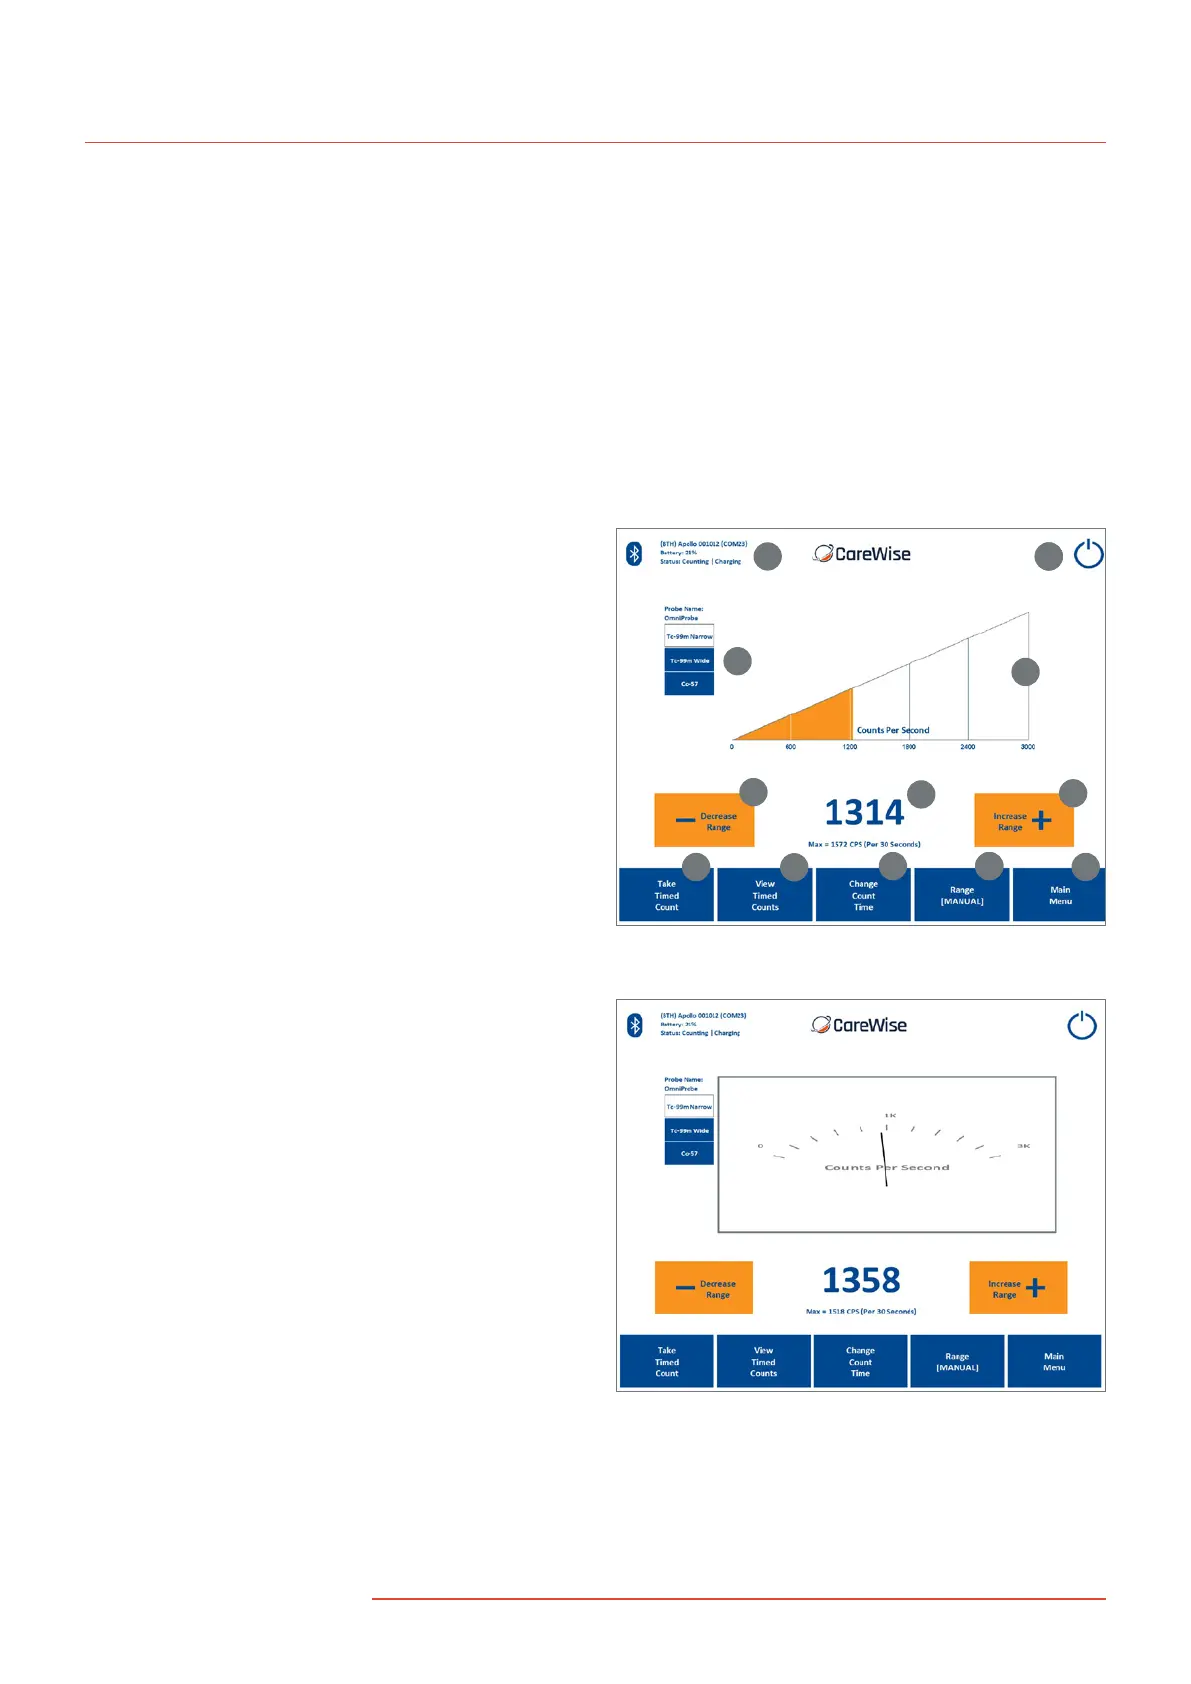
2.4-1 Count Screen
The first screen to appear when the system starts up is the
Count Screen, which displays feedback about the amount
of radiation the probe detects [Figure 4]. The features of
this screen are described below. Refer to Figure 4 and the
numeric reference for details.
(1) Rate Meter Display
• There are three versions of the RATE METER DISPLAY. The
default, shown in Figure 4, uses a wedge-shaped indicator
to show the amount of radiation detected. The other two
versions of the RATE METER DISPLAY are an analog
indicator and a histogram of counts per second over
time. These are shown in Figures 5 and 6 respectively.
• *NOTE: Tap the graphical indicator
to change the display type.
(2) Counts per Second Display – This numerical display indicates
the number of photons detected by the gamma probe per
second. Underneath the varying measured count rate value,
the maximum number of counts detected (in cps) is displayed;
this value is updated every 30 seconds. Tapping this area allows
you to change this to 5,10,15,20 or 25 seconds. When a new
maximum count rate is reached during a measurement,
the Counts per Second numerals will change from
blue to red temporarily.
(3) Range Controllers – The DECREASE RANGE and INCREASE
RANGE controllers are used to adjust the range of counts
per second displayed. Ranges of 0-100, 0-300, 0-600, 0-1000,
0-3000, 0-6000, 0-10000, 0-30000, 0-60000, 0-100000
are available.
(4) Take Timed Count Button – Pressing this button begins a
timed count for the current duration. While timed counts
are underway, they are viewed on the TAKE TIMED COUNTS
SCREEN. Details are in 2.4-2. The Timed Count operation may
also be started by pressing the Timed Count ‘Egg Timer’
button on the Apollo Handset keypad or by pressing
the foot pedal accessory.
(5) View Timed Counts Button – Pressing this button allows
the user to view any data for timed counts already taken.
Details are in 2.4-3.
(6) Change Count Time Button – Pressing this button
allows the user to change the duration of timed counts.
Details are in 2.4-4.
Figure 5 – Count Screen with Analog Meter
Figure 4 – Count Screen with Wedge Meter
1
2
3
4
5
6 77
8
7910
3
11
C-Trak Apollo
8
|
www.carewise.com