Figure 6 – Change Count with Histogram
(7) Toggle between manual and auto-range – When the [AUTO]
ranging option is selected, the software will automatically
change the measurement range and associated sound pitch
to the optimal setting for the quantity of radioactivity being
detected at that point in time. The optimisation process
typically takes no more than five seconds.
(8) Main Menu Button – Pressing this button directs the
user to the MAIN MENU [Figure 11], described in 2.4-6.
(9) System Shutdown
(10) Probe Connection – (see section 2.4-14).
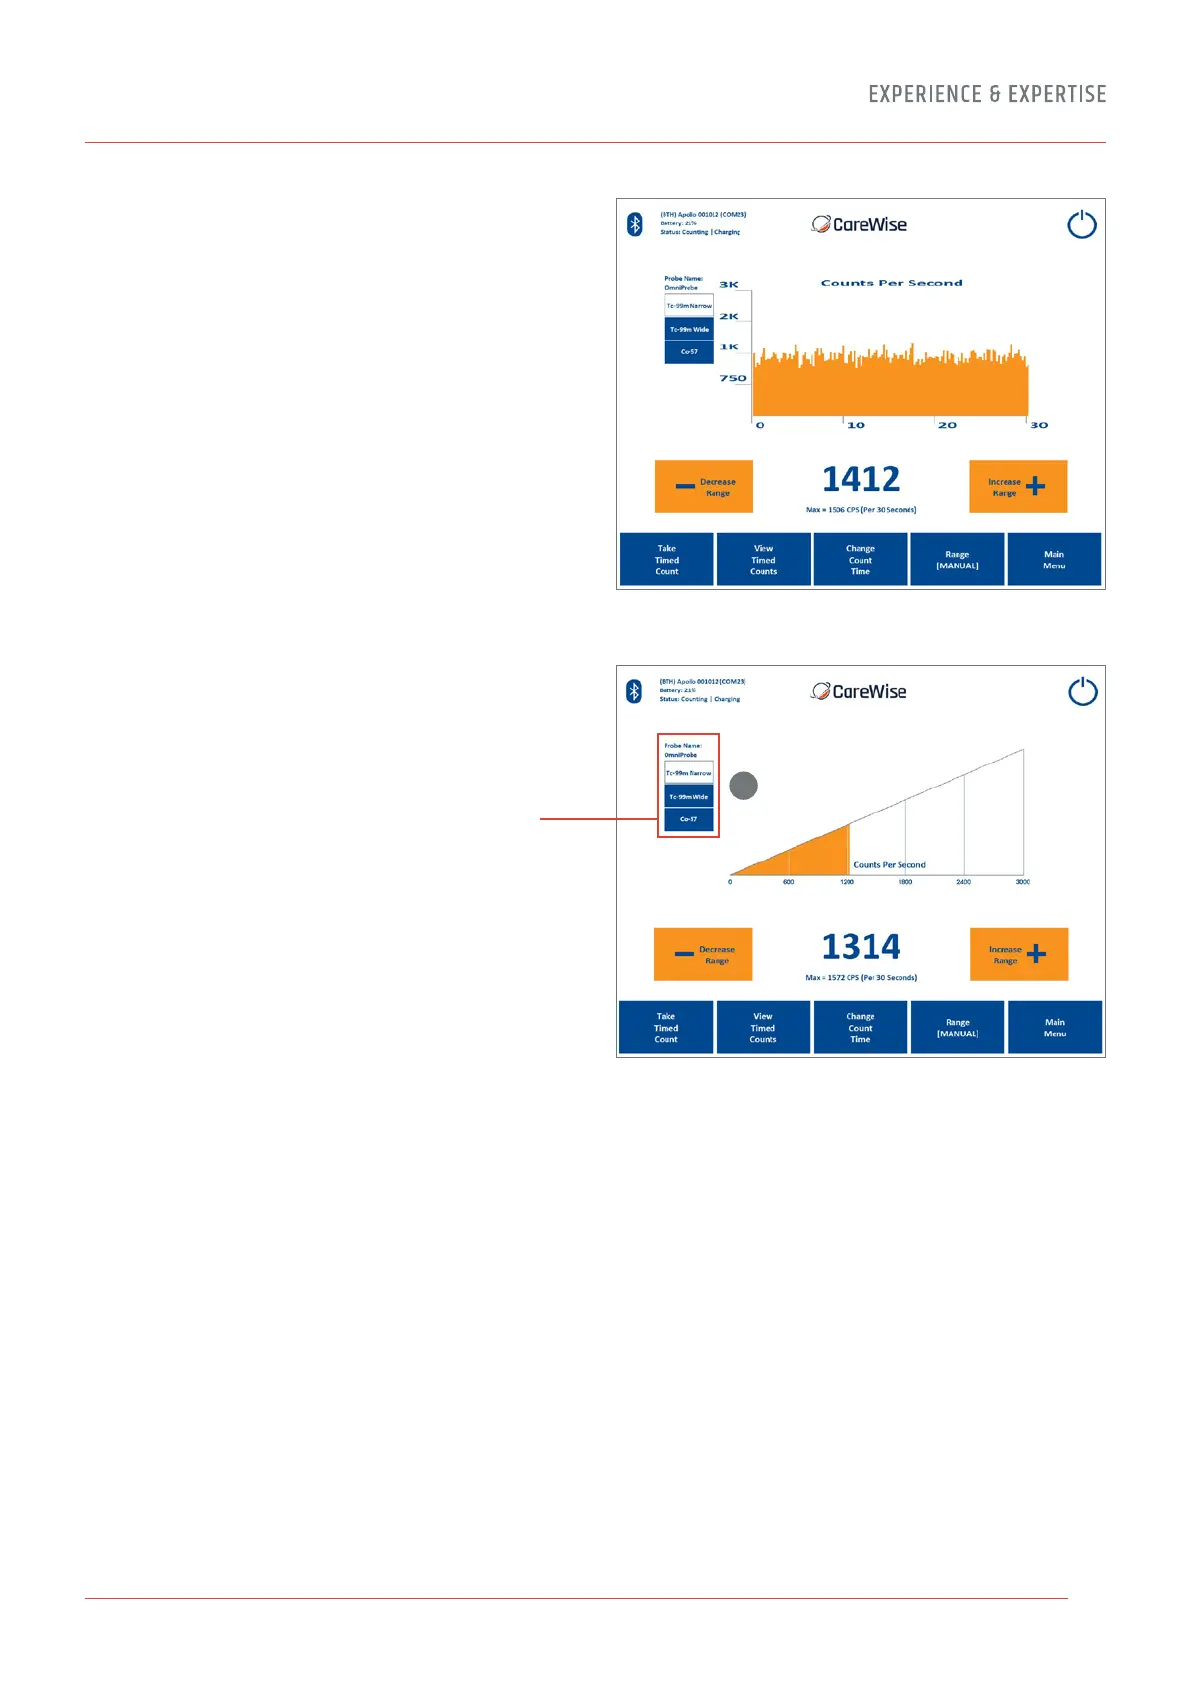
Figure 4 (Duplicated from page 7) – Count Screen with
Wedge Meter and highlighted Surgical Information
Window (Probe Information and Isotope Window Settings)
(If probe has not been calibrated in 30 days it will
prompt calibration).
(11) Surgical Information Window – This area of the screen
displays information about the current surgical procedure
including which probe and isotope are in use and what
detection range is selected.
Note: Three buttons on the main Counts screen
allow the isotope detection range to be toggled.
The top button sets the clinical isotope, the middle
is the Tc-99m wide setting which increases sensitivity
but at a compromise of directionality and the bottom
the customer User isotope. Details on setting these
isotopes can be found in Section 2.4-10.
11
9