3542 GW
English
Controls (type A - B)
Type “A” and “B” controls (See g. 30-31)
Type “A” control is used in 2-pipe systems.
Type “B” control is used in 4-pipe systems and 2-pipe systems with
electric heater.
Type “A” and “B” controls have a knob to select the temperature, with
a range from 10°C to 30°C, and room temperature is maintained at the
selected value.
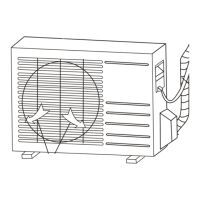
Wall-mounted control ( Fig.43)
• Prepare electrical connections between the control terminal block and
the unit control box panel.
• Remove the control cover, unscrewing the screw located in the
bottom part.
• Secure the control to the wall, marking the drill holes.
• Drill the holes previously marked. Avoid drilling with the control
already placed on wall.
• Fix the control using the screw anchors (See g. 33)
IMPORTANT: for more information on control operation refer to the kit
components.
NTC Control
Power supply connection (g. 38-39)
IMPORTANT: Make earth connection prior to any other electrical
connections.
• Before proceeding with the unit connection to the mains supply locate
live L and neutral N, then make connections as shown in the gures
38-39.
Communication bus connection
• Use connector “J9” (ref. B) on the card to connect the communication
“bus” and make sure to respect the polarities indicated on the card. We
suggest that a BELDEN 9842 cable is used.
IMPORTANT: The unit can be equipped with a “CRC” wire control or I.R.
control which are supplied as accessories. If the “CRC” control is used,
connect it to the “J2” ref. “A” terminal block and congure the system.
• With a small at blade screwdriver prize one of the points shown in the
gure. Insert the cable into the open contact. Remove the screwdriver
and check the connection solidity.
Window contact (Normally open) (g. 39a)
Depending on the contact you need to open, use a small at blade
screwdriver to prize a spring as shown in the gure.
Route the cable through the underlying space.
If the window contact is open for longer than one minute, the unit is
switched to the “frost protect” mode.
The unit will return to normal operation, when the window contact
closes. Connect pin 11 and 12 of connector J2 as shown in the gure.
Conguration of the digital input can be made by software, by setting
it to normally open (default) or normally close modes by means of the
“Service tool” programme.
3UHVHQFHGHWHFWLQJFRQWDFW3' ÀJE
The unit is equipped with a “Presence detecting” contact.
If this input is disabled, the unit follows the pre-set time conguration,
but when this input indicates a presence state for at least 5 seconds, the
unit is forced to operate in the “Occupancy” operating mode.
Connection to be made on pin 5 and 6 of connector J2 as shown in the
gure.
Conguration of the digital input can be made by software, by setting it
to normally open (preferably) or normally close modes.
2SHUDWLRQRI67$786DQG&&1OHGV Fig. 39d
Make all connections and position the covers of the switchboard.
After the unit has been connected to the mains, the red led “Status”
blinks and this can be seen through the window of cover 1.
If the unit is transmitting or receiving data from the remote controls, the
CCN green led ashes.
Warning:
Prior to any other operation on the electric components of the electric
panel, make sure power supply is disconnected. Check through the
special window (shown at the side) that the STATUS RED led is always
o.
The Status red led can ash in two dierent ways:
• Normal operation: regular ashing, one second on, one second o.
•
• Abnormal operation: the led emits a certain number of pulses
depending on the irregularity detected on the unit. The led remains
on for 60 sec. and o for other 60 sec. with 5 seconds between the two
ashings.
The detectable failures are the following:
2WKHUFRQQHFWLRQVÀJF
&20,1
&202872FFXSDQF\/('
*1'
9GF
'LVFUHWH,QSXW
*1'
)DQ6SHHG,Q
6HWSRLQW,Q
*1'
$0%$LU
11. Discrete Input 2
12. GND
}
"CRC"
 Loading...