3942 GW
English
See g. 44 - 45.
• Side knockouts allow connection of fresh air inlet ducts and ducts to
deliver conditioned air to an adjacent room.
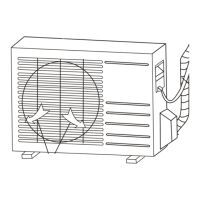
• Remove the external prepunched anti-condensate insulation and take
away the knockout panels using a punch.
See g. 47.
• The duct lengths and the increase in noise levels caused by these
ducts can be calculated in accordance with the “air supply to an
adjacent room diagrams ” (also taking into account the ow resistance
through air diusers and fresh air lters).
Air distribution to adjacent room (See g. 44-45)
• Remove the precut sheet metal (ref. 15) using a punch.
• With a pencil, trace a line on the polystyrene around the inside edges
of the panel that was previously removed. Cut away the polystyrene
with a knife, taking care not to damage the heat exchange coil.
Fresh air renewal (See g. 45)
• Remove the precut sheet metal (ref. 14) and install the air control
device by xing it to the unit frame.
• Use locally purchased material, suitable for operating temperatures
of 60 °C (continuous). Conduits can be of exible polyester (with
spiral core) or corrugated aluminium, externally covered with anti-
condensate material (bre glass of 12 +/- 25 mm thickness).
• To complete the installation, all non-insulated ducts must be covered
with anti-condensate insulation (ex. expanded neoprene, 6 mm
thickness).
If these instructions are not observed, condensate may drip.
The manufacturer will not be held responsible for any damage
caused.
Fresh air renewal (See g. 40e)
• The optional supplementary fan for fresh air intake (eld supplied) has
to be connected to terminal block as per diagrams enclosed.
Fan motor operation is parallel to the thermo-electric control valve,
and the motor stops when the valve shuts o.
• For winter operation with fresh air intake, an anti-freeze thermostat set
at 2°C is recommended, with the bulb placed on the water outlet pipe,
before the supplementary fan.
• The fresh air ow must be less than 10% of the total air ow, to avoid
operating problems or eccessive noise. For higher air ow a "primary
air kit" is available which uses the prepunched hole for air ducting to
an adjacent room and a bae so that the fresh air is introduced into
the room through a diuser.
• Install an air inlet grille with lter inspection port to prevent dust
and dirt from entering and fouling the unit heat exchanger. Filter
installation also makes the installation of a duct closing damper during
shut-down periods unnecessary.
Conditioned air supply to an adjacent room
(See g. 44-45)
• Air supply to an adjacent room requires that the outlet
corresponding with the duct is closed, using the air supply outlet
obstruction kit supplied. The kit cannot be used in units equipped
with electric heater. An air inlet grille must be tted (if possible
near the oor) between the air conditioned room (where the unit is
situated) and the adjacent room or, alternatively, the door must be
undercut, as shown in the drawing.
• The duct lengths can be calculated in accordance with the “air
distribution to an adjacent room” diagram, also taking into account
the pressure drop through air diusers and fresh air lters.
• DO NOT use active carbon or electrostatic lter kits for ducts
towards adjacent rooms.
Fresh air renewal and conditioned air supply to an
adjacent room
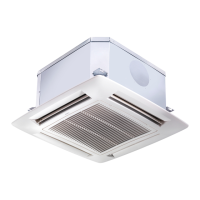
Installation of grille/frame assembly
See g. 24 - 25.
Carefully unpack the assembly and check for damage sustained in
transit.
Attach the assembly to the unit, fastening it onto its two xing supports
(ref. 15), then locking the four xing nuts with their spacers (ref. 17).
To x the frame use only the screws supplied with it.
For units with I.R. control and/or motorized louvers the electric cables
must be connected between the unit and the frame.
Ensure that the frame is not distorted by excessive tightening, that it is
aligned with the false ceiling and above all that there is a seal between
the air inlet and outlet.
In the drawing gasket "" prevents return air from mixing with the
supply air and gasket "" prevents the supply air from leaking into the
ceiling void.
On completion, the gap between the unit frame and the false ceiling
must not be more than 5 mm.
 Loading...