EasyManua.ls Logo

Carrier 42NQV050M User Manual

Carrier 42NQV050M
102 pages
To Next Page IconTo Next Page
Page #1 background imageLoading...
Page #1 background image
R410A
FILE NO. SVM-10052-3
SERVICE MANUAL
SPLIT TYPE
Indoor Unit
<High Wall, Heat Pump Type>
Revised May, 2011
Outdoor Unit
<Heat Pump Type>
42NQV050M
42NQV060M
42NQV050M-N
42NQV060M-N
42NQV050M-A
42NQV060M-A
38NYV050M2
38NYV060M2
38NYV050M-A
38NYV060M-A
Question and Answer IconNeed help?

Do you have a question about the Carrier 42NQV050M and is the answer not in the manual?

Carrier 42NQV050M Specifications

General IconGeneral
Model42NQV050M
Cooling Capacity (kW)5.0
RefrigerantR410A
Voltage (V)220-240
Power Supply50Hz

Summary

SAFETY PRECAUTIONS

SPECIFICATIONS

REFRIGERANT R410A

Safety During Installation/Servicing

Precautions for handling R410A refrigerant during installation and servicing to prevent hazards.

Refrigerant Piping Installation

Processing of Piping Materials

Tools

Recharging of Refrigerant

Brazing of Pipes

Brazing

WIRING DIAGRAM

SPECIFICATIONS OF ELECTRICAL PARTS

REFRIGERANT CYCLE DIAGRAM

Refrigerant Cycle Diagram

Detailed diagram of the refrigerant cycle for specific model series.

CONTROL BLOCK DIAGRAM

Outdoor Unit (Inverter Assembly)

OPERATION DESCRIPTION

Role of indoor unit controller

Role of outdoor unit controller

Operation Description

Indoor fan motor control

Outdoor fan motor control

Capacity control

Current release control

Release protective control by temperature of indoor heat exchanger

Defrost control (Only in heating operation)

Auto Restart Function

How to Cancel the Auto Restart Function

Operation of remote control

INSTALLATION PROCEDURE

Installation Diagram of Indoor and Outdoor Units

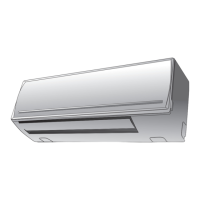
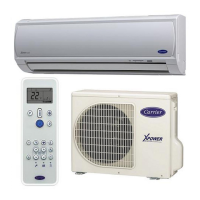
Diagrams showing the correct placement and mounting of indoor and outdoor units.

Installation/Servicing Tools

Indoor Unit

Electrical Work

Wiring Connection

Piping and Drain Hose Installation

Indoor Unit Installation

Drainage

Outdoor Unit

Installation Place

Guidelines for selecting an appropriate location for the outdoor unit.

Draining the Water

Refrigerant Piping Connection

Evacuating

Test Operation

Gas Leak Test

Procedure for checking refrigerant gas leaks using a detector or soapy water.

Test Operation

How to perform the initial system test after installation.

HOW TO DIAGNOSE THE TROUBLE

First Confirmation

Confirmation of Power Supply

Checking if the power breaker is operating correctly.

Primary Judgment

Judgment by Flashing LED of Indoor Unit

Self-Diagnosis by Remote Controller (Check Code)

Judgement of Trouble by Every Symptom

Indoor unit (Including remote controller)

Troubleshooting steps when the indoor unit or remote controller is not operating.

Only the indoor motor fan does not operate

Indoor fan motor automatically starts to rotate by turning on power supply

Troubleshooting for remote controller

Wiring Failure (Interconnecting and Serial Signal Wire)

Outdoor unit does not operate

Troubleshooting steps when the outdoor unit fails to operate.

Outdoor unit stops in a little while after operation started

Diagnosing why the outdoor unit stops shortly after starting operation.

Check Code 1C (Miswiring in indoor/outdoor units) and 1E

How to Diagnose Trouble in Outdoor Unit

How to Check Simply the Main Parts

P.C. Board Layout (Outdoor)

How to Simply Judge Whether Outdoor Fan Motor is Good or Bad

HOW TO REPLACE THE MAIN PARTS

Front cabinet

Inverter assembly

Control board assembly

Side cabinet

Fan motor

Compressor

Reactor

Electronic expansion valve coil

TE sensor (outdoor heat exchanging temperature sensor)

TS sensor (Suction pipe temperature sensor)

TD sensor (Discharge pipe temperature sensor)

TO sensor (Outside air temperature sensor)

Related product manuals