9
Step 4 — Prepare Unit
Be sure that unit power requirements match available power
source. Refer to unit nameplate and wiring diagram. Check all
tags on unit to determine if any shipping screws are to be re-
moved. Remove screws as directed. Install the mixing box if the
unit is ordered with one. Follow the mixing box installation in-
structions found on Step 9 page 16.
Step 5 — Position Unit
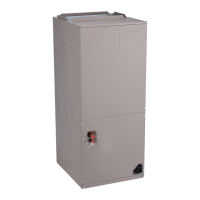
1. The horizontal blower coil units have 5/8 in. (15.88 mm)
knockouts in each corner of the top and bottom panels for
1/2 in. (12.70 mm) all thread (not supplied with unit) to
pass through (see Fig. 9 and 10). Be sure to support the
unit from underneath until mounting is complete.
2. Install vibration isolators (recommended for all sizes).
Field-supplied and field-installed accessories must be
independently supported or suspended. It is recommended
that a trapeze suspension be used on 42BHE size 30 and
40 units.
3. To ensure proper drainage and operation, be sure unit is
level. DO NOT mount the unit on a slope. The pitch of a
suspended unit can change after coil is filled; recheck
after filling. Drain pan has built-in slope to ensure proper
drainage.
4. Sufficient clearance must be maintained for service and
maintenance. Ensure that there is a minimum clearance of
24 in. (609.60 mm) on access side for motor, pulley and
belt access. Filter shall be removed from side or top of the
filter rack on vertical unit (42BVE) and side or bottom of
the filter rack on horizontal unit (42BHE). If side access to
filter is desired, the minimum clearance required is the
width of the filter rack plus 6 inches (154.40 mm).
5. A minimum of 48 in. (121.92 cm) clearance is required
between factory supplied electric heater and a field sup-
plied combustible component placed downstream of the
unit.
6. Protect unit from damage from jobsite debris. Do not
allow foreign material to fall into drain pan. Prevent dust
and debris from being deposited on motor or fan.
7. Maximum operating altitude for units is 13,400 ft. (4 km).
All units are IPX0 rated.
TOTAL WEIGHT UNIT CORRECTION FACTOR (LB)
See Fig. 11 and 12 for 8-row water-filled coils and double wall
construction (see Table 1). For a different number of rows, total
unit weight can be determined by:
1. Identify the size of unit and number of rows
2. From Fig. 11 or 12, identify the total weight of the unit
3. From Table 1, identify the correction factor and deduct this
factor from the total weight.
See Fig. 11 and 12 for operating weight information. Weight infor-
mation is based on 8-row water-filled coils and double wall cabi-
net construction. For a different coil and cabinet options, use the
weight correction factor table, Table 1.
Fig. 9 — 42BHE Threaded Rod Suspension
5/8” KNOCKOUTS
FOR SUSPENSION
RODS (4 PLACES
TOP AND 4
PLACES BOTTOM
OF UNIT
ISOLATORS - 4
PER UNIT (FACTORY
FURNISHED AND FIELD
INSTALLED)
3/8” THREADED ROD
SUSPENSION
(FIELD
FURNISHED AND
INSTALLED)
WASHER AND DOUBLE
NUT (FIELD
FURNISHED AND
INSTALLED)
TRAPEZE - REQUIRED ON
42BHE UNIT SIZES 30 AND 40.
1.5” x 1.5” x 1/4” ANGLE
FIELD-SUPPLIED AND INSTALLED
ALONG BOTH LONG EDGES.
 Loading...