10
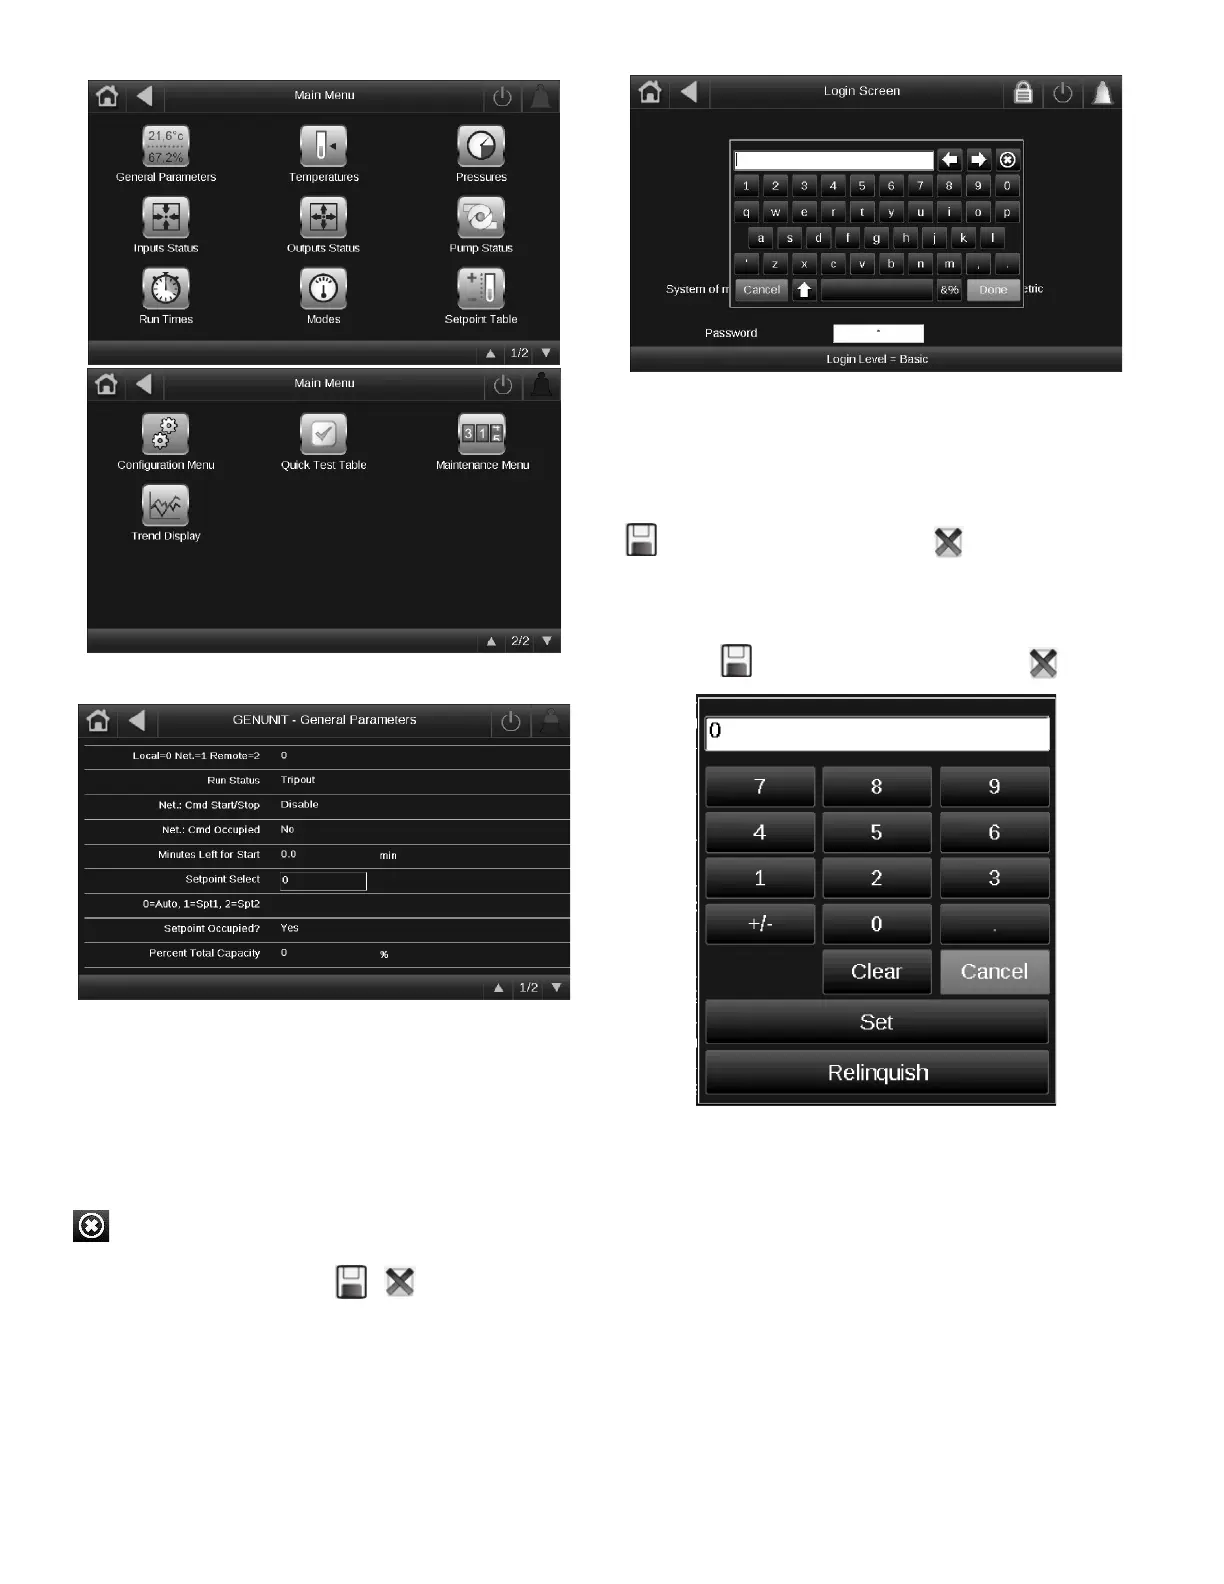
Fig. 7 — Main Menu, Page 1 and Page 2
Fig. 8 — General Parameters, Page 1
Points that can be changed with the current level of user access
are outlined by a box. For example, to modify the set point select
parameter, select the current set point select value as shown in
Fig. 8 and enter the desired parameter.
The data entry screen will be displayed (Fig. 9). For alphanu-
meric responses, such as the password screen, a QWERTY key-
board is displayed (see Fig. 9). In addition to the normal alpha-
numeric keys, arrow, and symbols, there is a Backspace Key
, a Cancel button, and a Done button. Enter the data re-
quired and touch the Done button to accept the change. If re-
quired, Save and Cancel icons will appear in the
Unit Status Line to confirm the changes.
Fig. 9 — Data Entry Keyboard
If a numeric response is required, a keypad will be displayed along
with Cancel, Clear, Set, and Relinquish keys (see Fig. 10). Use the
keypad to enter the value and touch the Set key. Once complete,
Cancel and Save buttons will appear in the lower left section of the
Unit Status Line. To accept the change, touch the Save button
. To cancel, touch the Cancel button .
For menu items, a series of limited choices will be displayed on
the screen in a separate window. Select the desired value. Once
complete, Cancel and Save buttons will appear in the lower left
section of the Unit Status Line. To accept the change, touch the
Save button . To cancel, touch the Cancel button .
Fig. 10 — Data Entry Keypad
GENERAL CONFIGURATION TABLE
This table contains configuration settings for the unit. Select
Main Menu
Configuration Menu
General Configura-
tion to access the table (Fig. 11).
 Loading...