15
Installation manual
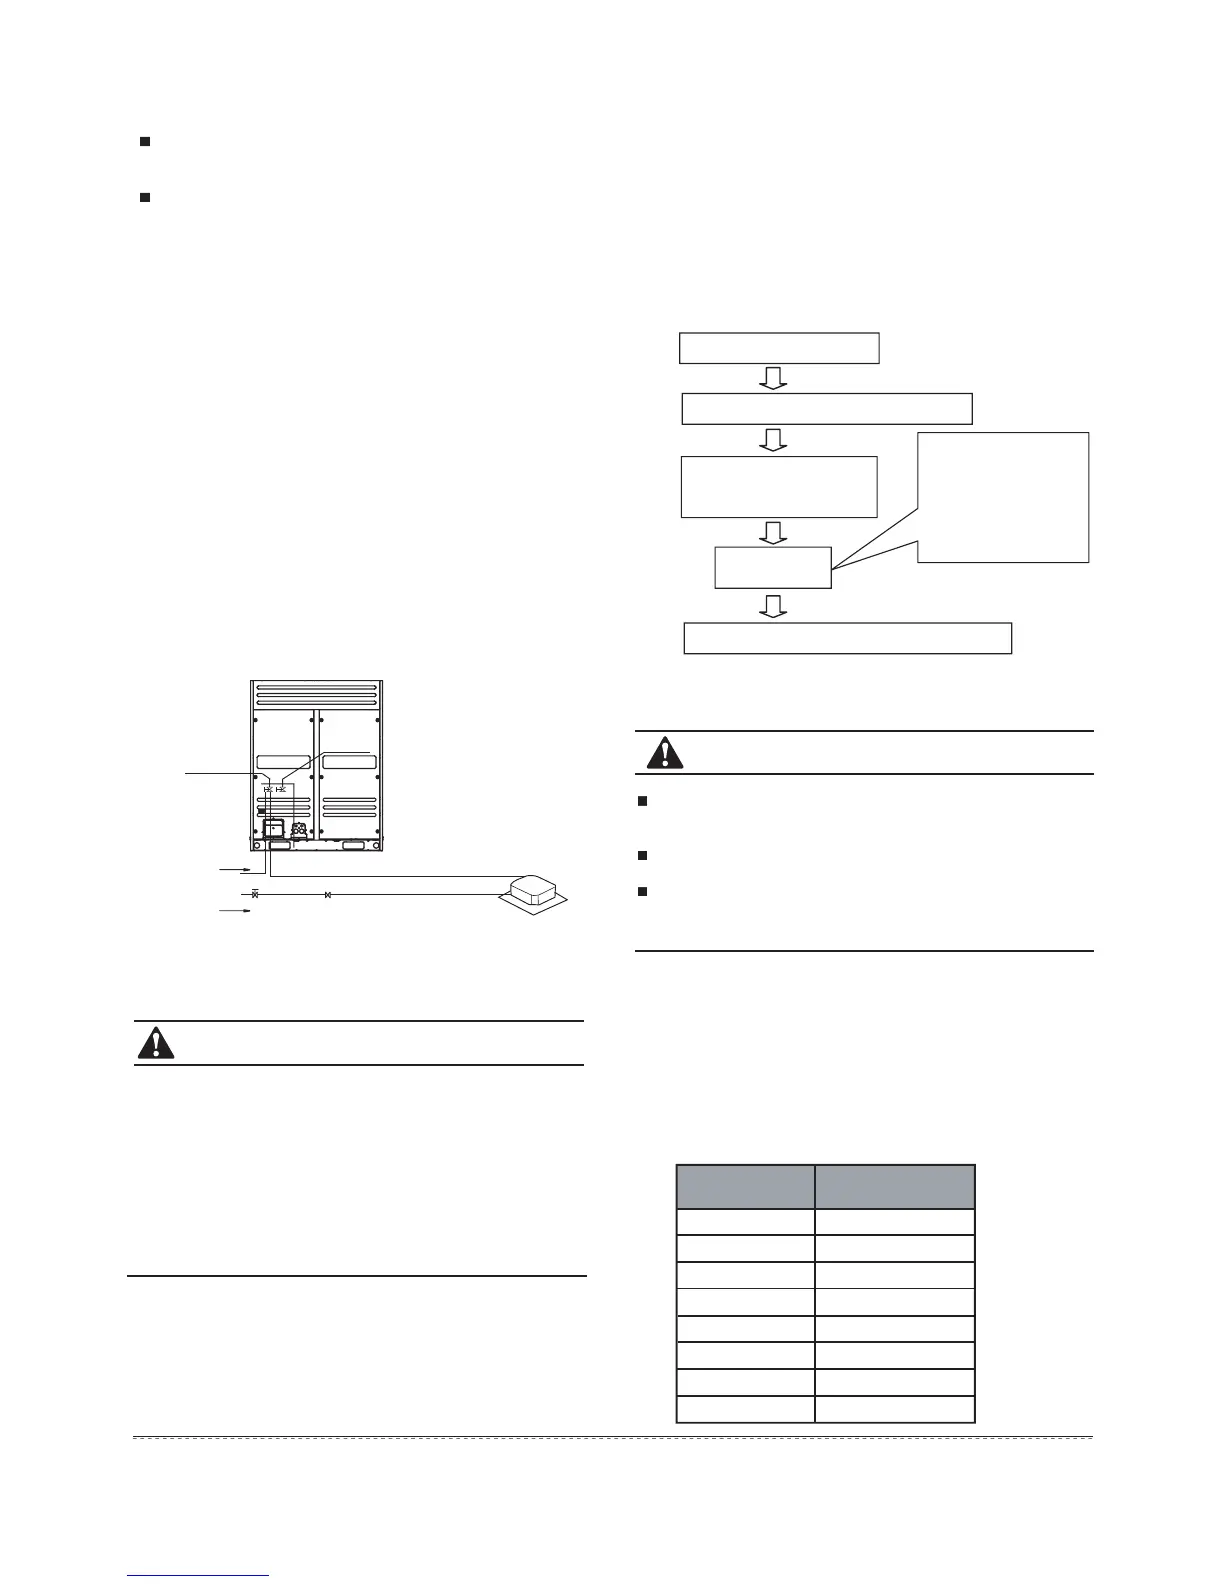
Fig.5-5
CAUTION
Use the vacuum pump which vacuum level lower than
-0.1MPa and the air discharge capacity above 40L/min.
The outdoor unit is not necessary to vacuum, don’t open the
outdoor unit gas and liquid pipe shut-off valves.
Make sure the vacuum pump could result as -0.1MPa or
below after 2 hrs or above operation. If the pump operated 3
hrs or above could not achieve to -0.1MPa or below, please
check whether water mix or gas leak inside of the pipe.
5.10 Vacuum with vacuum pump
1)
2)
3)
Fig.5-5
5.8 Remove dirt or water in the piping
Make sure there is no any dirt or water before connecting
the piping to the outdoor units.
Wash the piping with high pressure nitrogen, never use
refrigerant of the outdoor unit.
5.9 Gas tight test
Upon set up the indoor unit pipeline, please connect the Hi-
pressure pipe with shut-off valve firstly.
Weld the pipe at the low pressure side to the meter connector.
Use the vacuum pump discharging air inside the liquid side
shut-off valve and meter connecter, until to the -1kgf/
CM2
.
Close the vacuum pump, charge 40kgf/
CM2
nitrogen gas from
the piston of shut-off valve and from the meter connector.
Pressure inside should be maintained at there no less than
24 hrs.
Upon the airtightness test, do a good welding between float
valve and pipe at the low pressure side.
Pressurized nitrogen˄3.9MPa˗40kgf/
CM2
˅is used for
airtightness test.
It is not allow to bring pressure on the float valve directly.
(See Fig. 5-5˅
It is not allow to use oxygen, combustible gas or toxic gas
to conduct the airtightness test.
When welding, please use wet cloth insulating the low
pressure valve for protection.
For avoid the equipment be damaged, the pressure
maintainedtime should not last too long.
Connect with vacuum pump
Perform the pump (last for 2 hrs or above)
When get the vacuum level
-0.1MPa, the pump should
keep running for 20-60 mins
Shut down the
vaccun pump
Place the vaccum state unused (1 hrs or above)
1. Close-off the valve of
vacuum meter.
2. Cut off the connection
between pressure meter
and vacuum pump.
3. Close the vacuum
pump.
●
●
●
●
●
1)
2)
3)
4)
5)
Outdoor unit
Indoor unit
Nitrogen
Nitrogen
Liquid pipe
Gas pipe
Liquid side of
shut-off valve
Gas side of float valve
Pressure meter connector
CAUTION
5.11 Refrigerant amount to be added
Calculate the added refrigerant according to the diameter and
the length of the liquid side pipe of the outdoor/indoor unit
connection. The refrigerant is R410A.
Pipe size on
liquid side
Refrigerant to
be Added per meter
Φ6.4
Φ9.5
Φ12.7
Φ15.9
Φ19.1
Φ22.2
Φ25.4
Φ28.6
0.022kg
0.057kg
0.110kg
0.170kg
0.260kg
0.360kg
0.520kg
0.680kg
Table.5-10
Don’t mix up the different refrigerants or abuse the tools and
measurements which directly contact with refrigerants.
Don’t adopt refrigerant gas for air vacuuming.
If vacuum level could not get to -0.1MPa, please check whether
resulted by leakage and confirm the leakage site.If no leakage,
please operate the vacuum pump again 1 or 2 hrs.
 Loading...