11
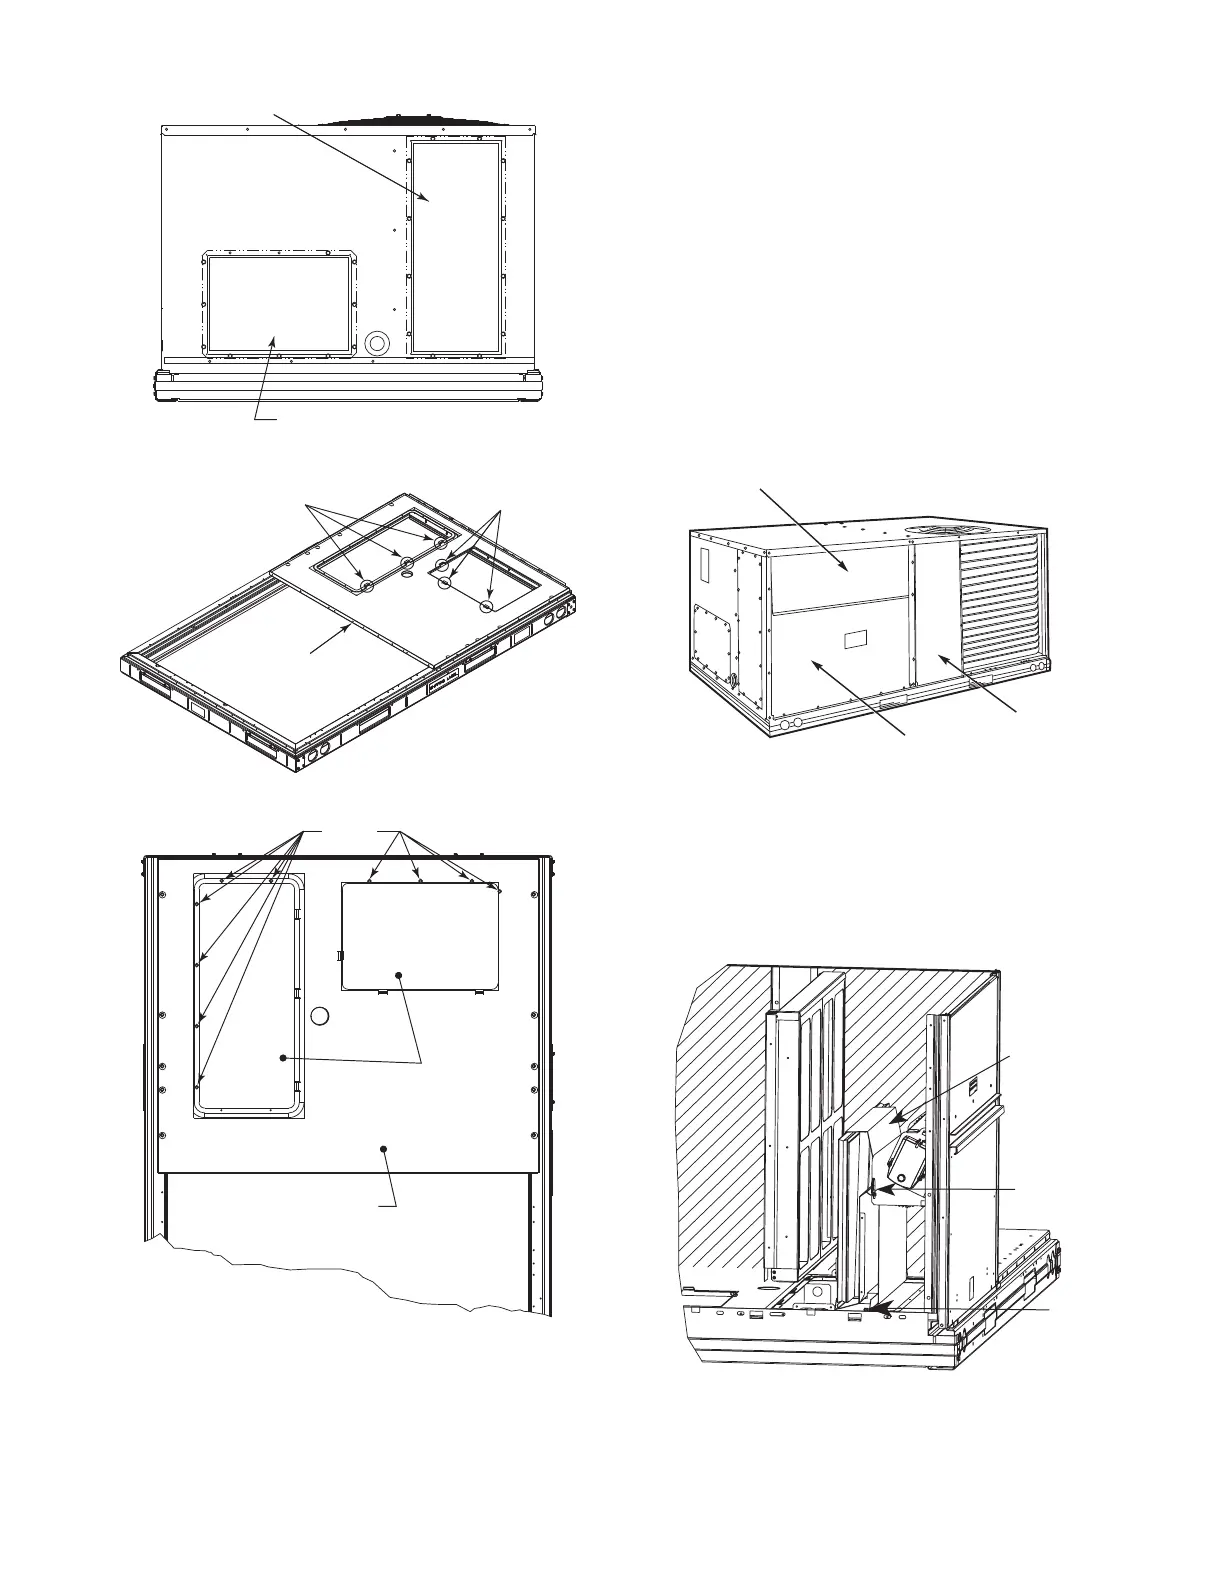
Fig. 7 — Horizontal Conversion Panels
Fig. 8 — Location of Notches
Fig. 9 — Horizontal Duct Panels In Place
Step 8 — Install Outside Air Hood
ECONOMIZER AND TWO POSITION DAMPER HOOD
PACKAGE REMOVAL AND SETUP (FACTORY
OPTION)
NOTE: Economizer and two position damper are not available
as factory installed options for single phase (-3 voltage code)
models.
The hood is shipped in knock-down form and must be
field assembled. The indoor coil access panel is used as the
hood top while the hood sides, divider and filter are packaged
together, attached to a metal support tray using plastic stretch
wrap, and shipped in the return air compartment behind the
indoor coil access panel. The hood assembly’s metal tray is
attached to the basepan and also attached to the damper using
two plastic tie-wraps.
1. To gain access to the hood, remove the filter access
panel. See Fig. 10.
Fig. 10 — Typical Access Panel Locations
2. Locate the (2) screws holding the metal tray to the base-
pan and remove. Locate and cut the (2) plastic tie-wraps
securing the assembly to the damper. See Fig. 11. Be
careful to not damage any wiring or cut tie-wraps secur-
ing any wiring.
Fig. 11 — Economizer and Two-Position Damper
Hood Parts Location
REMOVABLE HORIZONTAL
SUPPLY DUCT OPENING COVER
REMOVABLE HORIZONTAL
RETURN DUCT OPENING COVER
BASEPAN
NOTCHES
NOTCHES
SCREWS
DUCT COVERS
SHEET METAL
FACE UP
BASEPAN
FILTER ACCESS PANEL
OUTDOOR-AIR OPENING AND
INDOOR COIL ACCESS PANEL
COMPRESSOR
ACCESS PANEL
HOOD PARTS
PLASTIC TIE WRAP
QTY (2)
SCREWS FOR
METAL TRAY
QTY (2)

 Loading...


