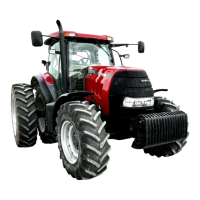
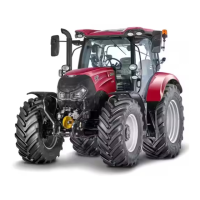
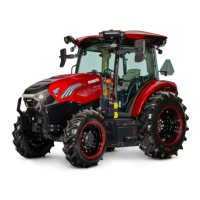
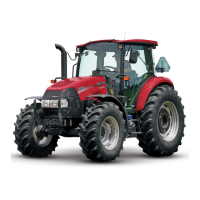
The provided document is a quick instruction guide for the Case IH Luxxum tractor, dated 08.01.2018. It offers an overview of the most important controls and functions, emphasizing that it is not a substitute for the full operator's manual.
The Case IH Luxxum is a tractor designed for agricultural use, featuring a sophisticated cab environment with numerous controls for various operations. Key aspects of the tractor's functionality include its transmission, front axle suspension, PTO (Power Take-Off) system, and hydraulic valves for implement control.
Cab and Controls
The cab is equipped with a range of switches and controls for comfort, visibility, and operational functions. These include:
- Heating switches: For the front/rear screen and rear mirrors (1, 2).
- Rear mirror adjustment (3).
- Trailer brake test switch (4).
- Shuttle lever + neutral button (5): Controls forward/reverse movement and neutral.
- Dashboard (6): Displays speed, gear settings, and other vital information.
- Front wiper, indicator (7).
- Multicontroller armrest (8): A central control unit for various functions.
- Electrical joystick (9): For transmission functions and remotes (front loader).
- Mechanical front loader joystick (10): For front loader operations (not pictured, but its position is indicated).
- Hazard light (11).
- Display - Home/Enter, Up/Down (12): For navigating menus and settings.
- Tractor light main switch (13).
- Battery main switch (14).
- AC/Heating control unit (15).
- Rear screen wiper/washer (16).
- Auxiliary light switch (17).
- Front axle suspension switch (18).
- Front axle manual leveling (19).
- Work light panel (20).
- Radio (21).
- Transport/Field group lever (22).
Detailed Controls and Functions
The multicontroller armrest and side console house numerous controls for precise operation:
- Mechanical rear remotes (1).
- Multicontroller (2).
- Electronic remotes (f/r) (3).
- Mechanical lever for front remotes (4).
- Toggle switch f/r remotes (5).
- Encoder for remote settings (timer, flow) (6).
- Hand throttle (7).
- Shiftpoint adjustment (8).
- Transmission programming (9).
- Shuttle reactivity (10).
- Maximum working depth (11).
- Draft control encoder (12).
- Constant engine speed switch + adjustment (13).
- 4WD switch (14).
- Differential lock (15).
- Manual switch for rear hitch raise/lower (16).
- EDC master switch (17).
- PTO soft start (18).
- EDC controls (19).
- Signal socket (20).
- ISO-BUS cabIN socket (21).
- Power socket (22, 27).
- Eco/Normal PTO lever (23).
- 540/1000 PTO lever (24).
- Front & rear PTO switch (25).
- Screw type 12V socket (26).
- EFH panel (28).
- Slip control (29).
First Steps and Operation
To start the tractor:
- Depress the clutch pedal fully.
- Ensure the shuttle lever is in the neutral position.
- Activate hitch and hydraulic functions using the three-position switch:
- Up: Remote valves active.
- Center: Remotes and rear hitch deactivated.
- Down: Remotes and rear hitch activated.
Multicontroller
The multicontroller is available in electro-hydraulic and mechanical remote versions.
- PowerClutch: Allows clutchless shifting.
- Constant engine speed: Maintains a set engine RPM.
- Transmission modes: Selects different driving modes.
- Power Shuttle: Controls forward/reverse direction.
- Shift: Changes gears.
- Rear Hitch up/down, quick penetration, stop: Controls the rear hitch.
- Remote Valve F1/R4 - R3: Controls specific remote hydraulic valves.
- Powershift gears: Allows shifting within powershift ranges.
Dashboard Display
The dashboard provides critical operational information:
- Indicator Trailer I/II: Trailer connection status.
- Turn left/right: Turn signal indicators.
- Rear/Front PTO: PTO engagement status.
- 4WD: Four-wheel drive status.
- Rear/Front DiffLock: Differential lock status.
- Rear AUTO PTO: Automatic PTO status.
- High Beam: Headlight status.
- STOP/WARNING: Critical alerts.
- Front axle suspension: Suspension status.
- Hand brake: Parking brake status.
- Trailer Brake: Trailer brake status.
- Brakes not latched: Brake system warning.
- Eng. Oil pressure: Engine oil pressure warning.
- Grid heater: Engine pre-heating status.
- Constant ERPM: Constant engine RPM status.
- Low fuel level: Fuel level warning.
- Alternator charging: Alternator status.
- Remotes: Remote valve status.
- Main display area: Shows current gear, gear shift mode, driving direction, Delta, Powershift gear, ground speed, rear PTO speed, rear hitch position, front PTO speed, EFH pressure, EFH position, slippage, Ad Blue status, odometer, area worked, area per hour, service message, remote valve values, battery voltage, air brake pressure, and error messages.
Gear Shift Modes
The Luxxum offers several gear shift modes:
- Gear match (standard setting): Automatically adapts powershift steps for optimal speed during up- and downshifting.
- Auto FIELD: Automatically shifts only PS-steps within a specific range.
- Auto TRANSPORT: Automatically shifts all gears.
- Manual: Gears are shifted completely manually using +/-.
Automatic Power Shift Function
This function allows selection of FIELD or TRANSPORT automode via the multicontroller.
- Auto FIELD: Only PS-steps in a range are shifted automatically.
- Auto TRANSPORT: All gears are shifted automatically.
- Gear shifting points can be adjusted based on engine speed and load using the hand throttle (5).
- Power Mode: PS-step shifting at higher RPM.
- Mid Power Mode: Between Power and Eco.
- Eco Mode: PS-step shifting at low RPM.
Transmission Programming
Four modes are available for transmission programming:
- ActiveClutch: Stops the tractor by pressing the brake pedal without using the clutch.
- Delta (Memory shuttle) PROG: Programs forward/reverse speed by adjusting powershift gears (+3 to -3) relative to the forward powershift gear. Adjust using +/- on the multicontroller.
- Powershift steps in Auto Field mode: Adjusts the bandwidth of powershift gears for automatic use in the field. Adjust using +/- on the multicontroller.
- Standard gear: Sets the default gear engaged after starting the engine or when the vehicle comes to a standstill. Adjust main gear using Shift +/-, and PS gear using +/-.
Driving the Tractor
- Choose Field or Road range.
- Select driving direction.
- Release the clutch; the tractor will start in the standard gear.
- Shift groups 1 to 4 using Shift +/- or PS-steps using +/- on the multicontroller.
- To stop, use the clutch or the Powerclutch button on the multicontroller.
- Gearmatch is always active after starting; transmission mode can be changed via the multicontroller.
Transmission Features
- Anti-Jack-Knifing: Inhibits automatic gear shifts when the Shuttle FWD button is pressed, ensuring smooth driving on hilly terrain.
- Shuttle reactivity: Adjusts how quickly the tractor shifts from forward to reverse.
- 1 - High reactivity: For loader work.
- 2 - Standard reactivity: For transport.
- 3 - Low reactivity: For field work.
Front Axle
- Suspended axle: Allows raising/lowering the front-end height with a switch.
- Axle capacity: 3,500 kg.
- Suspension deactivation: Can be turned off between 0-12 km/h.
- Automatic engagement: Active suspension engages above 12 km/h.
- Suspension settings: Adjustable to "soft," "normal," and "hard" levels by pressing the button for 3 seconds.
- Manual leveling: Allows manual adjustment of the front axle height.
Constant Engine Speed
Two electronically regulated constant engine speeds can be stored, useful for PTO operations.
- CES on/off: Activates or deactivates constant engine speed.
- Adjust CES 1: Set using the hand throttle at idle. Short presses adjust in 10 rpm steps, constant pressing in 100 rpm steps.
- Change to CES 2: Adjust as with CES 1.
- Work with CES (CES on): Hand throttle above 1000 rpm.
- Change between speed 1 and 2.
PTO (Power Take-Off)
- Automatic Stop/Run of PTO Shaft:
- Turn on PTO.
- Switch on auto PTO.
- Drive off and start working.
- Adjustment of On/Off Points:
- Press the auto PTO switch for >3 seconds.
- Lift/lower rear hitch to desired stop position (e.g., 30% lifting height, "u" = up). Press auto PTO switch briefly.
- Lift/lower rear hitch to desired start position (e.g., 65% lifting height, "d" = down). Press auto PTO switch briefly.
- Finished ("End").
Mechanical Valves
- Rear remotes: Up to 3 controlled by levers on the side console (raise/neutral/lower/float/lock).
- Front loader joystick: Controls two front remote valves (raise/neutral/lower/float, with detent on float).
- Oil flow volume: Adjustable for all remote valves using plastic wheels.
Electrical Valves
- Multicontroller remotes: 2 remote valves, default for rear remotes.
- Joystick remotes: 2 remote valves, default for front remotes (front hitch, front loader).
- Toggle switch: Changes operation of rear and front valves between multicontroller and joystick.
- Push/turn switch: Adjusts timer and oil flow values (displayed on dashboard).
- Activation of float (pressure release): For remotes operated on the multicontroller.
EHR (Electronic Rear Hitch) - Draft Control
- EDC main switch (1).
- Work position selector (2): Adjusts maximum working depth.
- Draft/position control selector (3):
- Fully right: Rear hitch position controlled by draft force variations.
- Fully left: Rear hitch position remains constant regardless of draft force.
- Mixed position: Turning knob clockwise increases draft measuring sensor reactivity.
- Draft control sensitivity (4):
- Left: Low sensitivity (few position corrections).
- Right: High sensitivity (many position corrections).
- Adjust to 1-2 corrections per second (check control light "L").
- Lowering throttle (5): Adjusts lowering speed of the rear hitch.
- Maximum lifting height (6).
- Slip control value (7): Radar option.
EFH (Electronic Front Hitch) Panel
Two operation modes:
- Position control: For precise working height of the implement.
- Turn right to increase position control value.
- Controls exact position of the front linkage.
- Pressure control: To adjust pressure transmitted to the ground.
- Turn left to increase pressure control value.
- Controls lifting pressure applied by the front linkage on the implement.
- Lowering throttle (3).
- Limitation of lifting height (4).
Calibration of Implement Weight
- Adjust height limiter so the implement is minimally lifted.
- Press and hold the raise button on the multicontroller.
- Keep pressed until the red EFH control light flashes.
- Calibration is complete when flashing stops.
- Automatic Lift: Lifts implement to max. adjusted height when pressing the lift button on the multicontroller.
- Normal Lift: Lifts implement as long as the lift button on the multicontroller is pressed (up to max. adjusted lift height).
- Up/Down: For implement connection.