Do you have a question about the Casio Celviano AP-65R and is the answer not in the manual?
Covers CAUTION boxes and symbol explanations for electrical safety.
Ensures safe use of the power source and proper handling of the power cord.
Outlines precautions for disassembly, malfunctions, and damage.
Details safe practices for plugging, unplugging, and handling the power cord.
Covers safe use of the instrument, stand, and preventing tip-overs.
Provides instructions on cleaning the unit and avoiding damage.
Details on setting up and using the Auto Accompaniment feature with chords.
Step-by-step guide to saving current piano settings into Registration Memory.
Explains how to store and recall up to 20 piano setups for instant access.
How to retrieve previously saved piano setups from Registration Memory.
Introduction to recording and playing back sequences.
Explains how the Mixer controls up to 16 parts for accompaniment and sequencers.
Guides on adjusting parameters like volume, pan, and effects for specific channels.
Detailed steps for real-time recording to tracks, including variations.
Details real-time and punch-in recording methods for the sequencer.
Guides on using punch-in recording to overdub or correct recorded tracks.
Guides on saving created or edited patterns to user memory.
Detailed steps for creating new accompaniment patterns from scratch.
Advanced editing of accompaniment patterns.
Step-by-step instructions for recording new accompaniment patterns.
Procedures for saving or discarding pattern data.
Guides on saving created patterns and assigning them a number.
How to exit the mode without saving any changes to the pattern.
Detailed procedure for saving piano data like patterns, songs, and setups to diskette.
How to play back Standard MIDI Files (SMF) from a diskette.
Step-by-step guide for loading data from a diskette into the piano's memory.
Explains how to save user rhythms, songs, and registration memory to diskette.
How to convert rhythm patterns from Technics or Roland keyboards.
Guides on setting up MIDI parameters like GM ON and Keyboard Channel.
Explains how MIDI functions interact with the Mixer for controlling parts.
Details various MIDI messages like Note ON/OFF, Program Change, and Control Change.
How the Mixer controls external channels for MIDI input and playback.
Procedure to send recorded data from the piano to an external device via MIDI.
How to import data from an external device into the piano via MIDI.
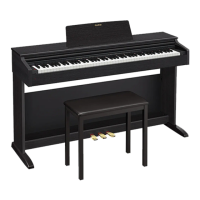
Step-by-step instructions for assembling the piano stand.
Guides on safely mounting the keyboard unit onto the assembled stand.
Instructions for connecting the pedal unit to the piano.
Guides on connecting the piano to a power outlet for operation.
| Type | Digital Piano |
|---|---|
| Number of Keys | 88 |
| Key Action | Weighted Hammer Action |
| Effects | Reverb, Chorus |
| Speakers | 12cm x 2 |
| Metronome | Yes |
| Transpose | Yes |
| Tuning | Yes |
| Touch Sensitivity | 3 Levels |
| Sound Source | AHL (Acoustic & Highly-compressed Large-waveform) |
| Recorder | 1-track, 1 song |
| Pedals | Damper, Soft, Sostenuto |
| Connectors | MIDI IN/OUT |
| Power Supply | AC Adaptor |
| Included Accessories | AC Adapter, Music Stand |
| Polyphony | 32 notes |
| Amplifier | 20 W x 2 |