― 48 ―
5. BAR CODE CALIBRATION SETTING
5.1 ABOUT THE CALIBRATION SETTING
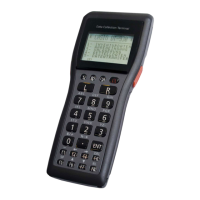
Since DT-930/DT-940 employs swing angle controlling, it is necessary to set bar code calibration (criterion
of swing angle setting).
The setting has already done in the factory. Perform the setting only when LASER ASSY or MAIN PCB is
replaced.
Setting procedure is as follows.
(1) Read a calibration setting bar code and memorize the calibration value in FROM.
(2) Conrm that laser swing amplitude varies in accordance with bar codes.
5.2 OPERATION
1
Turn the unit on while pressing down [S] and [ • ] keys.
SYSTEM MENU appears.
SYSTEM MENU
1. EXECUTE AP
2. SET MODE
3. DATE/TIME
4. TRANSMIT
5. VERSION
2
Press [2] key to select SET MODE.
MODE SET
1. ENVIRONMENT
2. DISPLAY MODE
3. BARCODE
4. SET ID
3
Press [9] key to select CALIBRATION.
• It is not shown on the menu.
• Conrm that the green LED lights.
OBR CALIBRATION
PLEASE PUSH
TRG KEY
TRG : START
CRL : EXIT
4
Press down TRIGGER or [L] keys for more than one second to start
calibration setting.
Note: When reading a bar code, short time of key depression may
cause an error. Press keys for more than one second.
• Apply a laser beam on calibration setting bar code printed on the
User’s Guide.
• Touch the nose of Handheld Terminal on the center of the bar code
and match laser beam and both end’s guide lines).
OBR CALIBRATION
PLEASE PUSH
TRG KEY
TRG : START
CRL : EXIT
Note: Correct bar code must be used in accordance with the reading window.