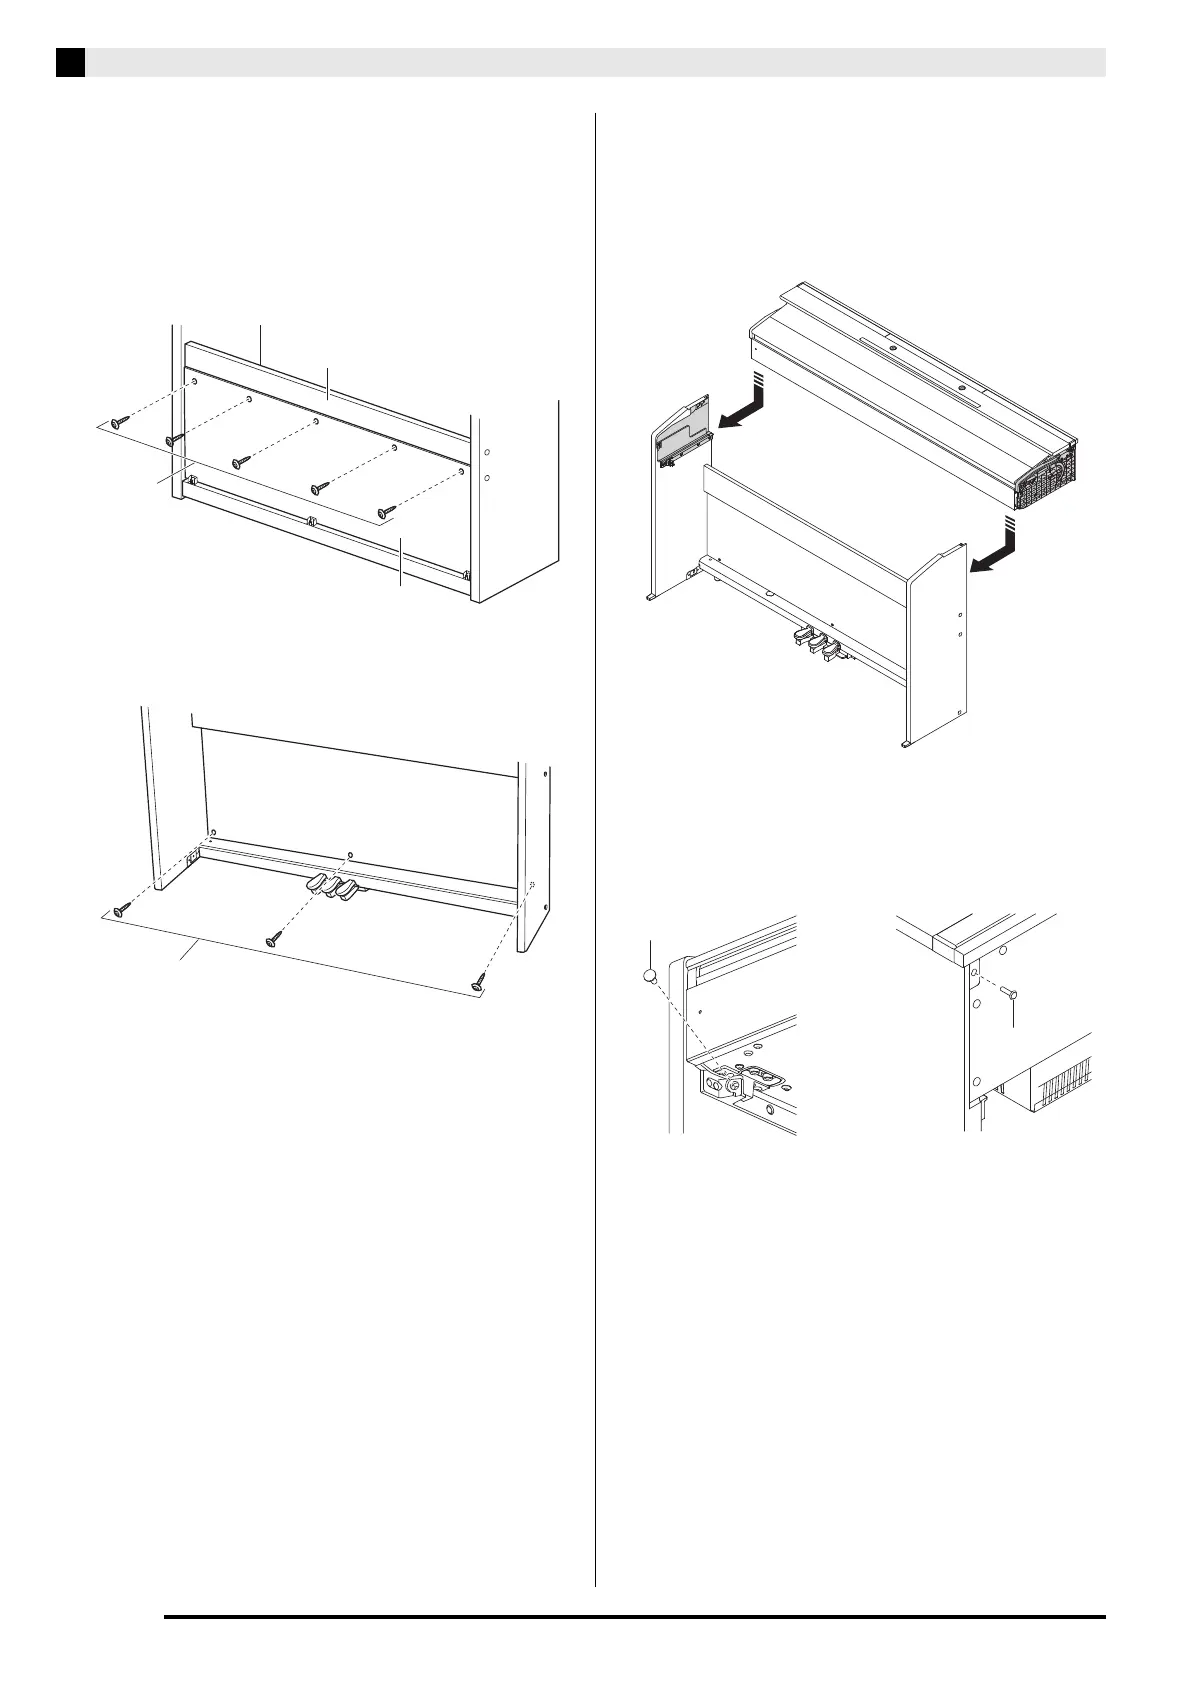
EasyManuals Logo

Casio Privia PX-870 User Manual

Casio Privia PX-870
63 pages
To Next Page IconTo Next Page
To Previous Page IconTo Previous Page
Page #53 background imageLoading...
Page #53 background image
EN-52
Getting Ready
(PX-870 only)
8.
Secure the back panel
to the back board
.
Place the back panel
onto pedal unit
so it is in
front of the three screw lugs of the pedal unit.
Screw the screws
into the five holes in the back
panel
.
Go around to the front of the Digital Piano and
securely tighten the three screws
shown in the
illustration below.
9.
From the back of the assembled stand, slide
the piano into the grooves of side panel
and side panel
.
Note that there is nothing anchoring the piano to the
stand at this time. Take care to ensure that the piano
does not fall off the stand.
10.
Use
screws to secure the piano to the
stand from both the front and the back.
F
5
X
C
D
F
3
X
H
H
[Front]
[Rear]

Table of Contents

Questions and Answers:

Question and Answer IconNeed help?

Do you have a question about the Casio Privia PX-870 and is the answer not in the manual?

Casio Privia PX-870 Specifications

General IconGeneral
Keyboard88 keys, Tri-sensor Scaled Hammer Action Keyboard II
Touch Sensitivity3 sensitivity levels, Off
Polyphony256 notes
Tones19 built-in tones
Speakers12cm x 2, 4cm x 2
Amplifiers20W + 20W
USBType B
Power Consumption18W
Sound SourceAiR Sound Source
Acoustic SimulatorDamper Resonance, String Resonance
EffectsReverb (4 types), Chorus (4 types), Brilliance, DSP
Lesson FunctionYes
Recorder2 tracks, 5, 000 notes total
Metronome0 to 9 beats; tempo range: 20 to 255
Transpose25 steps (-12 semitones to +12 semitones)
TuningA4 = 415.5Hz to 440.0Hz to 465.9Hz
Pedals3 pedals (damper, soft, sostenuto)
Connectors2 x Headphones
Line OutYes
Power SourceAC adaptor: AD-E24250LW
Included AccessoriesAC adaptor, Music Stand
HeadphonesStereo mini jack (3.5mm) x 2

Related product manuals