– 22 –
About the hammers
The design of the hammers installed in the PX-130BK/PX-130WE was modied after the mass production.
The operation of the newly designed hammer is completely compatible with that of the old one. New and old
hammers may be installed in one single unit. The installation and removal procedures are the same.
NOTE: When an old type of hammers is to be replaced, the new type of hammers has priority in shipping.
NOTE: The new types of hammers are installed in PX-130RD since the beginning of mass production.
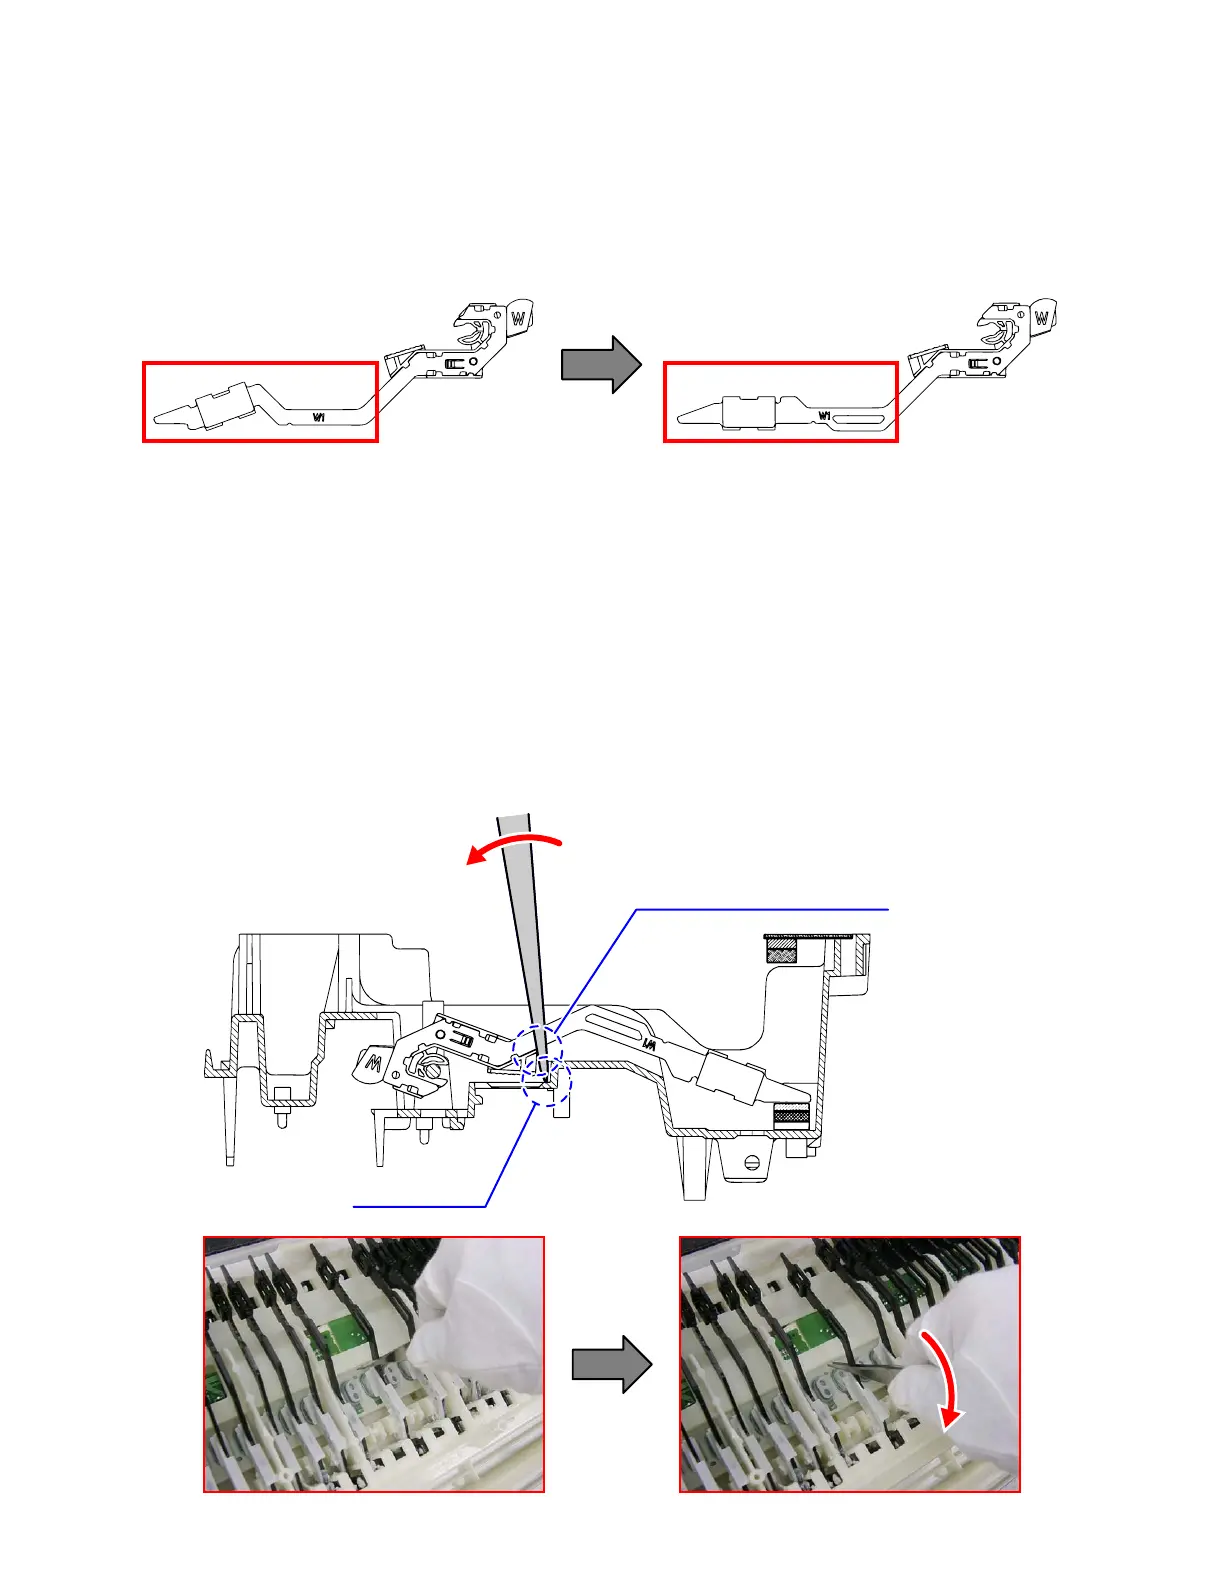
<Old hammer> <New hammer>
Removing the hammers
1. Place the chassis upside down so that the hammers are visible.
2. Press the chassis with the tip of tweezers.
3. While catching a hammer with tweezers, set the tweezers against the resin part of the chassis.
4. Using the chassis-tweezer contact as a fulcrum point, press down against the resin part in the direction
of the red arrow in the illustration below, and then disengage the hammer.
NOTE: You must press the resin part of the hammer.
NOTE: Pressing on the metal part of the hammer may damage the area connected to the resin.
Press down the resin part.
Fulcrum point