PX-150
– 31 –
B. Remove the HAMMER
B-1. Place the chassis upside down so that the hammers are visible.
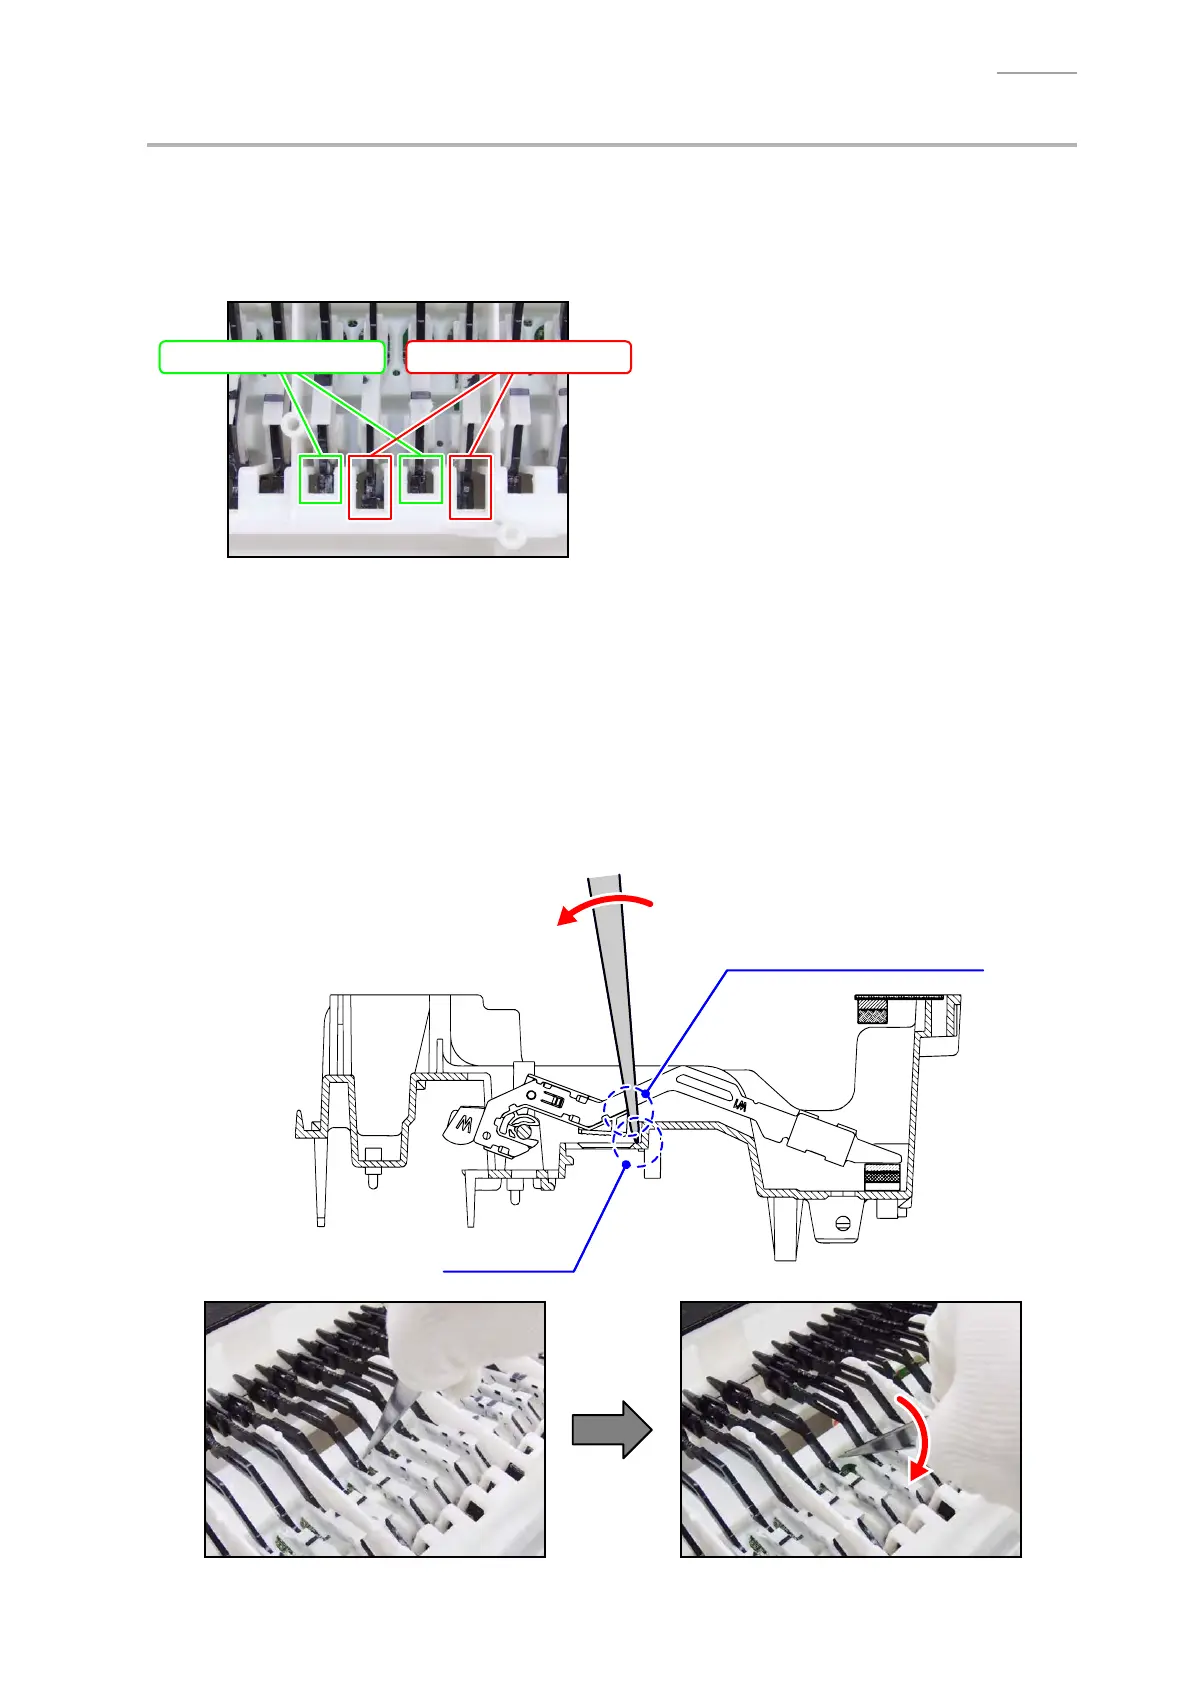
<Identifying the Hammers When Placed Upside Down>
• The size chassis hole differs between white and black keys. The hammer for a black key goes
into a bigger hole, while the hammer for a white key goes into a smaller hole.
Hammer for white key Hammer for black key
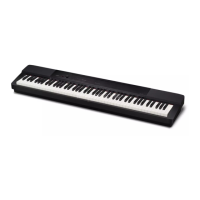
B-2. Press the chassis with the tip of tweezers.
B-3. While catching a hammer with tweezers, set the tweezers against the resin part of the chassis.
B-4. Using the chassis-tweezer contact as a fulcrum point, press down against the resin part in the
direction of the red arrow shown below, and then disengage the hammer.
NOTE: You must press the resin part of the hammer. Pressing on the metal part of the hammer
may damage the area connected to the resin.
NOTE: If a hammer does not disengage easily, perform the steps while lifting the hammer.
Press down the resin part.
Fulcrum point