— 9 —
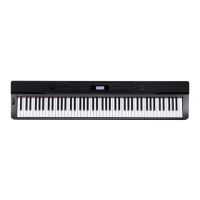
Connector
FPC
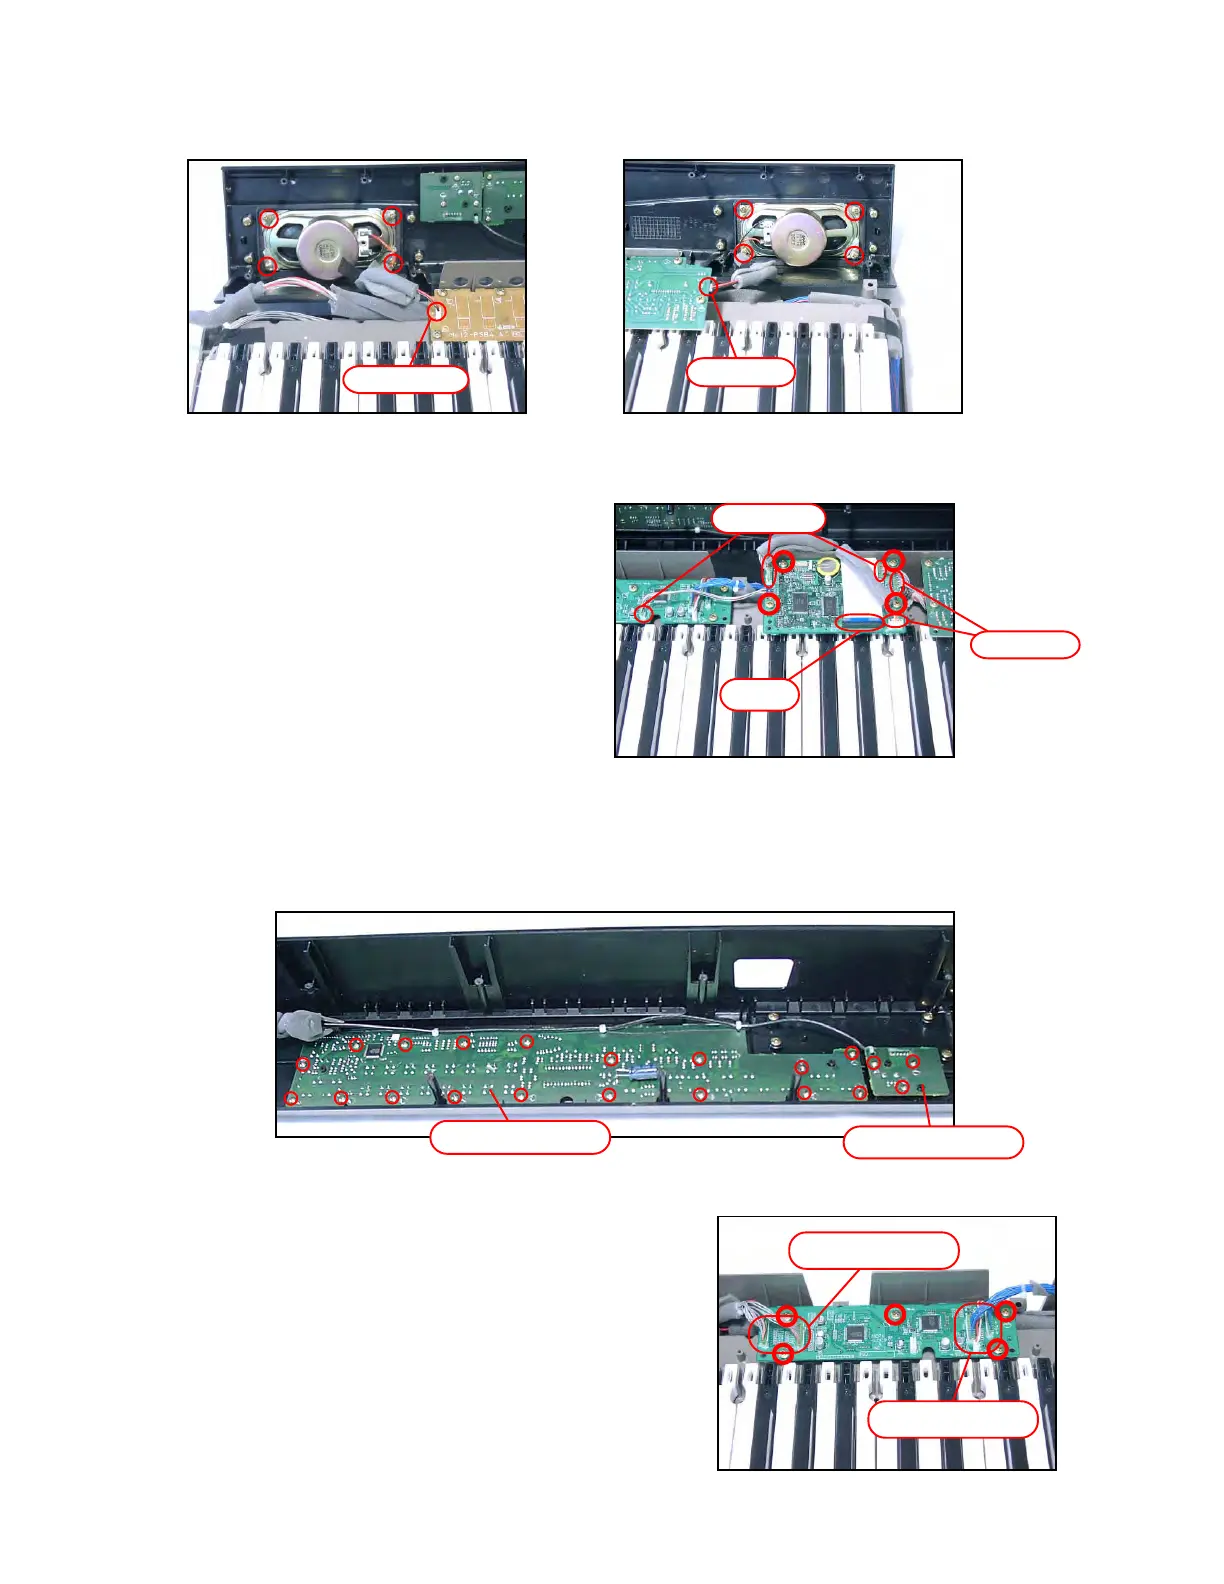
■ Removing the speaker
10. Remove two connectors and eight screws and then remove the speaker.
■ Removing the MAIN PCB (M412-MAA1)
11. Remove five connectors and then the FPC.
12. Remove four screws and then the MAIN PCB (M412-MAA1).
■ Removing the Volume PCB (M412-CNA2)
13. Remove three screws and then the volume PCB (M412-CNA1).
■ Removing the Console PCB (M412-CNA1)
14. Remove 18 screws and then the Console PCB (M412-CNA1).
15. Remove the rubber key.
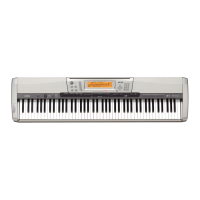
■ Removing the LED PCB (MCPK-LDC9)
16. Remove five connectors.
17. Remove five screws and then the LED PCB (MCPK-LDC9).
M412-CNA2 PCB
M412-CNA1 PCB
Connector
Connector
Connector
Connector
× 3
Connector × 2