– 41 –
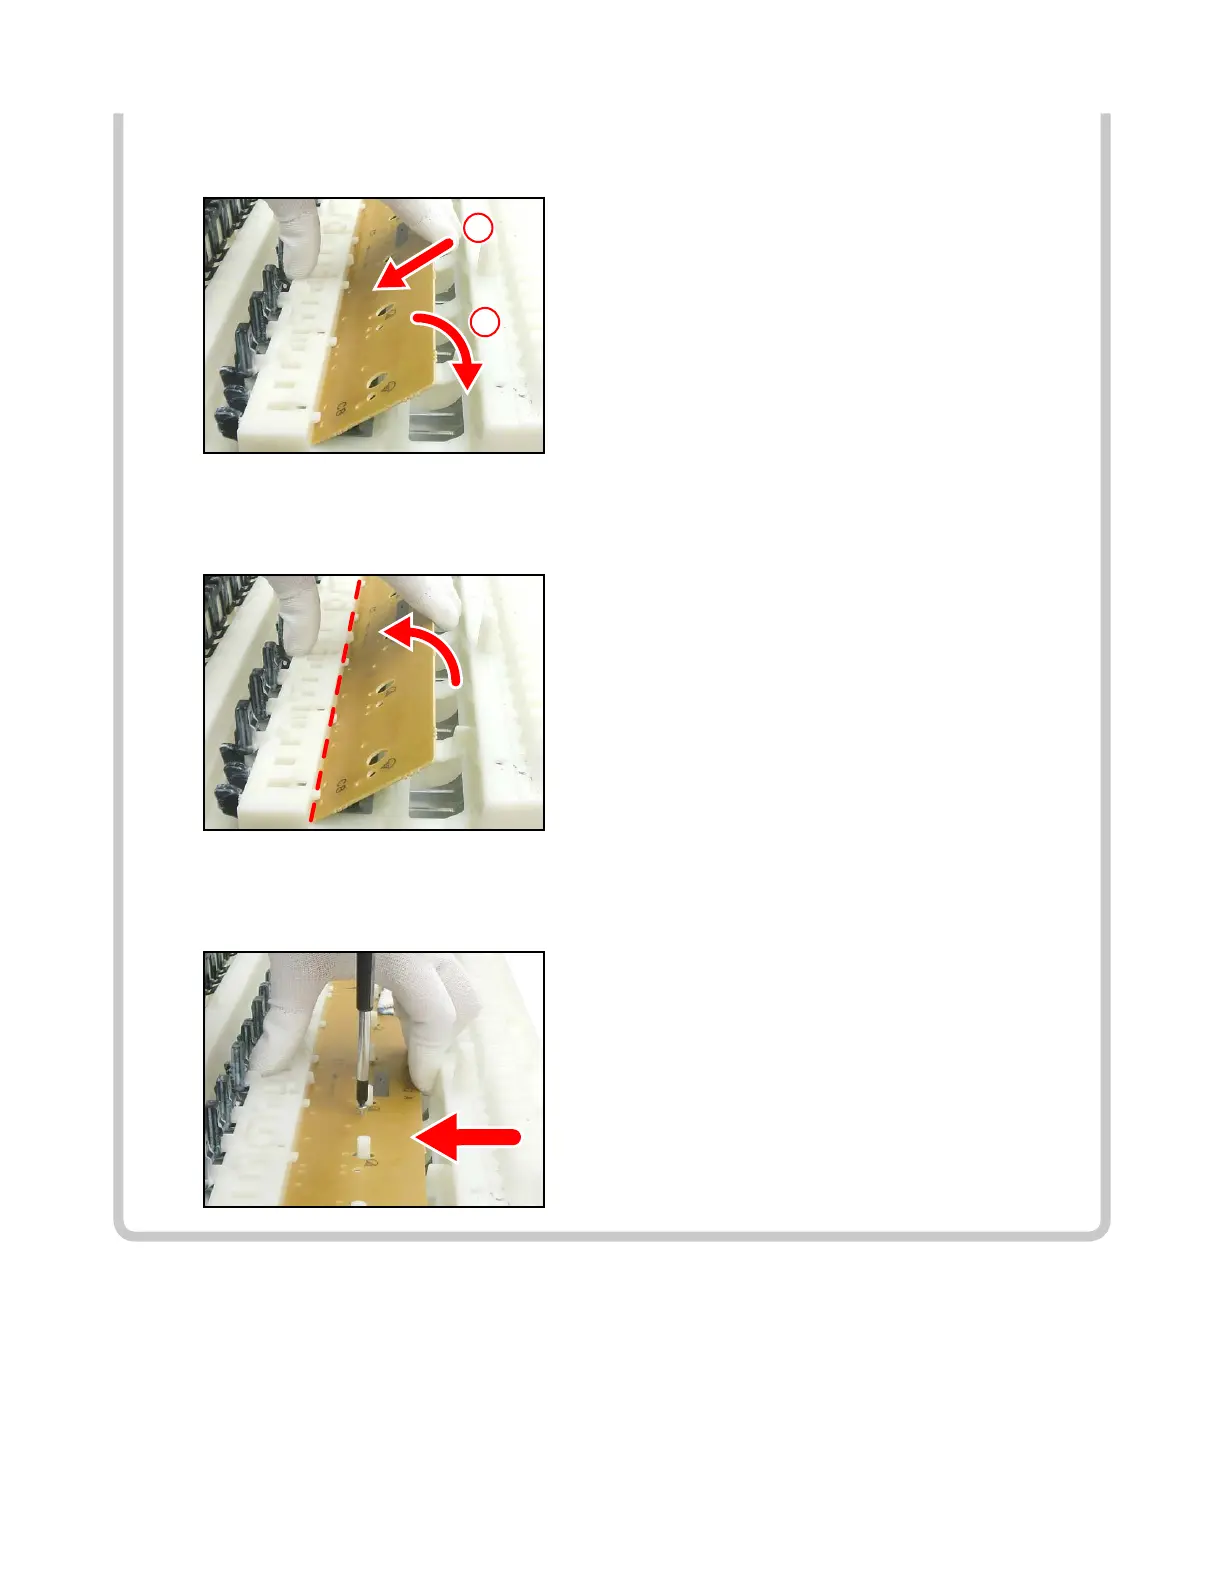
3. Insert the MACP-KYA1/KYA2 PCB and MACP-KYB1/KYB2 PCB at an angle against the chassis,
and place them while paying attention not to misalign the rubber keys.
1
2
4. WhileplacingthePCBs,thecontactwiththerubberkeysmaycomeoutofalignment.Alignthem
against the red dotted line in the illustration below, lift the PCB once in the direction of the red
arrow, and then place them again.
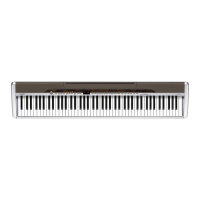
5. Secure the MACP-KYA1/KYA2 PCBs, and the MACP-KYB1/KYB2 PCBs with 26 screws.
Press the PCBs lightly in the direction of the red arrow in the illustration below while tightening a
screw.