– 50 –
Operation after replacing the main PCB or the keyboard parts
Make sure to perform the following procedure after replacing the main PCB or the keyboard parts.
Applicable parts number on the Parts List: No.1 for the main PCB, No. 52 to 84 for the KY-ASSY
or the KY-ASSY component parts
<Procedure>
1. Hold down the "
<
/ NO", "
>
/ YES", and "STORE" buttons at the same time, to turn the power ON.
The following LEDs are lit.
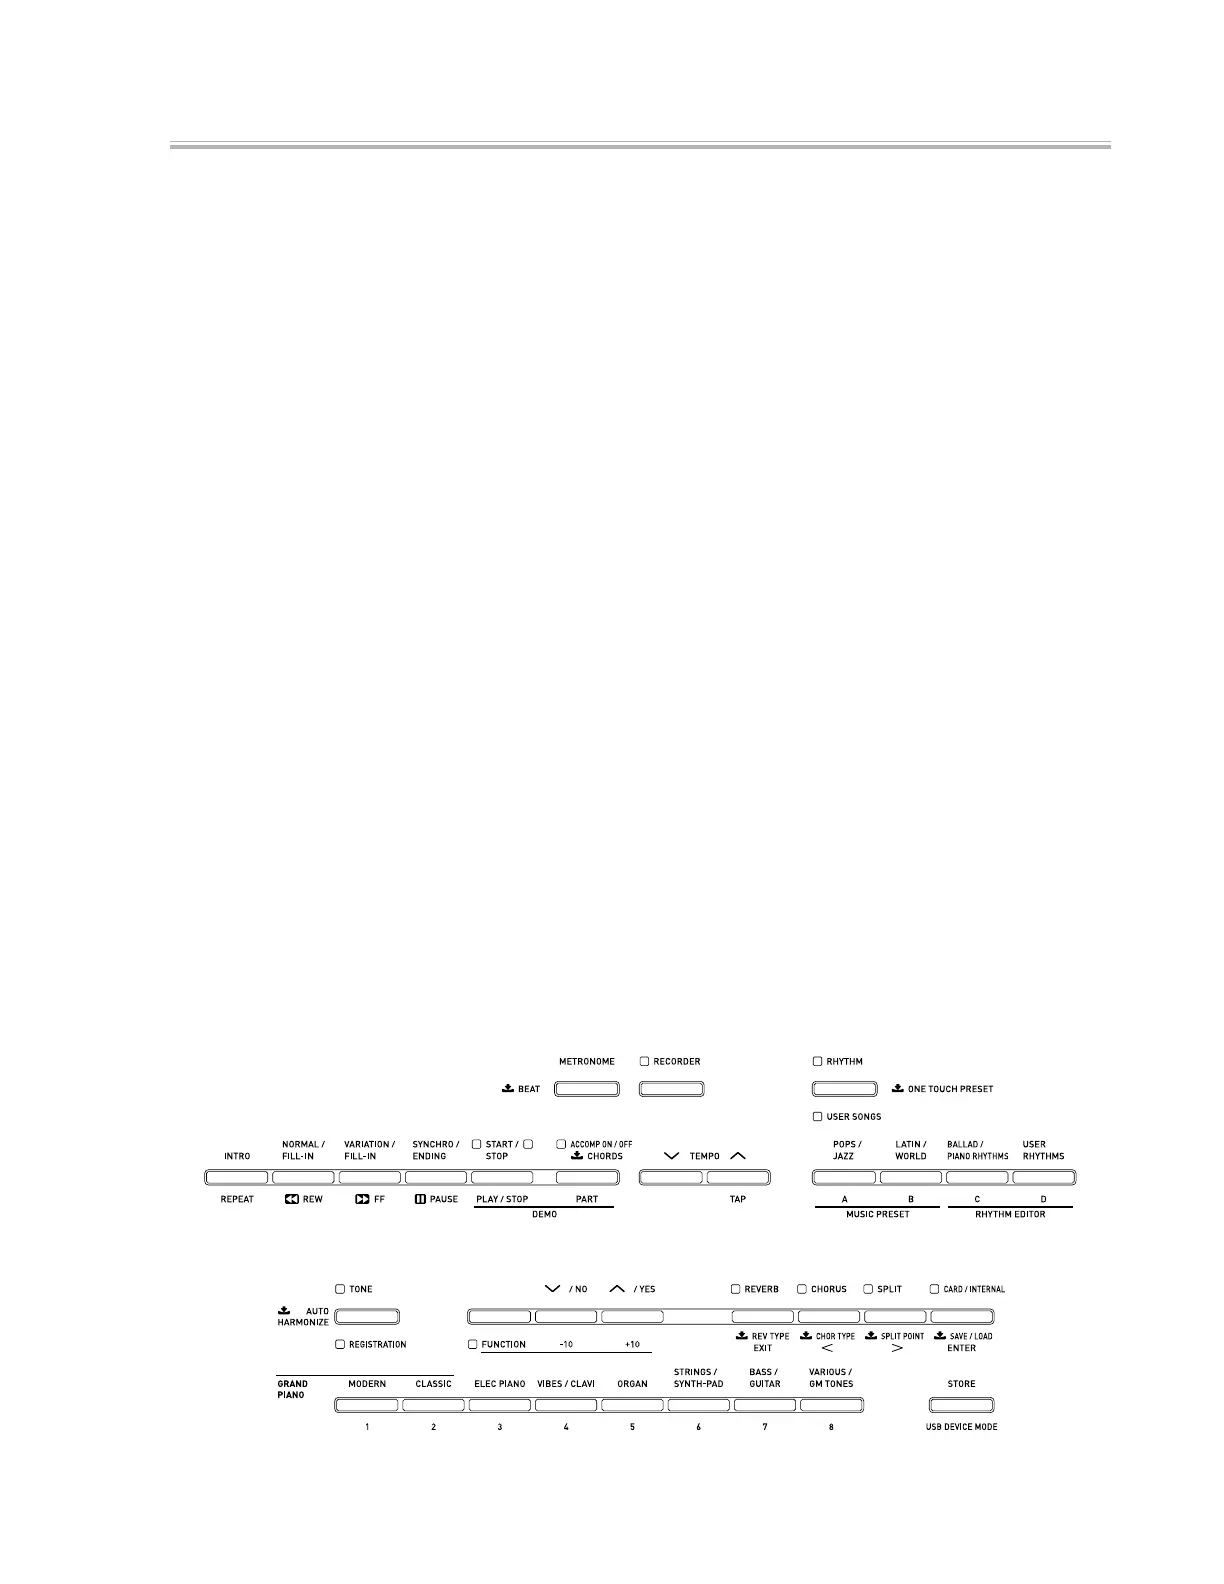
"TONE", FUNCTION", "REVERB", "CARD/INTERNAL", "MODERN", "CLASSIC", "ELEC PIANO",
"STRINGS/SYNTH-PAD", "BASS/GUITAR", "VARIOUS/GM TONES"
2. Release the "
<
/ NO", "
>
/ YES", and "STORE" buttons.
All the LEDs turn off except "TONE" and "REVERB" LEDs.
3. Press the "REVERB" button.
The "REVERB" and "STRINGS/SYNTH-PAD" LEDs are lit.
4. Press the "STRINGS/SYNTH-PAD" button.
The "REVERB" and "BASS/GUITAR" LEDs are lit.
5. Press the "BASS/GUITAR" button.
The "REVERB" and "VARIOUS/GM TONES" LEDs are lit.
6. Press the "VARIOUS/GM TONES" button.
The following LEDs are lit.
"FUNCTION", "REVERB", "CARD/INTERNAL", "VARIOUS/GM TONES"
7. Press the "STORE" button.
8. Pressthe"POWER"buttontoturnoffthepower.
<Button & LED Layout>