OPERATING INSTRUCTIONS
Ofix VP v1.0EN
If you want to change the Vigipool ''central unit' appliance, the system must be reset (see ''Re-
setting to zero'')
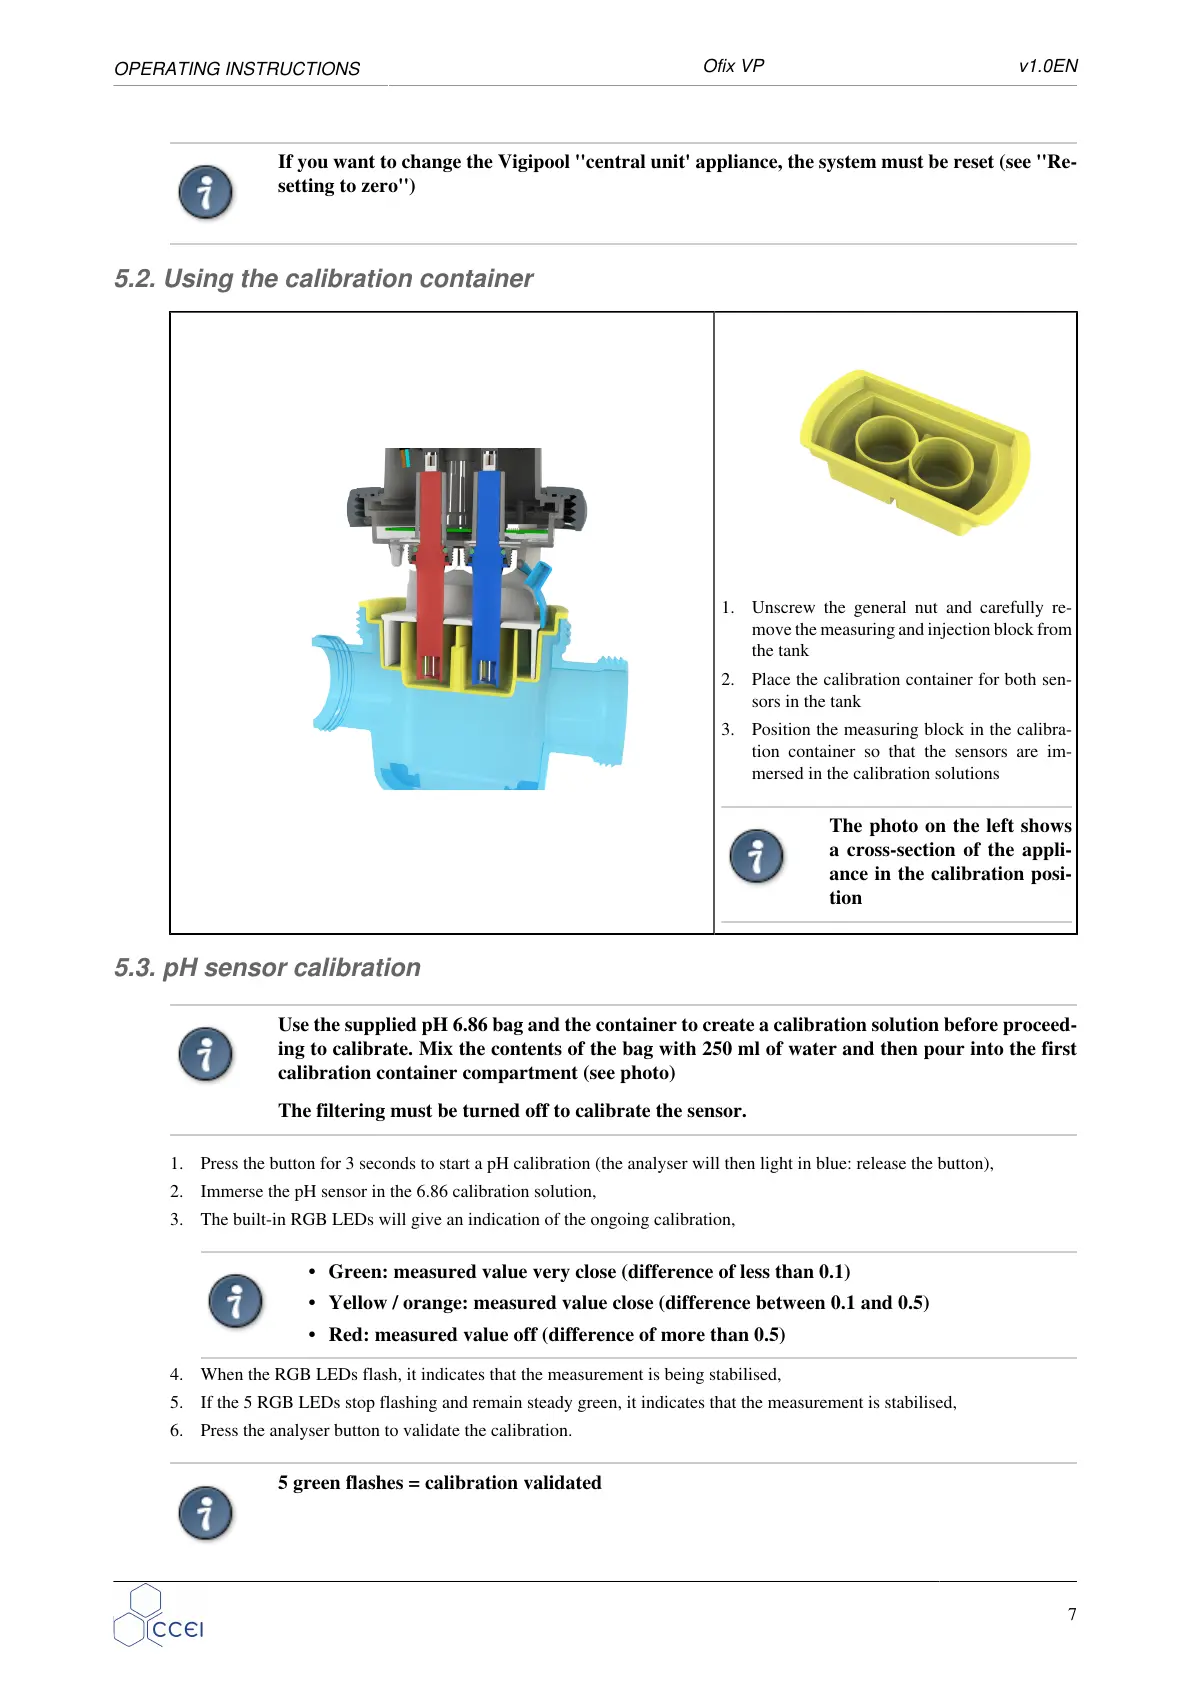
5.2. Using the calibration container
1. Unscrew the general nut and carefully re-
move the measuring and injection block from
the tank
2. Place the calibration container for both sen-
sors in the tank
3. Position the measuring block in the calibra-
tion container so that the sensors are im-
mersed in the calibration solutions
The photo on the left shows
a cross-section of the appli-
ance in the calibration posi-
tion
5.3. pH sensor calibration
Use the supplied pH 6.86 bag and the container to create a calibration solution before proceed-
ing to calibrate. Mix the contents of the bag with 250 ml of water and then pour into the first
calibration container compartment (see photo)
The filtering must be turned off to calibrate the sensor.
1. Press the button for 3 seconds to start a pH calibration (the analyser will then light in blue: release the button),
2. Immerse the pH sensor in the 6.86 calibration solution,
3. The built-in RGB LEDs will give an indication of the ongoing calibration,
• Green: measured value very close (difference of less than 0.1)
• Yellow / orange: measured value close (difference between 0.1 and 0.5)
• Red: measured value off (difference of more than 0.5)
4. When the RGB LEDs flash, it indicates that the measurement is being stabilised,
5. If the 5 RGB LEDs stop flashing and remain steady green, it indicates that the measurement is stabilised,
6. Press the analyser button to validate the calibration.
5 green flashes = calibration validated
7
 Loading...