OPERATING INSTRUCTIONS
Ofix VP v1.0EN
Pairing is only possible via the Vigipool app. Do not attempt pairing from the smartphone's
Bluetooth settings.
4. Installation of the Ofix VP
4.1. Hydraulic installation
The Ofix VP connected analyser is installed on a 50mm diameter pipe using the supplied union fittings. It is installed down-
stream of filtration (after the filter) and must be placed horizontally on a section of pipe that is always pressurised relative to
the pool water level, this is to make sure that there is always water in the appliance and that the sensors are always in water.
Prefer using a by-pass (mandatory in excess of 15m3/hour) so that the flow can be controlled, and to be able to remove it
without stopping filtering.
During installation and use, make sure the Ofix VP is pressurised relative to the pool water
level, to make sure it is always full of water and free of air. If this were not the case and air is
present inside the measurement chamber, the sensor readings may not be correct.
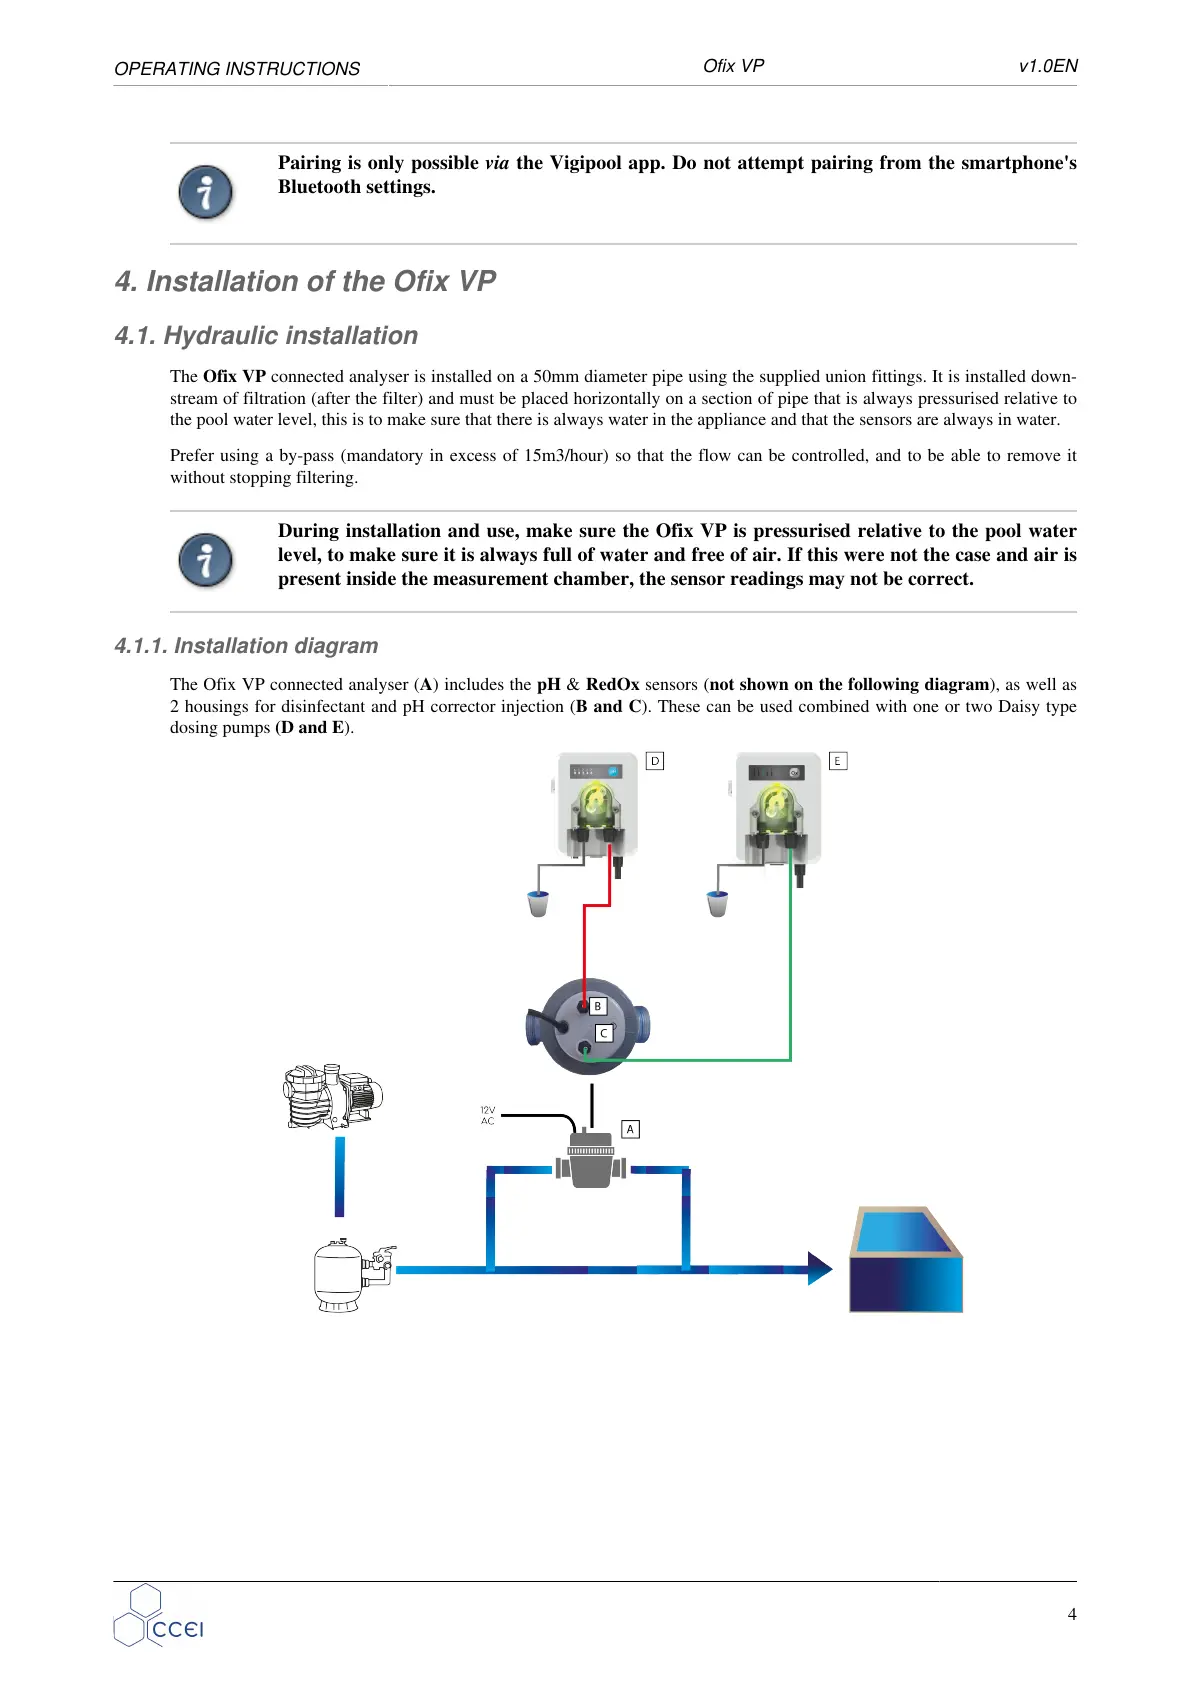
4.1.1. Installation diagram
The Ofix VP connected analyser (A) includes the pH & RedOx sensors (not shown on the following diagram), as well as
2 housings for disinfectant and pH corrector injection (B and C). These can be used combined with one or two Daisy type
dosing pumps (D and E).
4
 Loading...