Do you have a question about the Celestron EXPLORASCOPE 60AZ and is the answer not in the manual?
Lists all components included with the ExploraScope telescope for verification.
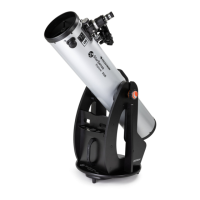
Instructions for setting up the telescope mount and tripod.
Steps to attach the telescope tube to the mount.
Guide for attaching the star diagonal to refractors (60, 70, 80mm).
Guidance on observing the Moon as a first astronomical target.
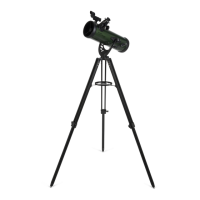
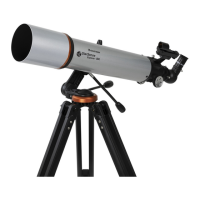
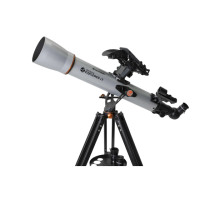
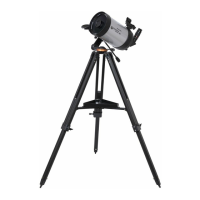
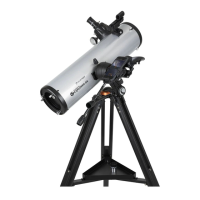
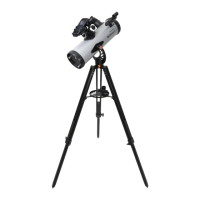
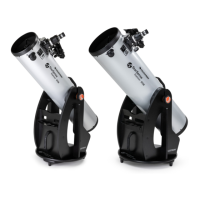
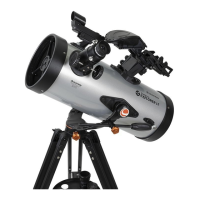
The Celestron ExploraScope is a series of astronomical telescopes designed for both novice and intermediate users, offering a gateway to exploring the cosmos. This instruction manual covers four models: the ExploraScope 60AZ, 70AZ, 80AZ, and 114AZ, each providing a unique viewing experience. The primary function of these telescopes is to magnify distant celestial objects, allowing users to observe details of the Moon, planets, star clusters, nebulae, and galaxies. Beyond astronomical observation, the refractor models (60AZ, 70AZ, 80AZ) are also suitable for daytime terrestrial viewing, thanks to their erect image diagonal, which provides a correctly oriented image.
The ExploraScope telescopes are designed for ease of assembly and use, making them accessible even for those new to astronomy. The mount and tripod come fully assembled, simplifying the initial setup process. Users simply need to extend the tripod legs to their desired length, secure them with hand knobs, and then snap the accessory tray into place, which also serves to stabilize the tripod. The telescope tube is then easily attached to the U-shaped mount by sliding the slow motion rod through its guide and lowering the hinges into the cradles, securing it with set screws and mounting bolts.
For the refractor models (60AZ, 70AZ, 80AZ), a star diagonal is included. This accessory is crucial for comfortable viewing, as it reflects light at a 90° angle, allowing for a more natural head position during observation. It also ensures a 100% correctly oriented image, which is particularly beneficial for terrestrial viewing. The diagonal can be rotated to any position by loosening its setscrews, offering flexibility in viewing angles.
Each ExploraScope telescope comes with two eyepieces: a low-power 20 mm eyepiece and a higher-power 4 mm eyepiece, along with a 3x Barlow lens (not pictured but included). The recommended practice for observation is to always start with the 20 mm eyepiece to locate and center the target object. Once the object is centered, users can switch to the 4 mm eyepiece for a more detailed, magnified view. The Barlow lens further increases the magnification of any eyepiece it's used with, offering even closer views of celestial bodies. Focusing is achieved by gently turning the focusing knobs until the image appears sharp. For the 114 mm Newtonian model, the 20 mm eyepiece provides a correctly oriented image for terrestrial viewing, while the 4 mm eyepiece will produce an inverted image, which is normal for astronomical observations with this type of telescope.
A key feature of the ExploraScope series is the Star Pointer finderscope. This red-dot finderscope acts as a sighting tool, projecting a red dot onto a round glass window, which helps users aim the telescope accurately at their desired target. Aligning the finderscope with the main optics of the telescope is a one-time process, ideally done during the day using a distant, easily recognizable object. Once aligned, users can simply place the red dot over the target in the finderscope's window, and the object should appear in the telescope's eyepiece. The finderscope has adjustment knobs for left-right and up-down motion to facilitate precise alignment.
The manual provides a step-by-step guide for a first astronomical observing session, focusing on the Moon. It advises observing the Moon from two days after a New Moon up to a few days before a Full Moon to see the most detail in craters and lunar mountain ranges. The process involves setting up the telescope with the 20 mm eyepiece, turning on the Star Pointer finderscope, centering the Moon in the finderscope's view, and then focusing through the eyepiece. After successfully observing with the 20 mm eyepiece, users are encouraged to switch to the 4 mm eyepiece for a closer view, adjusting focus as needed. This basic technique can then be applied to observe other celestial objects like planets, star clusters, and nebulae.
While the manual does not explicitly detail maintenance features, it implicitly suggests several practices to ensure the longevity and optimal performance of the telescope.
Firstly, it recommends saving the telescope box for storage when the device is not in use. This protects the telescope from dust, moisture, and accidental damage, which are common concerns for optical instruments. Proper storage helps maintain the cleanliness of the lenses and mirrors, which is crucial for clear viewing.
The instruction to remove dust caps from the focuser and diagonal before use, and implicitly to replace them afterward, highlights the importance of protecting the optical components from dust and debris. Dust on lenses and mirrors can degrade image quality and, if not handled properly, can lead to scratches during cleaning.
The manual also emphasizes careful handling during assembly, such as being careful not to overtighten hand knobs and mounting bolts. This prevents damage to the threads and structural components of the mount and tripod, ensuring the telescope remains stable and functional over time.
A critical safety warning regarding solar observation serves as a maintenance-related instruction as well. It strictly advises against looking directly at the Sun with the naked eye or through the telescope without a proper solar filter. This not only protects the user's eyes from permanent damage but also prevents internal heat build-up within the telescope, which could damage the optics and accessories. It specifically warns against using eyepiece solar filters or Herschel wedges due to the risk of cracking or breaking from heat, which could expose the eye to unfiltered sunlight. This warning underscores the importance of using only approved and safe methods for solar observation, thereby protecting both the user and the instrument.
Finally, the instruction to turn off the Star Pointer finderscope when not in use is a maintenance tip for conserving battery power. While not directly related to optical or mechanical maintenance, it ensures the finderscope remains operational when needed, preventing the inconvenience of a dead battery during an observing session.
In summary, the Celestron ExploraScope telescopes are user-friendly instruments designed to introduce individuals to the wonders of the night sky, with features that prioritize ease of use, comfortable viewing, and accurate targeting. While explicit maintenance instructions are minimal, the manual's emphasis on careful handling, proper storage, and adherence to safety warnings implicitly guides users in preserving their telescope's condition and performance.
| Type | Refractor |
|---|---|
| Aperture | 60 mm |
| Focal Length | 700 mm |
| Finderscope | 5x24 |
| Mount Type | Alt-Azimuth |
| Eyepieces | 20mm |
| Magnification | 175x |
| Tripod | Aluminum |
| Focal Ratio | f/11.7 |