34 | CELESTRON ORIGIN
INSTRUCTION MANUAL
16. Care and Maintenance
Cleaning the optics
Dust, debris, and fingerprints on the optics will usually have
little effect on the images you capture with Origin. However,
if the external surface of the Schmidt corrector lens becomes
excessively dirty, you should clean it. Remove dust with a
blower bulb or an optical cleaning brush. Then, use an optical
cleaning solution and lens cleaning tissue to remove any
remaining debris or stains. Apply the solution to the tissue and
then apply the tissue to the lens. Use low-pressure strokes;
do not rub in circles. When cleaning the corrector, strokes
should go from the center to the outer edge. Use a new tissue
for each stroke so as not to spread any oils or debris. Keep
the dust cover on Origin when it is not in use to minimize the
need for cleaning.
Only the Celestron Repair Department should clean your
Origin’s internal optical surfaces. If your Origin needs internal
cleaning, please call Celestron for a return authorization
number and price quote.
Optical Alignment
Origin’s optics are factory-aligned and should not normally
need adjustment. However, if needed, you can adjust the lens
group’s tilt to collimate the optical system. To do this, you’ll
need a 2mm hex key. If you have two of them, it will make
things easier. The primary mirror and corrector are permanently
aligned at the factory and cannot be adjusted.
To adjust the tilt of the lens group:
1. Turn Origin on and let it initialize on the night sky as usual.
2. Point Origin at a bright star. Make sure the star is centered
in the field of view.
3. Use the manual focus controls to defocus the star by about
500-1000 counts.
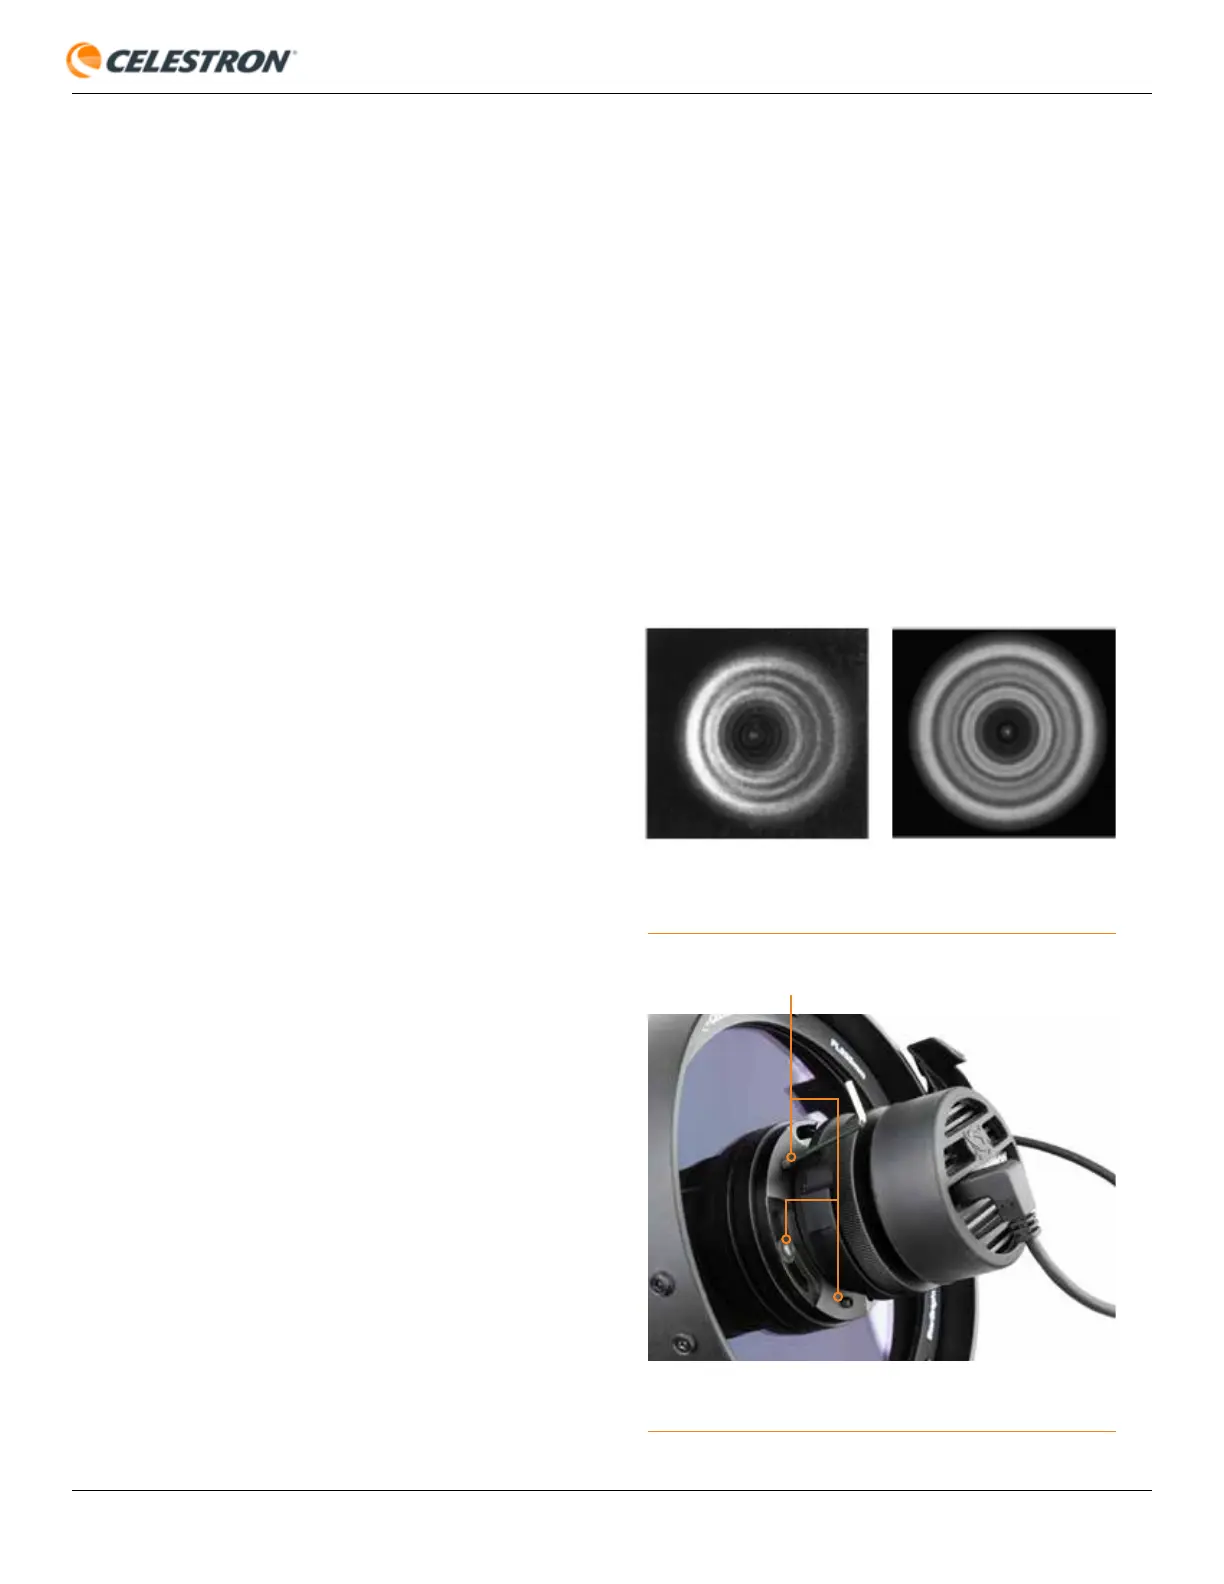
4. Inspect the defocused star diffraction pattern. When
collimated, the pattern should look like a concentric donut.
If the pattern is concentric, no adjustment is necessary. If
the “donut hole” is not centered within the pattern, some
adjustment is needed (Figure 33).
5. There are two sets of three collimation screws. The
setscrews act as push screws, while the button head
screws act as pull screws (Figure 34). The screw sets
work together as a push-pull tilt adjustment. Using the hex
keys, adjust the collimation by slightly loosening two of the
push screws and tightening the pull screw located between
them. Alternatively, you can loosen two of the pull screws
and tighten one of the push screws between them to tilt
the lens group in the opposite direction. Always loosen
two of the push or pull screws first, then tighten the screw
between them. TIP: If the defocused star pattern is thin on
one side, adjust the collimation screws so the star moves
towards the thin side.
6. After adjusting, recenter the star in the field of view and
reinspect the defocused star diffraction pattern.
7. Continue adjusting until the defocused star image is
concentric, as shown in Figure 33.
GOOD COLLIMATION
NEEDS ADJUSTMENT
FIG 33: If the optics need alignment, the “hole” will not be centered in the
defocused star image.
FIG 34: Adjust the tilt of the lens group (and camera) with the collimation
screws.
COLLIMATION SCREWS