- 15 -
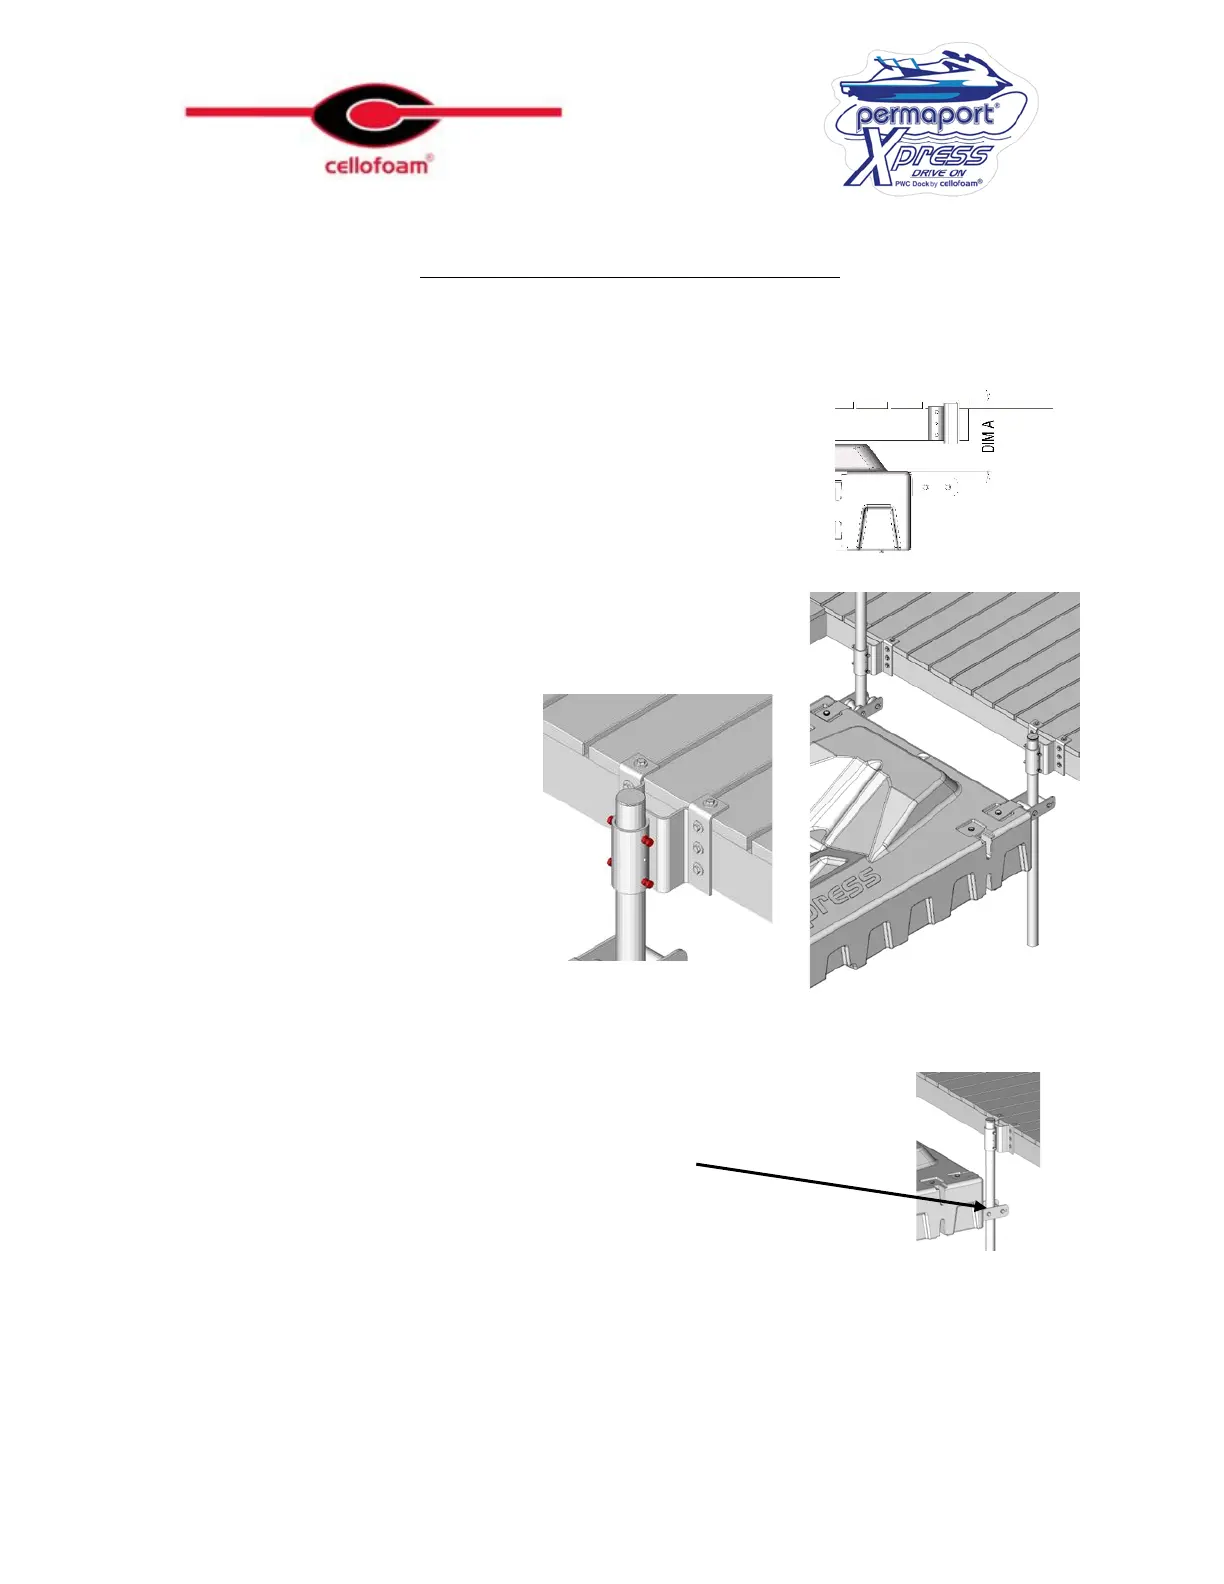
Attaching to a Floating Dock
It will be necessary to use two lengths of 2” schedule 40
Galvanized Pipe. Measure the distance between the top of the
dock and the top of the
Xpress
(Dim A). You will need two
pieces of 2” diameter, schedule 40 galvanized pipe that is at least
36” longer than that dimension. If you want to leave the pipe
above the dock to act as a handle to assist in accessing the
Xpress,
that needs to be added to the length of the pipe.
Position the
Xpress
under the Dock Brackets as shown and
slide the two lengths of pipe through the Dock Bracket and the
Xpress
brackets ensuring that they protrude at least 20”
below the
Xpress
bottom face.
Tighten the locking screws on the
Dock Brackets. Drill a 5/16” hole
through the pipe using the holes in
the bracket as a guide. (Hint, drill
two separate holes, one from each
side). Fasten with 4” x ¼” bolt and
nut.
Note: On some floating dock installations where the free board is low, the
Xpress
bracket may come close to the dock bracket; in that instance, it is
permissible to install the
Xpress
Brackets reversed as shown
For floating docks that are subject to rough water conditions there is
additional hardware supplied in the separate hardware box.
The directions for utilizing this additional feature are contained in the hardware box.