- 7 -
points for
Front Mount
points for Side Mount
point for Side Mount
Basic Assembly Applicable to all Applications
It is recommended that the basic mounting kit be applied to the
Xpress
away from the water
to avoid the possibility of loss of components.
It is essential that all threads are coated with an anti-seize compound prior to assembly;
failure to do so will complicate any future disassembly that may be required and will
invalidate the warranty.
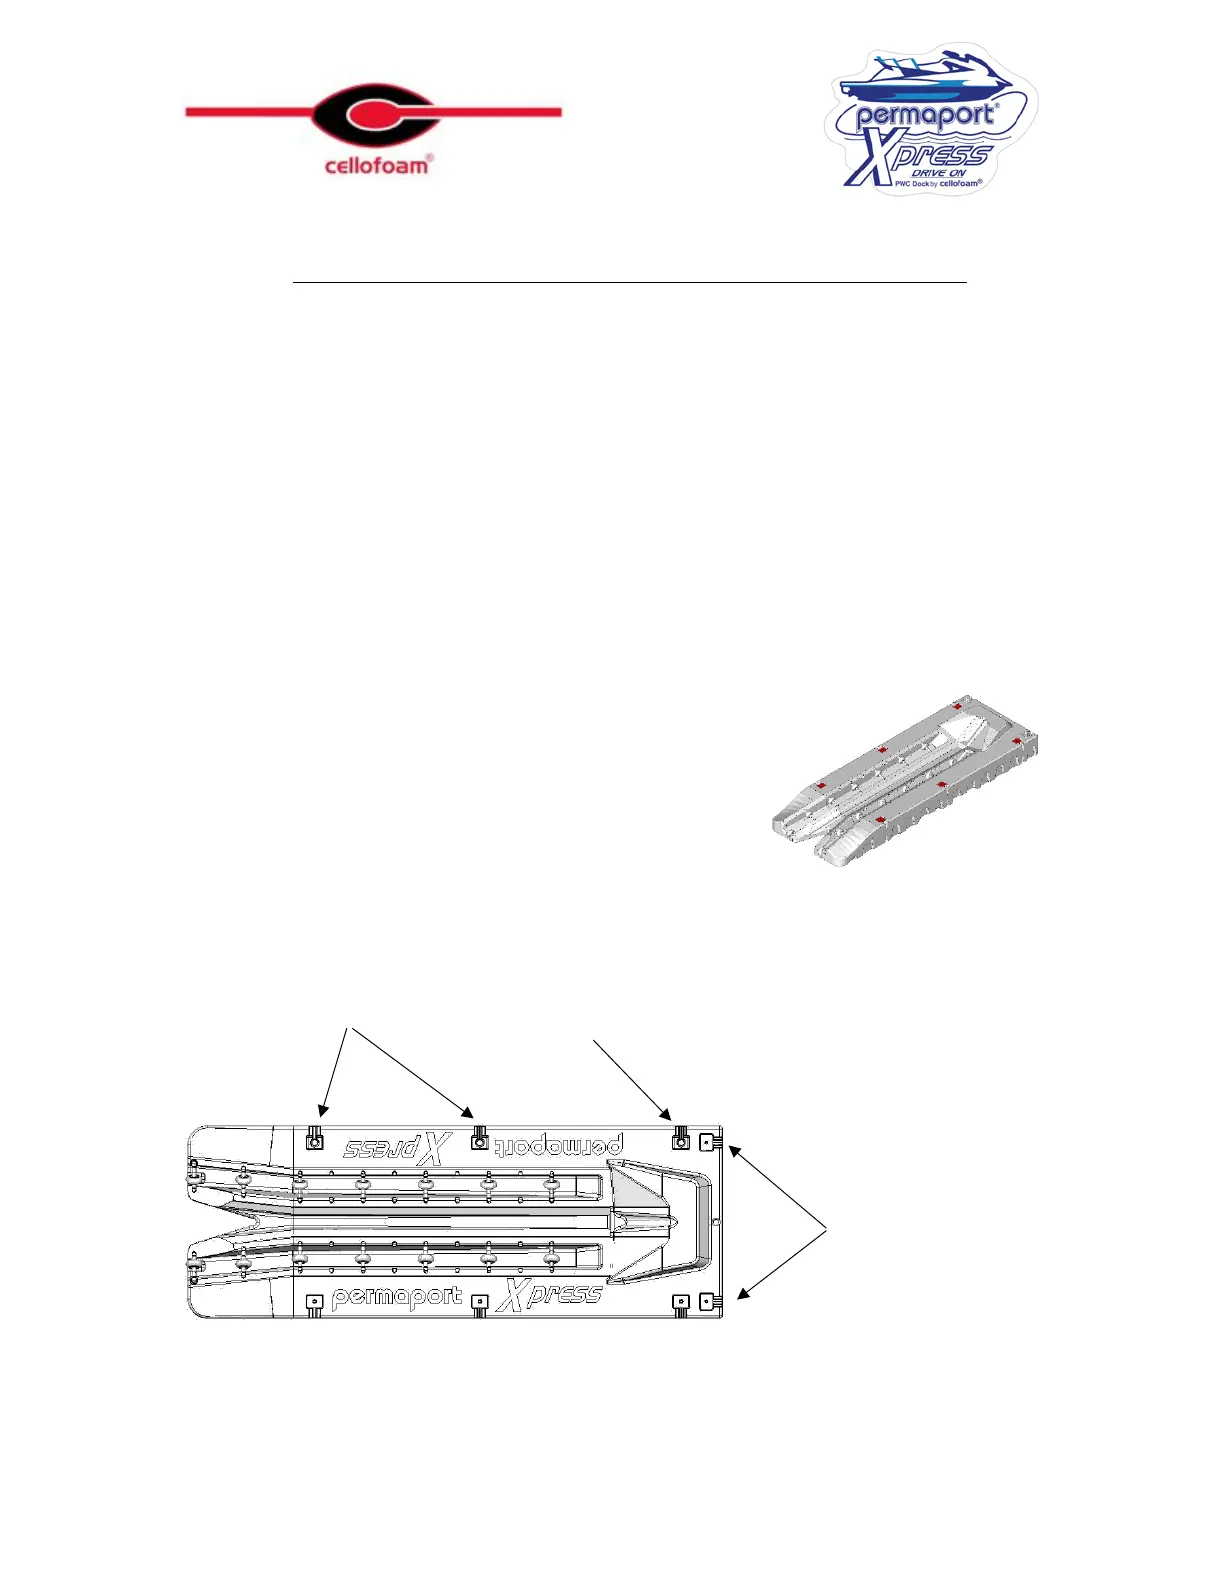
There are large rectangular mounting holes placed along the edges of the Xpress. Select the
holes to be used. For a front mount, use the two on the front edge. For a side mount, select
two holes on the side edge, the front hole and either one of the two rear holes, although it is
preferable to use the rear most position if possible.
The Permaport
®
Xpress
is supplied in a front mount
configuration with void fillers in the side holes. To use for
a side mount, remove the void fillers from the side
mounting holes and re-position then in the front holes. To
remove the fillers, use a screwdriver to pop off the black
caps and remove the bolt using a 9/16” socket and a 9/16”
wrench. Replace them in the front positions using the
same assembly as used in the side holes.