- 8 -
Place a shock absorbing insert in both the top and bottom rectangular recesses on the selected
holes. These are a tight fit, so use a mallet to tap into place home, if
necessary.
Bracket Preparation and Installation
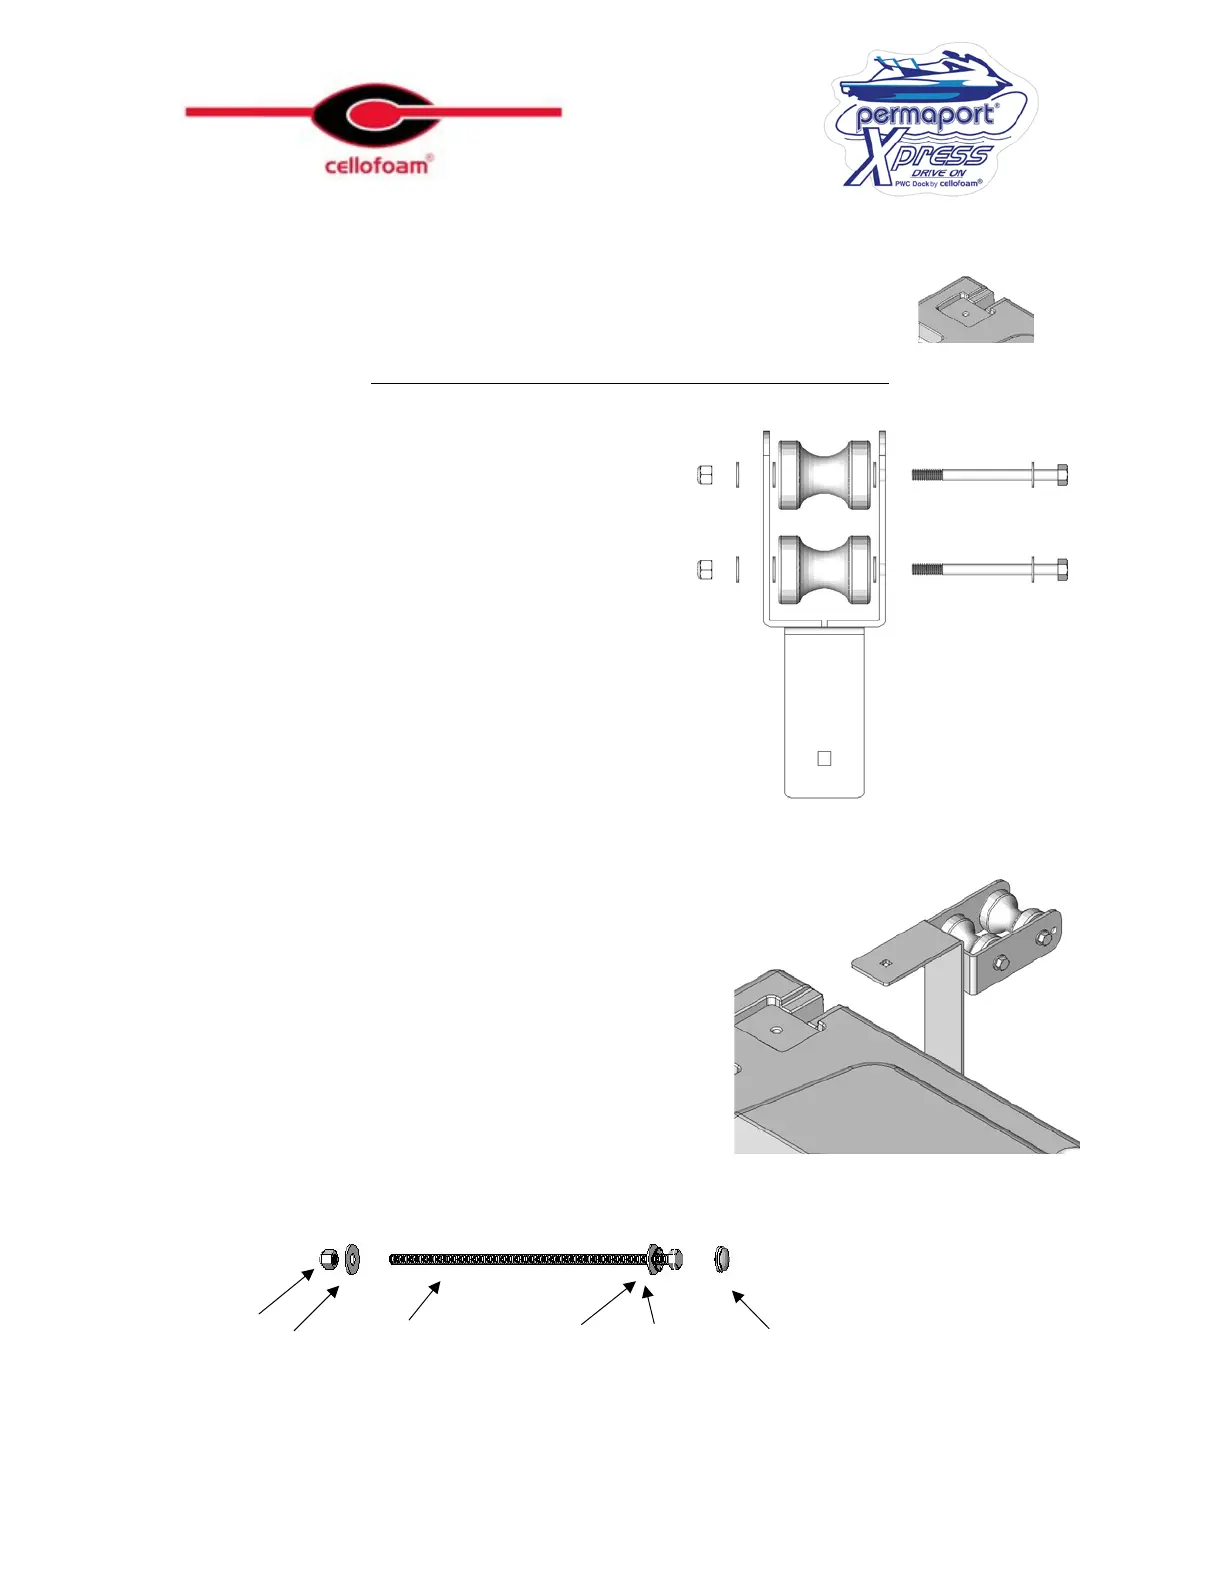
Assemble the two brackets as shown, ensuring
that there is a pair of contoured rollers on one
bracket and a pair of straight rollers on the
other. Place a washer as shown between the
bracket and the rollers as well as under the bolt
head and the locknut (4 washers per axle).
Tighten the locknut securely but do not distort
the bracket to the point where the rollers bind.
Do not mix rollers on one bracket.
Install the brackets by sliding over the inserts
Assemble the 14” long Stainless-steel bolt as shown. Do not attach the plastic cap.
Insert a 14” long x ½” stainless steel bolt through the assembly and attach the ½” Brass Lock
nut and washer on the bottom.