DE
ES
FR
IT
EN
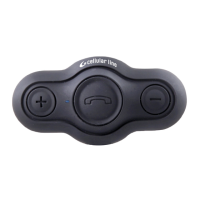
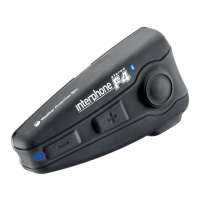
2. Overview
1
VOL– - Turn down the volume and send out
intercom
2 LED indicator
3
MFB button - Power on/off, redial last
number, answer/reject a call, answer/reject
intercom
4
USB port - It is a charging port and is used
as a port for connecting to microphone and
ear speaker
5
VOL+ - Turn up the volume and send out
intercom
6 Ear speaker
7 Microphone
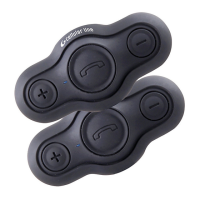
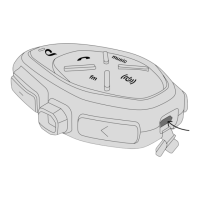
INSTALLING THE INTERPHONE
1. Installing the velcro attached to interphone head-
set
1) Before removing the protective strip from the dou-
ble-sided adhesive, find the best location to place the
velcro.
2) Clean the part of the helmet that the interphone
headset with adhesive will be attached to. Remove
any dirt or grease. Do not use cleaners that may dam-
age the helmet or that will leave an oily residue.
3) Check again the position of the velcro. Once it is fixed,
it will not be possible to move.
4) Make sure the surface is dry before continuing.
Remove the protective strip from the double-sided
adhesive and carefully fix the velcro to the outside
shell of the helmet.
Note: There are two types of velcro, thin and thick. It is
recommendable to use the thick velcro when the curva-
ture in the surface of the helmet is large.
2. Installing the interphone headset
Take your interphone headset, make the USB port
points down and attaches the interphone headset to
the velcro.
BTEASYCOM